Getting Started
Acnoo Pharmacy - Admin Panel
- Uploaded Date: 16-February-2025
- Project: Acnoo Pharmacy
- Author: Acnoo
- Email: acnooteam@gmail.com
Thank you for purchasing our product. If you have any questions that are beyond the scope of this documentation file, please feel free to email us via our user page contact form or directly to email at acnooteam@gmail.com
Requirements
- PHP >= 8.1
- Ctype PHP Extension
- cURL PHP Extension
- DOM PHP Extension
- Fileinfo PHP Extension
- Filter PHP Extension
- Hash PHP Extension
- Mbstring PHP Extension
- OpenSSL PHP Extension
- PCRE PHP Extension
- PDO PHP Extension
- Session PHP Extension
- Tokenizer PHP Extension
- XML PHP Extension
For more information about deployment see the Laravel documentation here https://laravel.com/docs/10.x/deployment
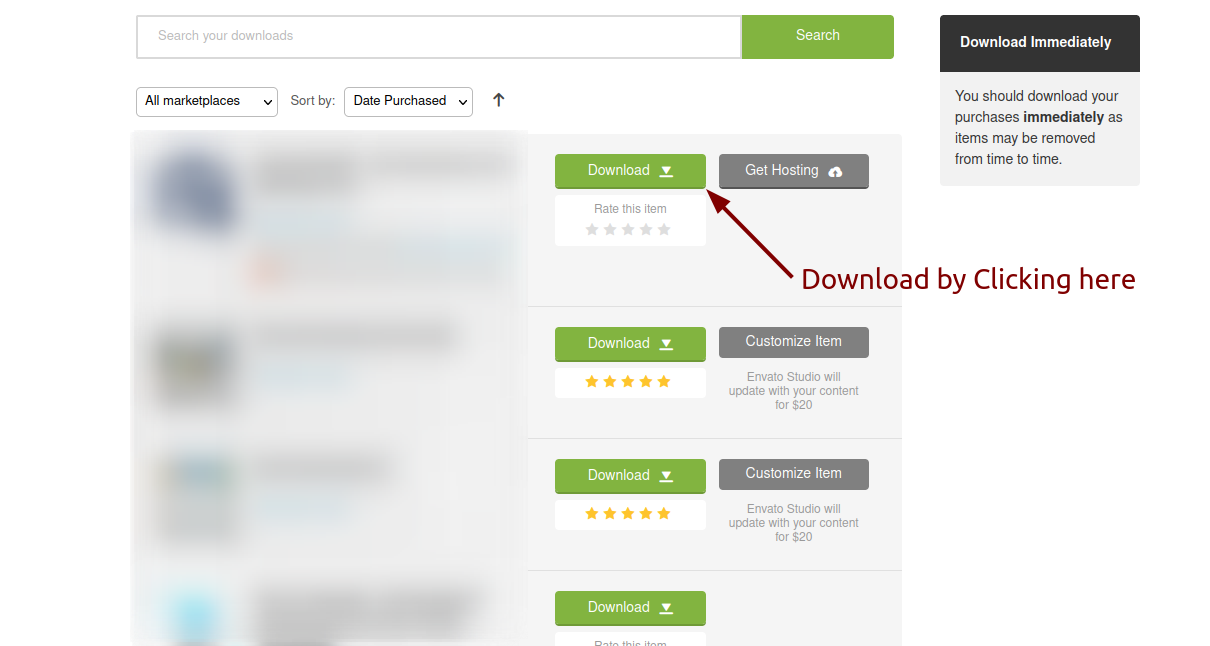
Download Project from Envato
After successfully purchase Acnoo Pharmacy, download the project from Envato download page
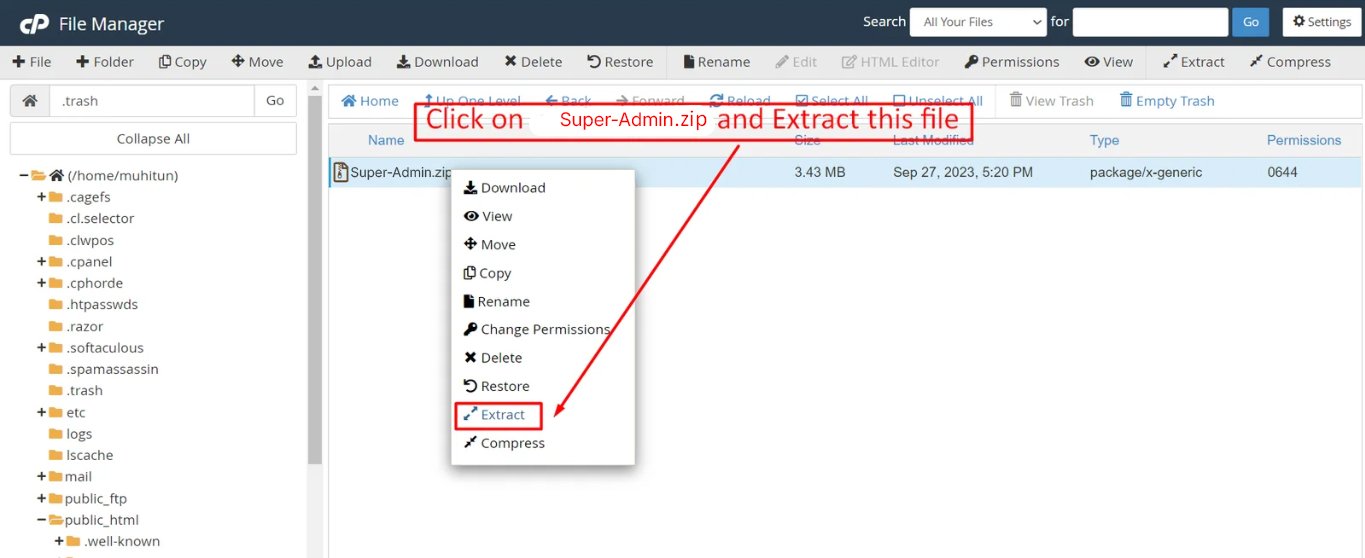
Extract the downloaded file. You will have another zip file named Super-Admin.zip containing the main project's files and a documentation folder. You are reading this documentation, that means you already have theme both.
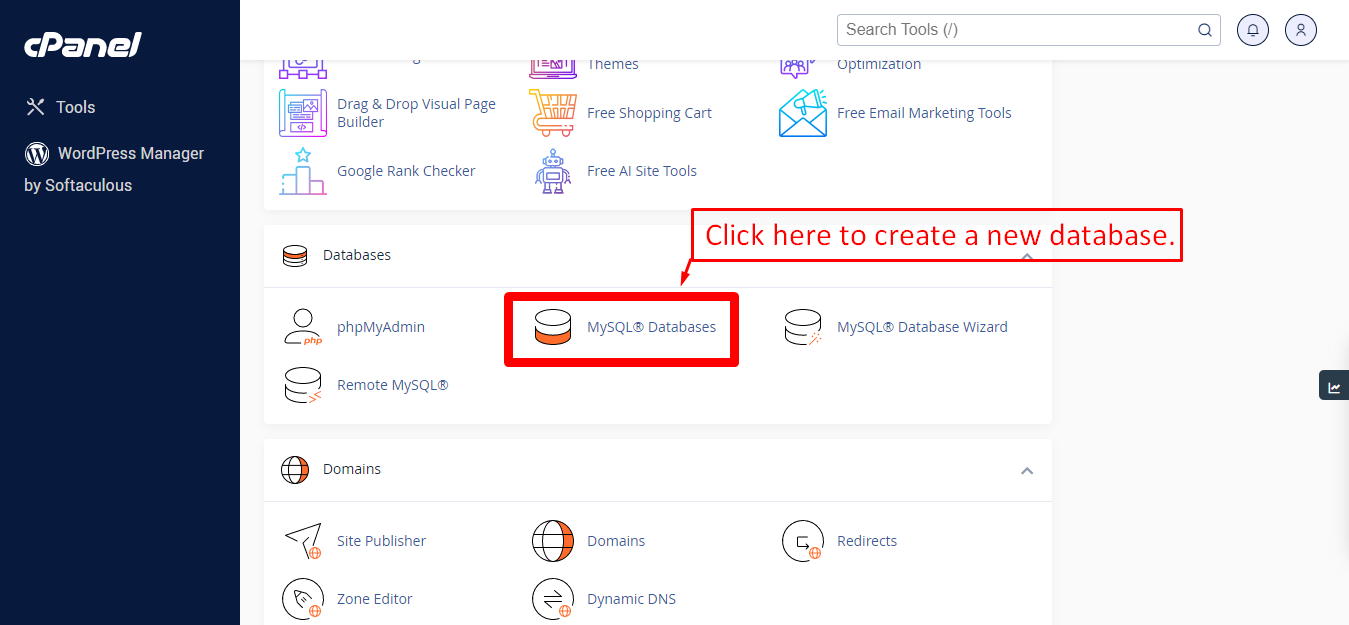
Creating Database
Before installing, you will need to create a new database. If you already know how to do this or have already created one, skip to the next step.
Note: Please use empty database. In most cases you should be able to create a database from your cpanel.
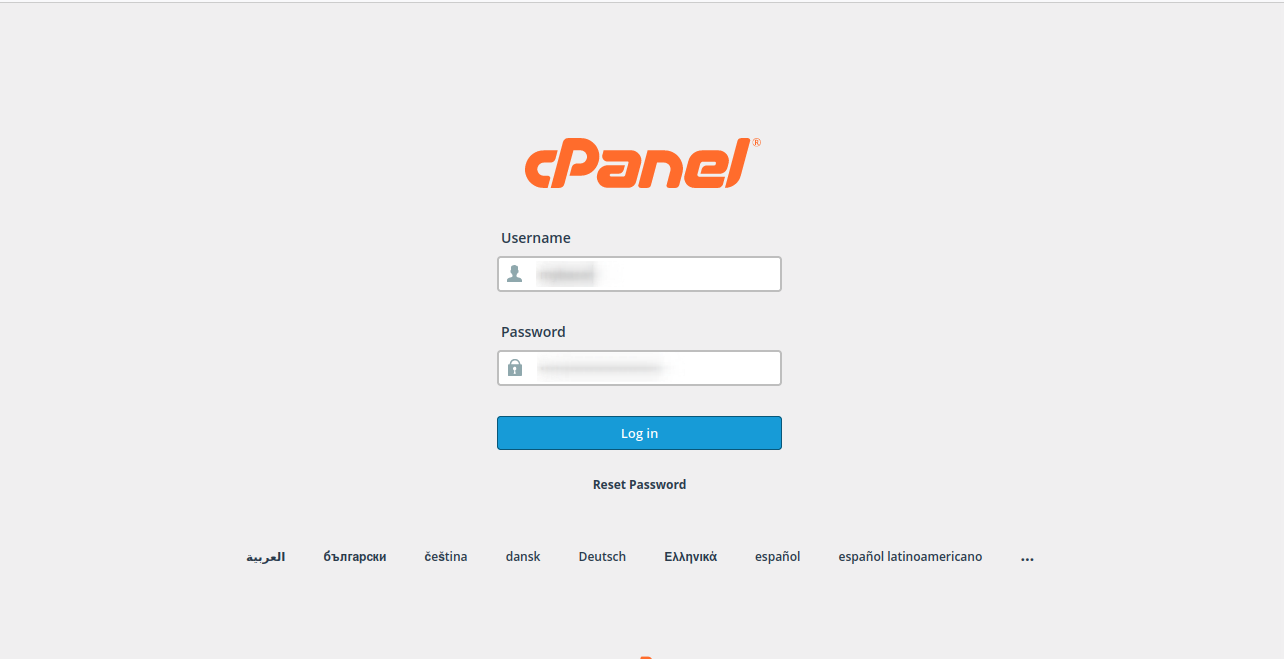
Login to your cPanel by entering this in your browser url
yourdomian.com/cpanel
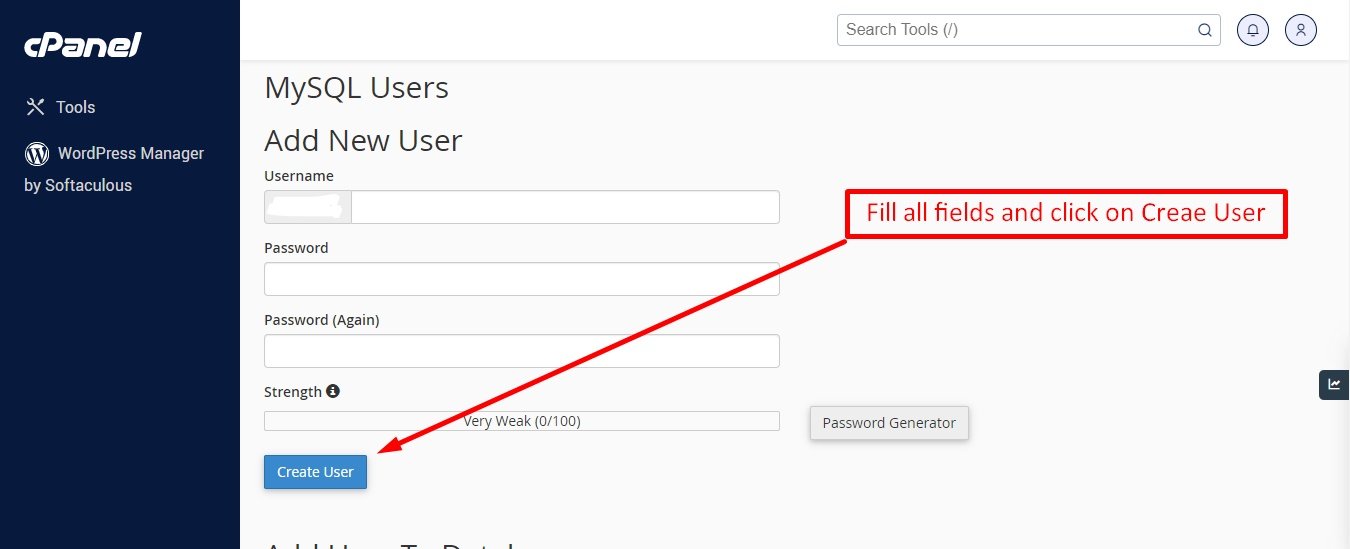
Step: 1
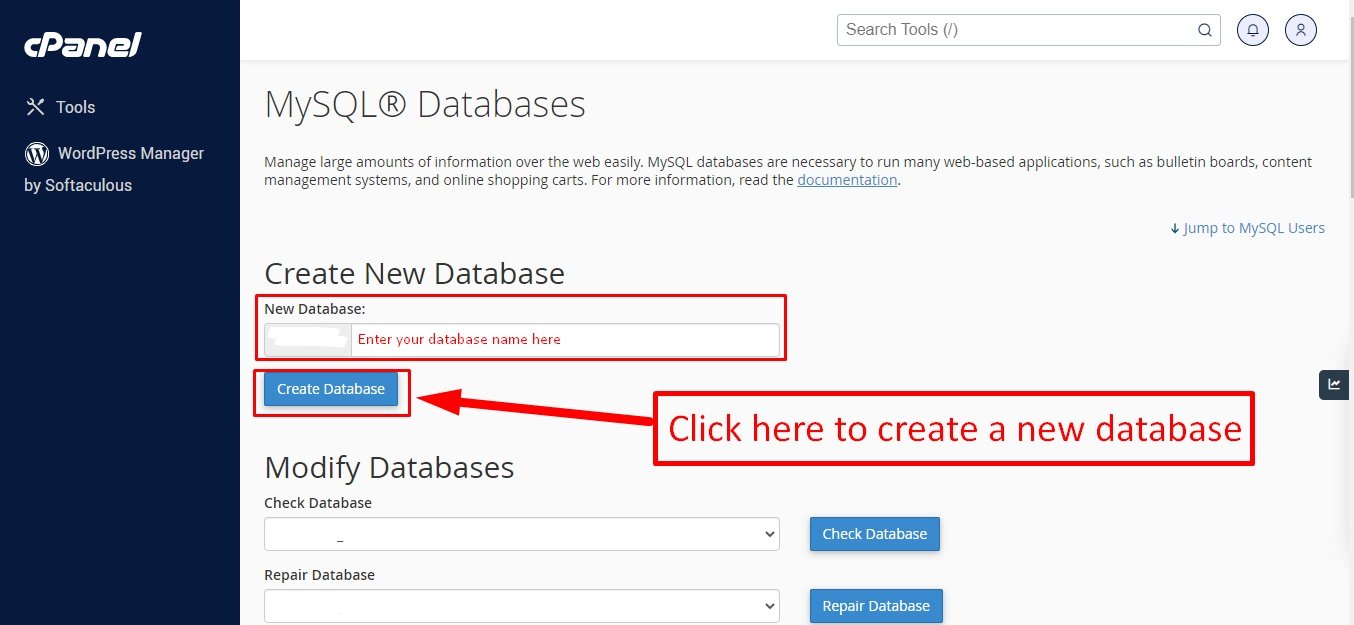
Step: 2
Step: 3
Now you need to create a new user. On the same page go to create a new database user
Step: 4
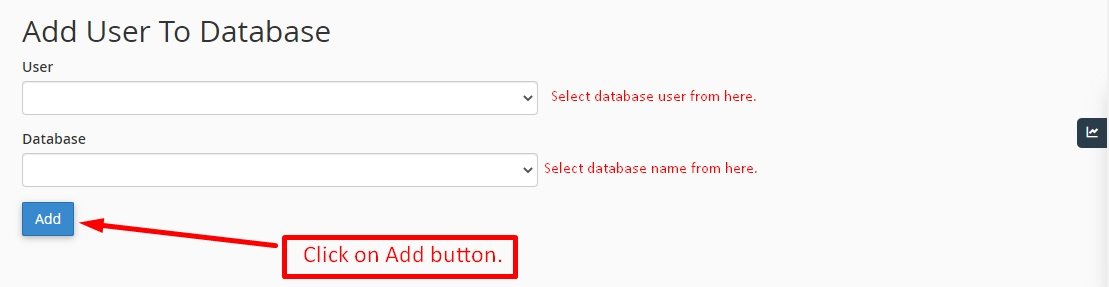
Now add the user to the database
Step: 5
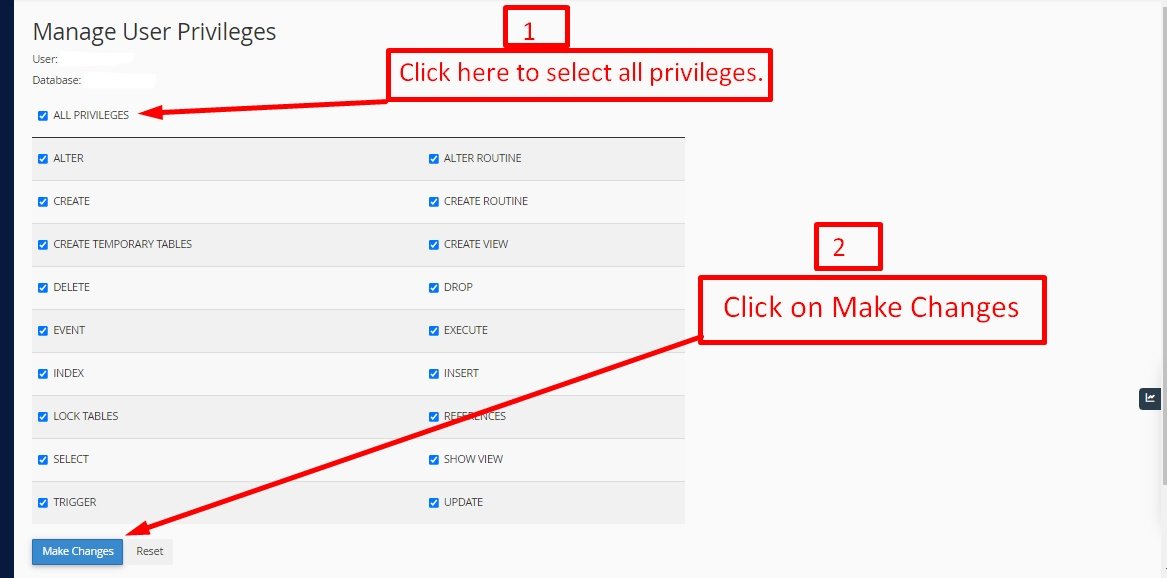
And select full permissions on the database to that user
Uploading Files
On some operating systems, the dotfiles are hidden by default. Before starting to upload the files, please make sure your file explorer has the option to view hidden files turned on.
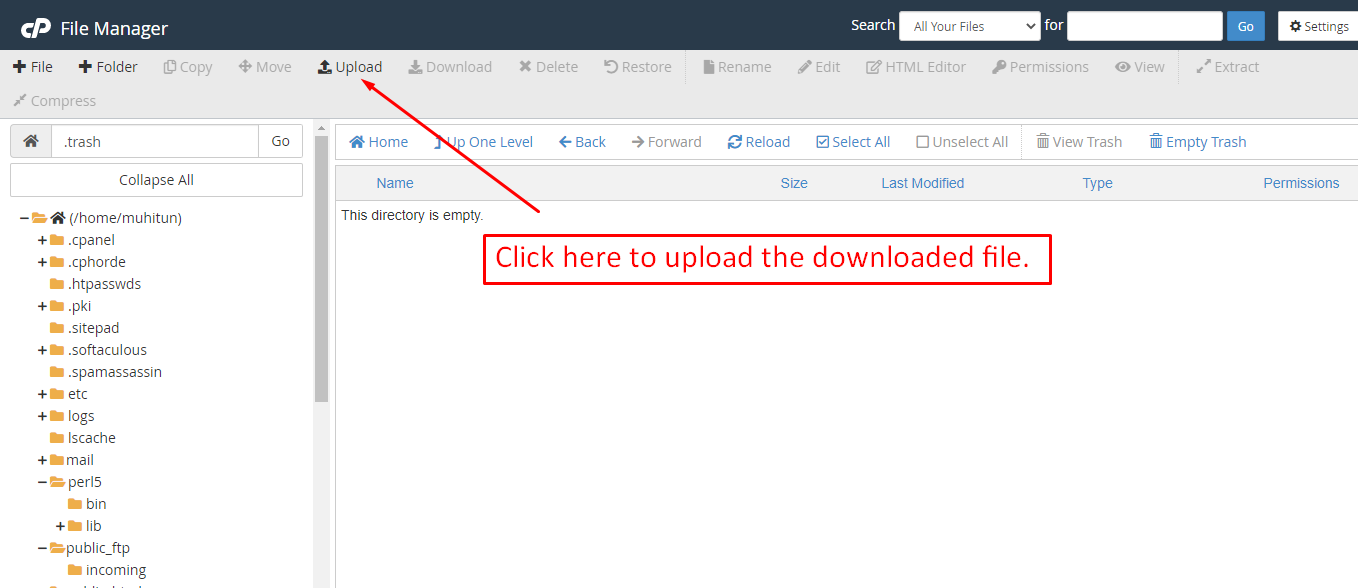
After creating a database, Upload the Super-Admin.zip file on the web root folder of your domain. This folder is generally called public_html, html, or example.com, but depending on your server's configuration, it might be named differently.
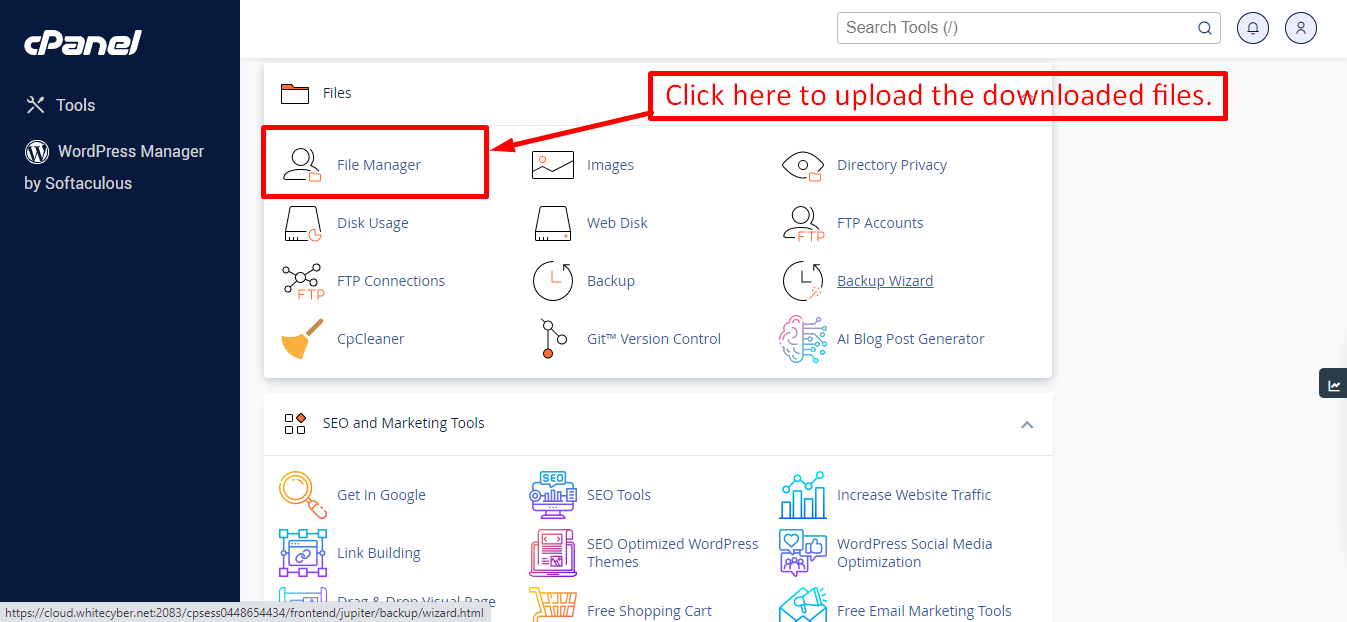
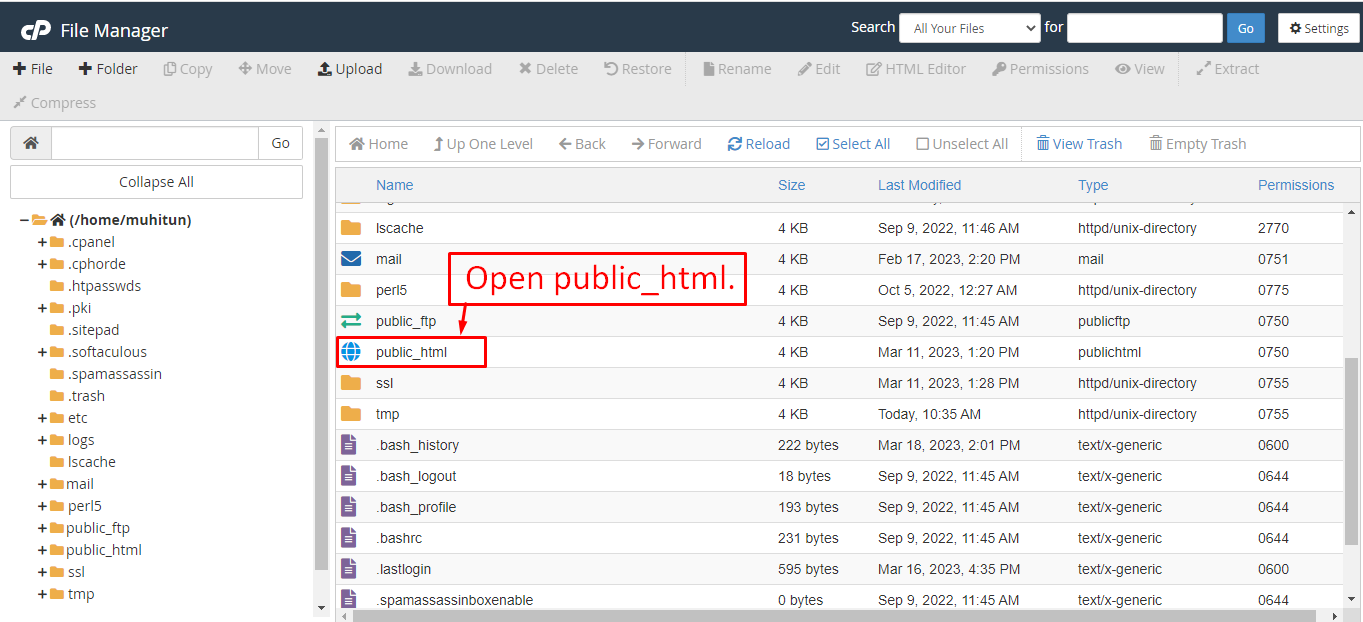
After that in the public_html directory upload the downloaded file.
Note: Important Make sure that you have .env file in your folder.
Note: Make sure that .htaccess file got copied properly from the download to your server.
Installation Wizard
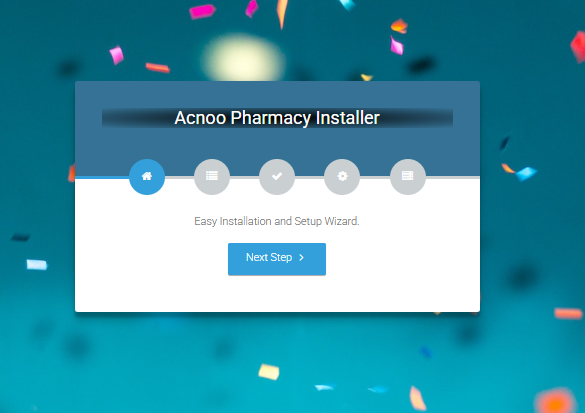
Go to your website address, then you'll see an installation wizard. To open the installer. Visit
yourdomain.com/install
Now the installer will show up.The First screen will be Welcome Screen
Note : If you are not able to access the website by accessing yourdomain.com/install, but you are able to access it via yourdomain.com/index.php/install, this means that you probably don't have Apache mod_rewrite installed and enabled.
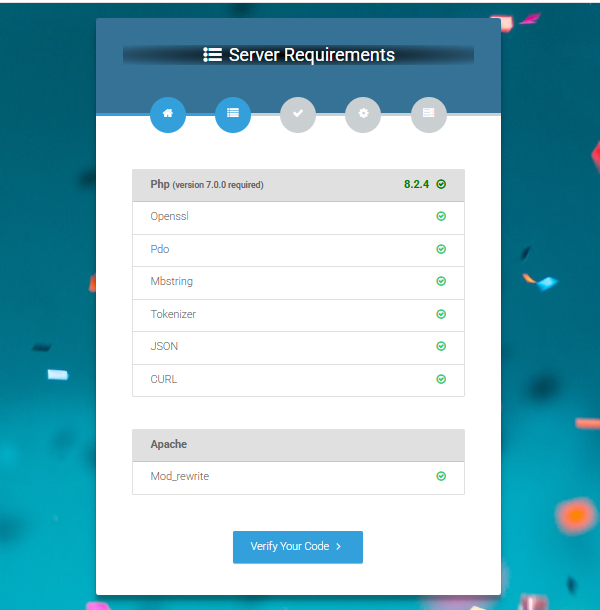
Server Requirements
After clicking on "Check requirement" button, you will be redirected to System Requirements step during the installation wizard, System Requirements.
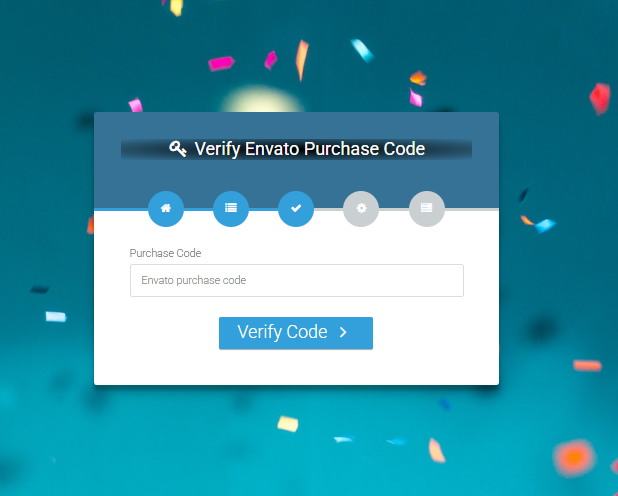
Verify Code
Here enter your Envato Purchase Code to proceed.
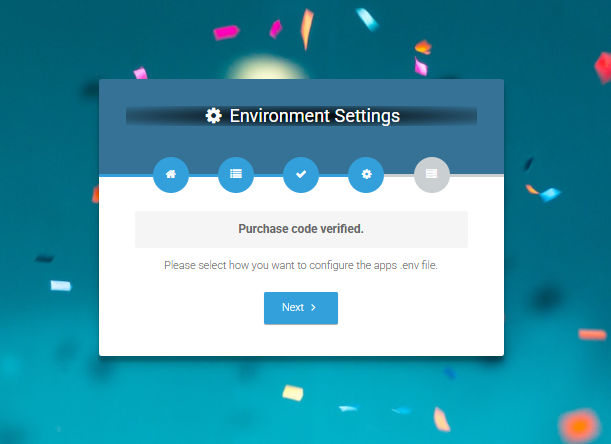
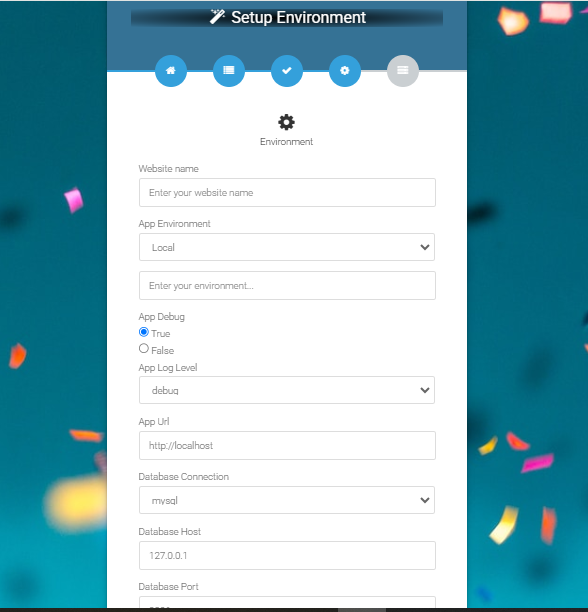
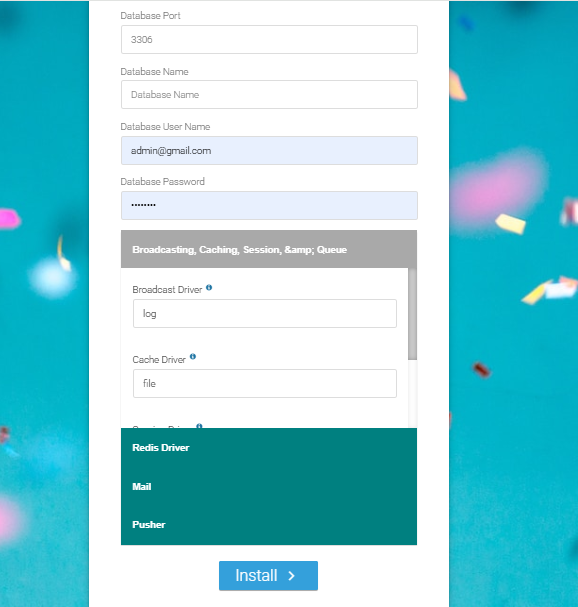
Database/Environment Setting
If your code is verified, simply click 'Next' to proceed to the next step.
Please enter your database credentials and click 'Install' to continue.
Exit
The last step is exit step.
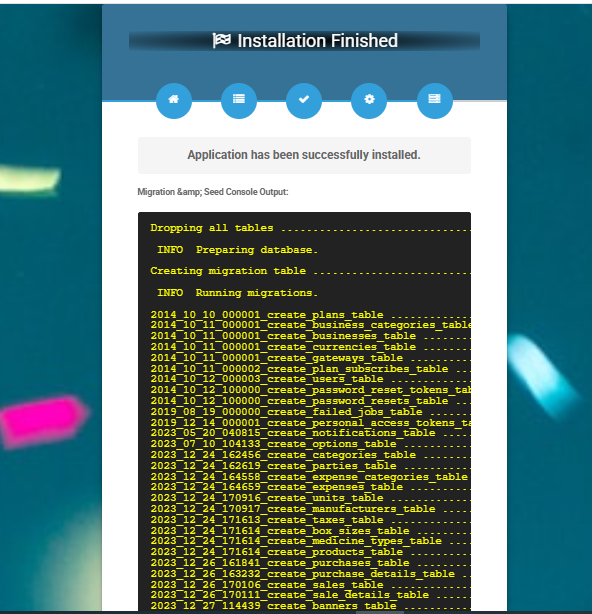
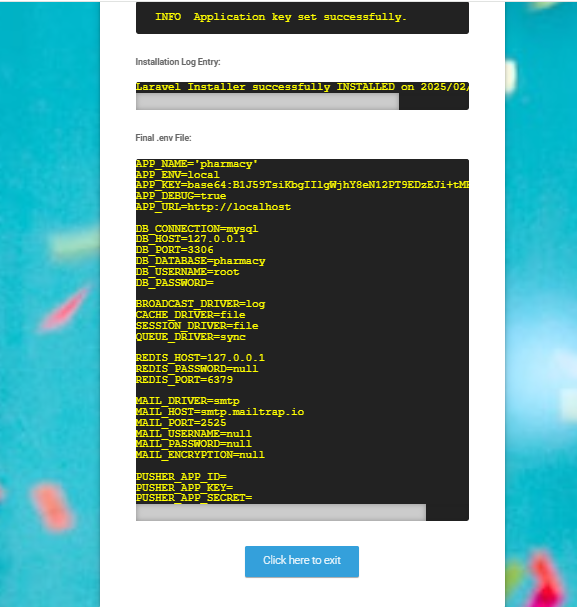
Congratulations you have successfully installed this project on your server. 😀
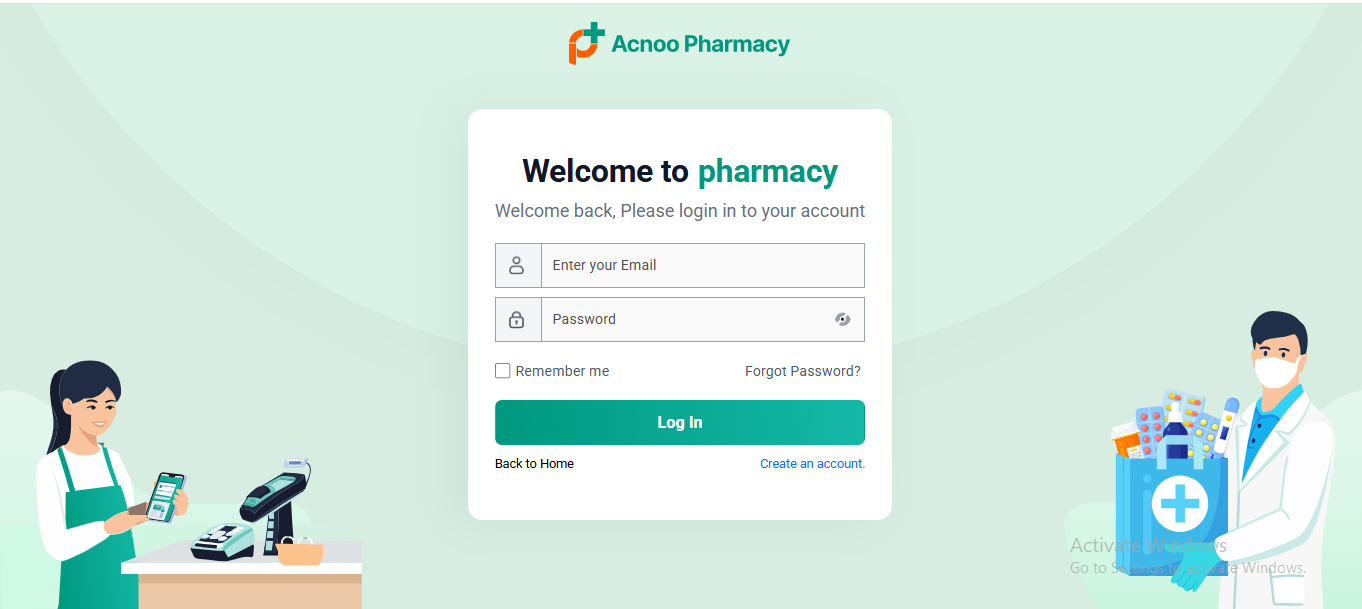
Default Password
You can login using several methods depending on your role.
Super Admin
superadmin@superadmin.com
superadmin
Admin
admin@admin.com
admin
Manager
manager@manager.com
manager
In this project, different modules are assigned based on user roles: Super Admin, Admin, Manager. Each role has distinct responsibilities tailored to their specific tasks and permissions. Below, we will discuss how each user role operates within the system.
Dashboard
The Acoo Pharmacy Admin Dashboard provides an intuitive interface for administrators to manage various aspects of the platform. It includes metrics on total shops, expired businesses, categories, subscription plans, financial overviews, and user registrations.

Store List
This appears to be a screenshot of a business list page. Business list functionalities typically allow users to collect and organize information about businesses. By clicking the "View" button, you can see the details of each business. You can also create a new business by clicking the "Add Store" button. Below, we'll describe how you can create a new store.
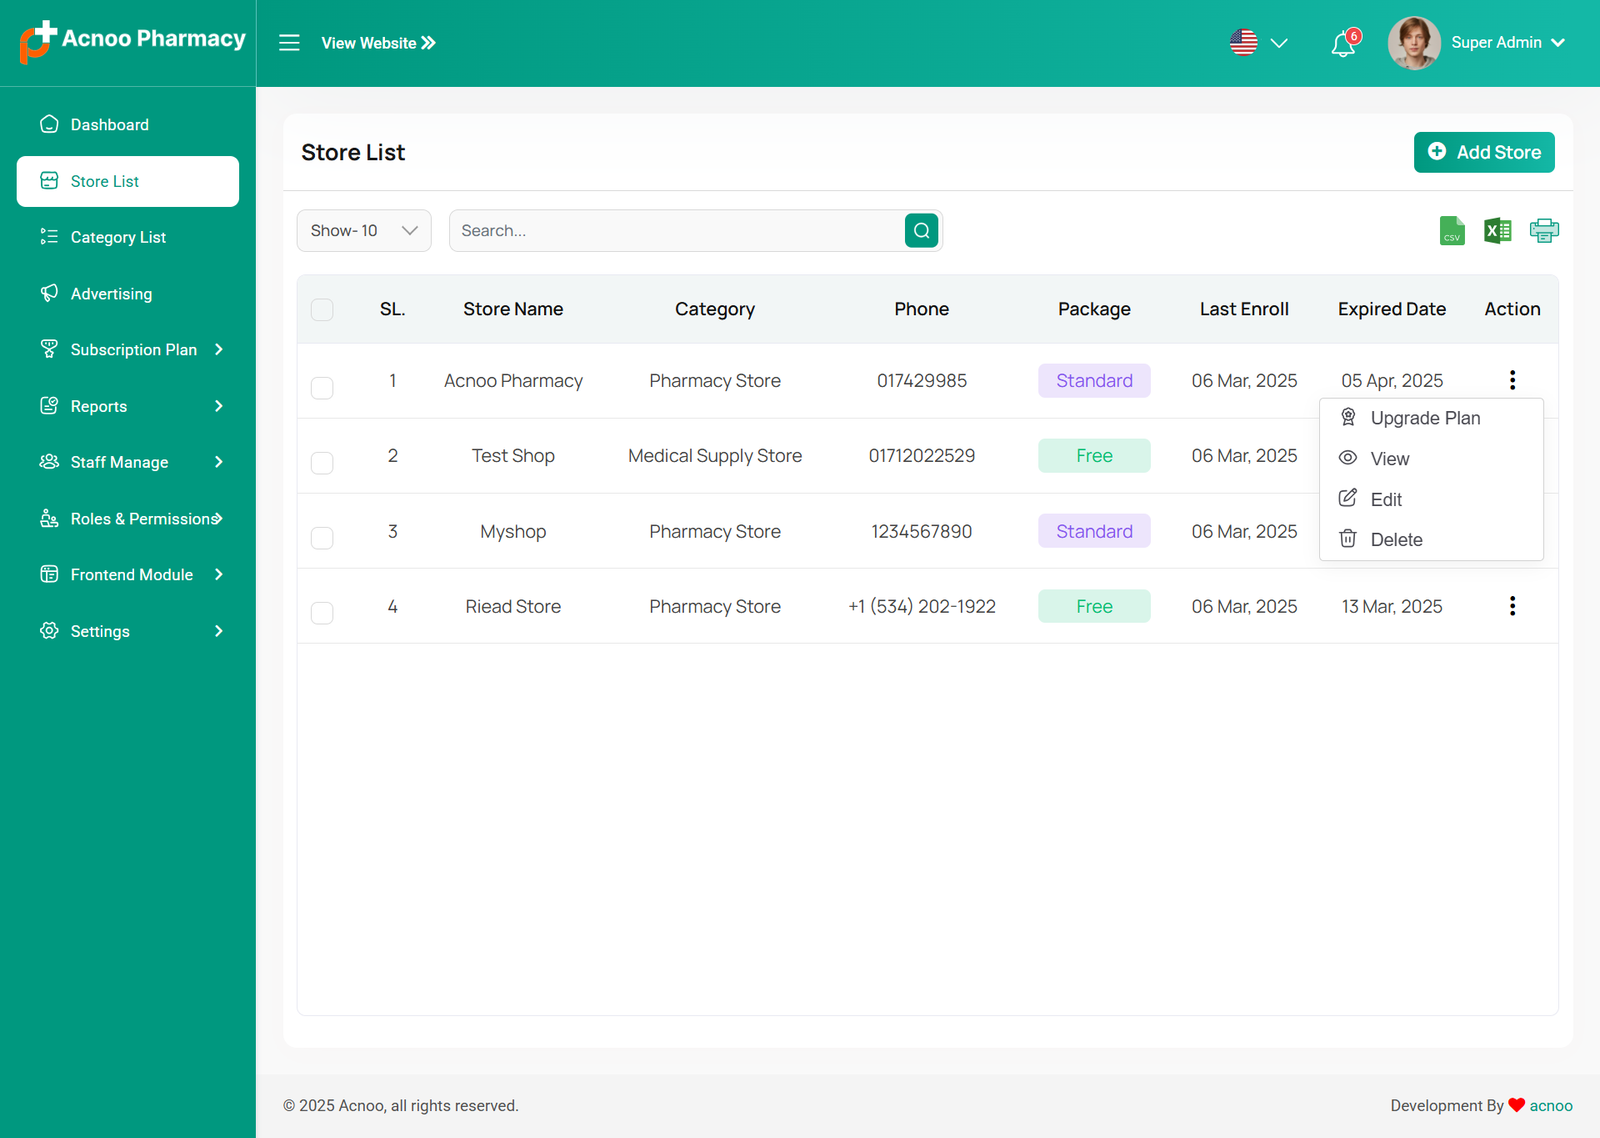
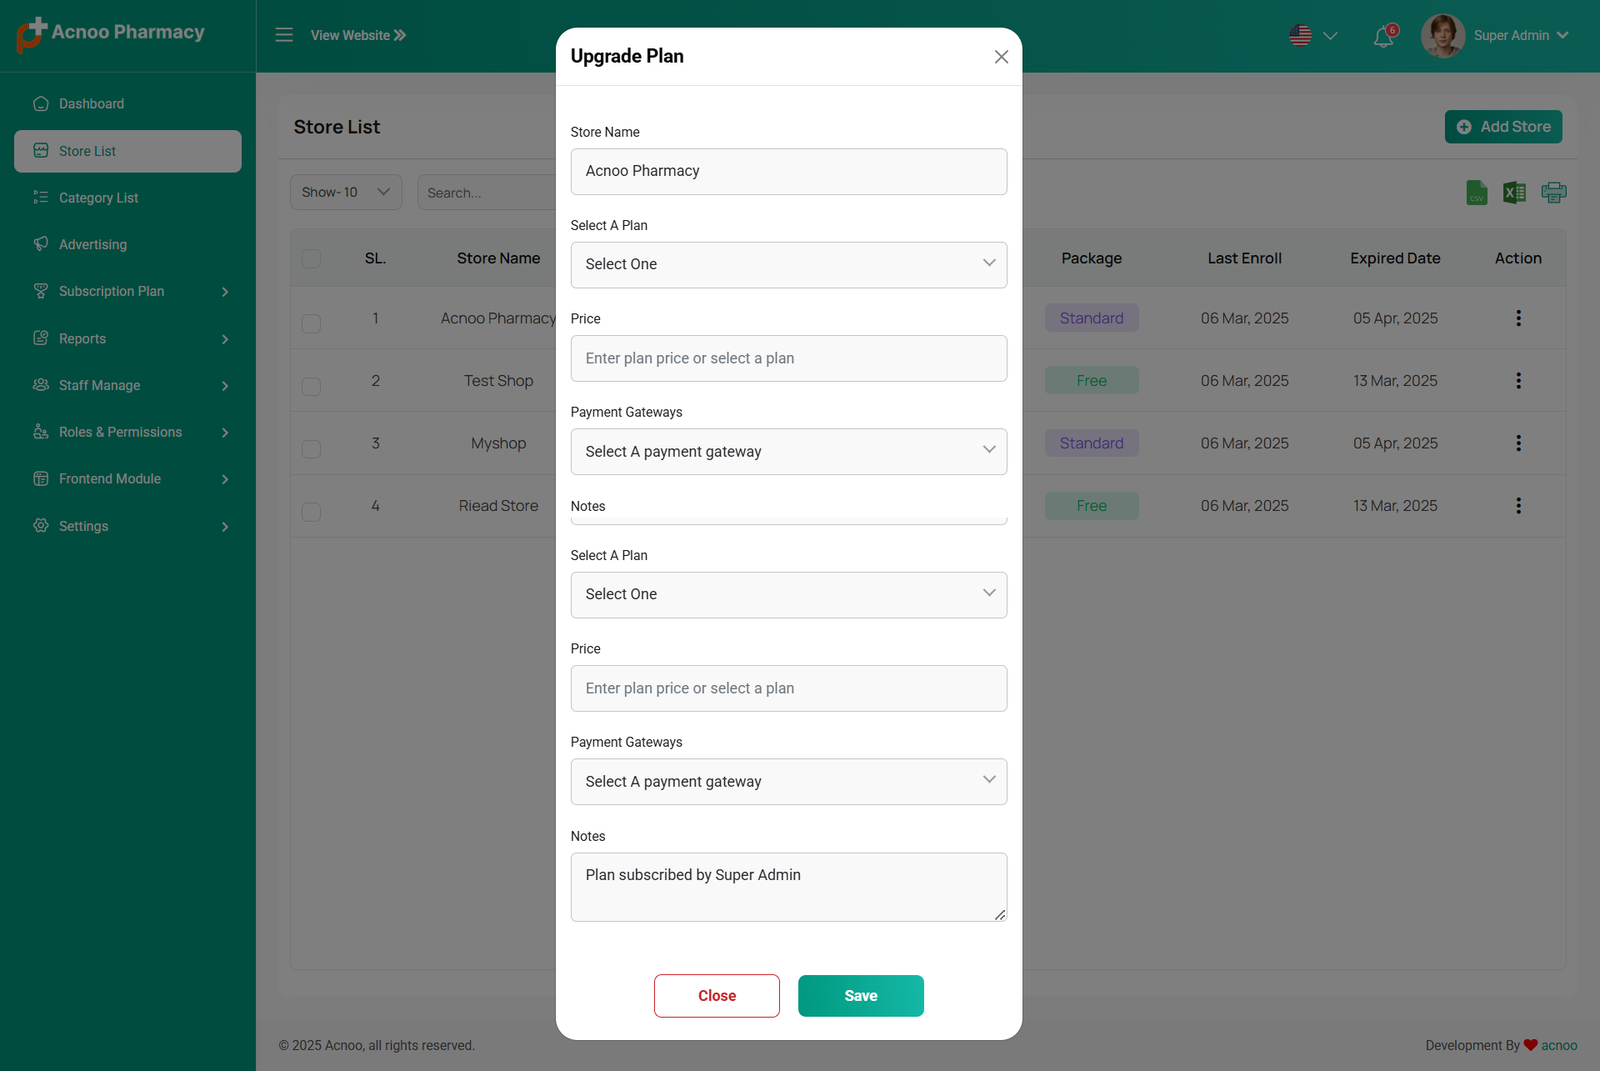
Upgrade Plan
If you need to upgrade the plan for any business, click on the "Upgrade Plan" button. You will likely see a popup for this. Here, you can update the plan, gateway, price, and notes. When you select a plan, the price input field will automatically fill in according to the selected plan, but you can also change the price manually. If desired, you can add a note by filling in the notes input field.
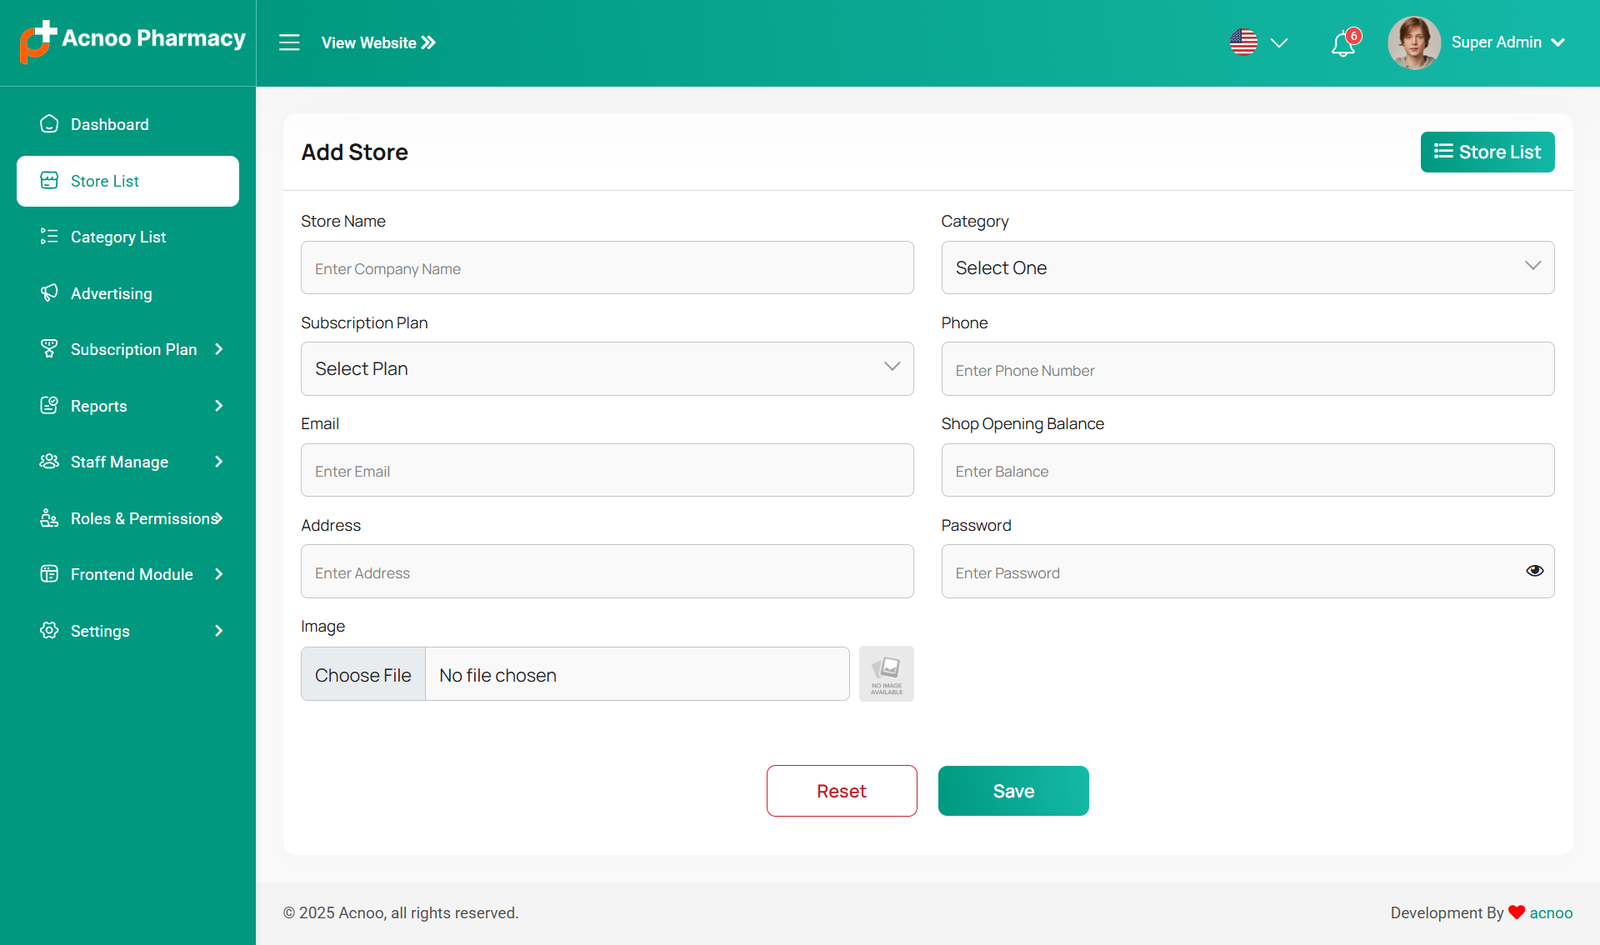
Add New Store
By clicking on the "Add Store" button, you can create a new business. You will need to fill in the necessary fields. Here is the screenshot of the create business page.
Business Category List
This appears to be a screenshot of a business categories list. Here, you can filter business categories, as well as edit, delete, or multi-delete them. There is also an "Add New Category" button for adding new business categories. To add a new business category, fill in the necessary fields. You need to enter the business name, and the description field is optional. You can also update the status from this page.
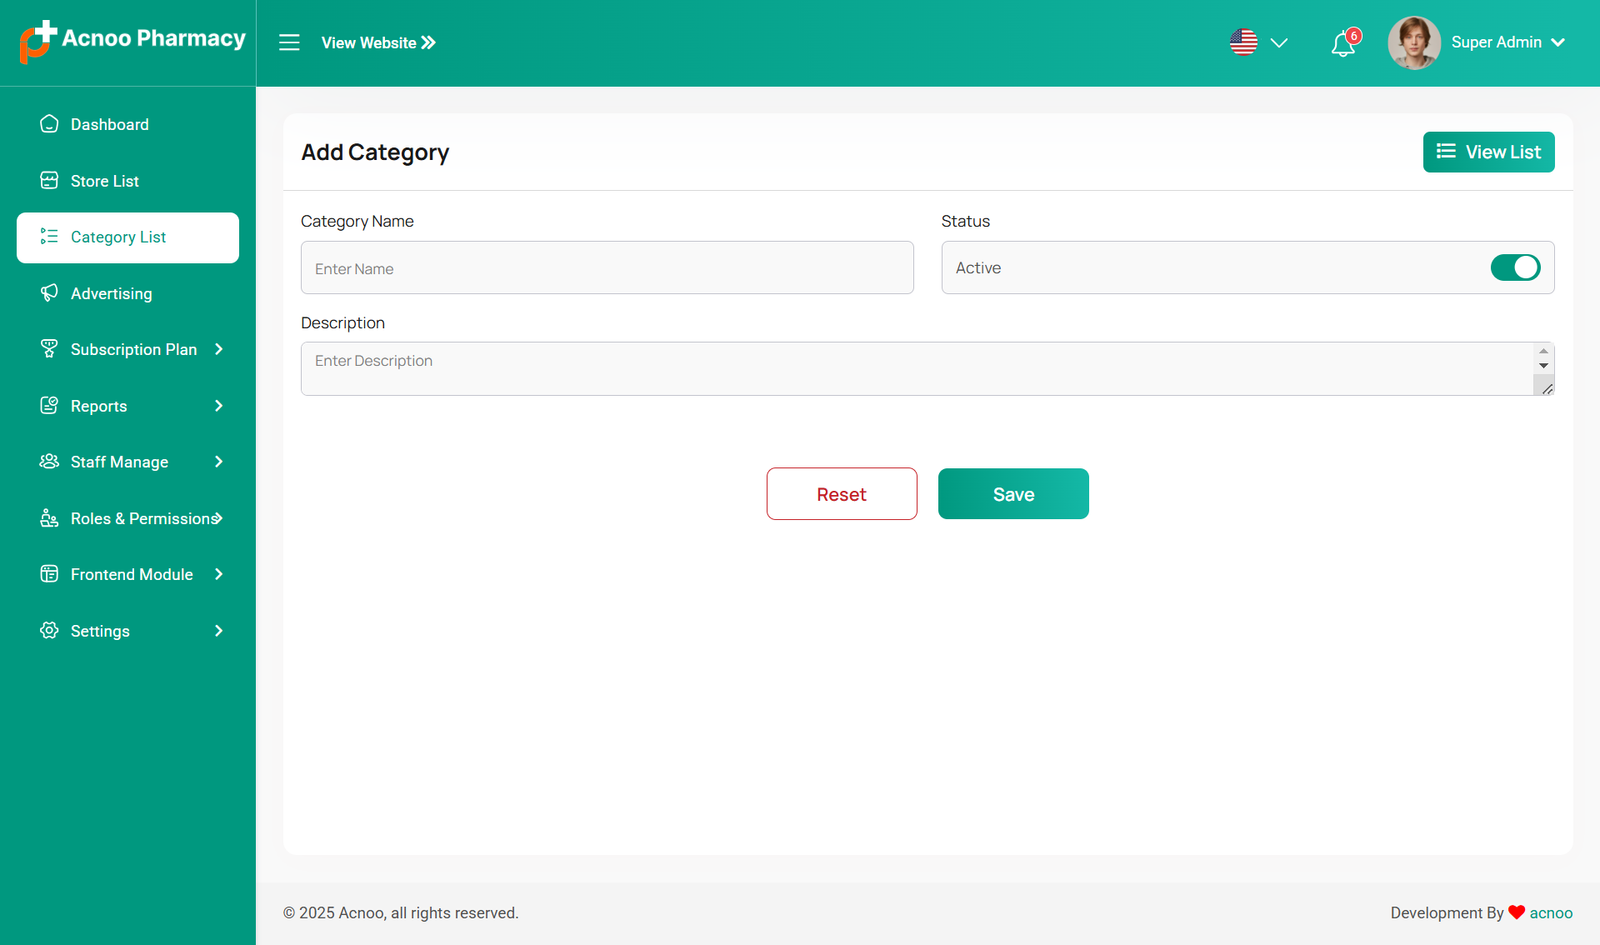
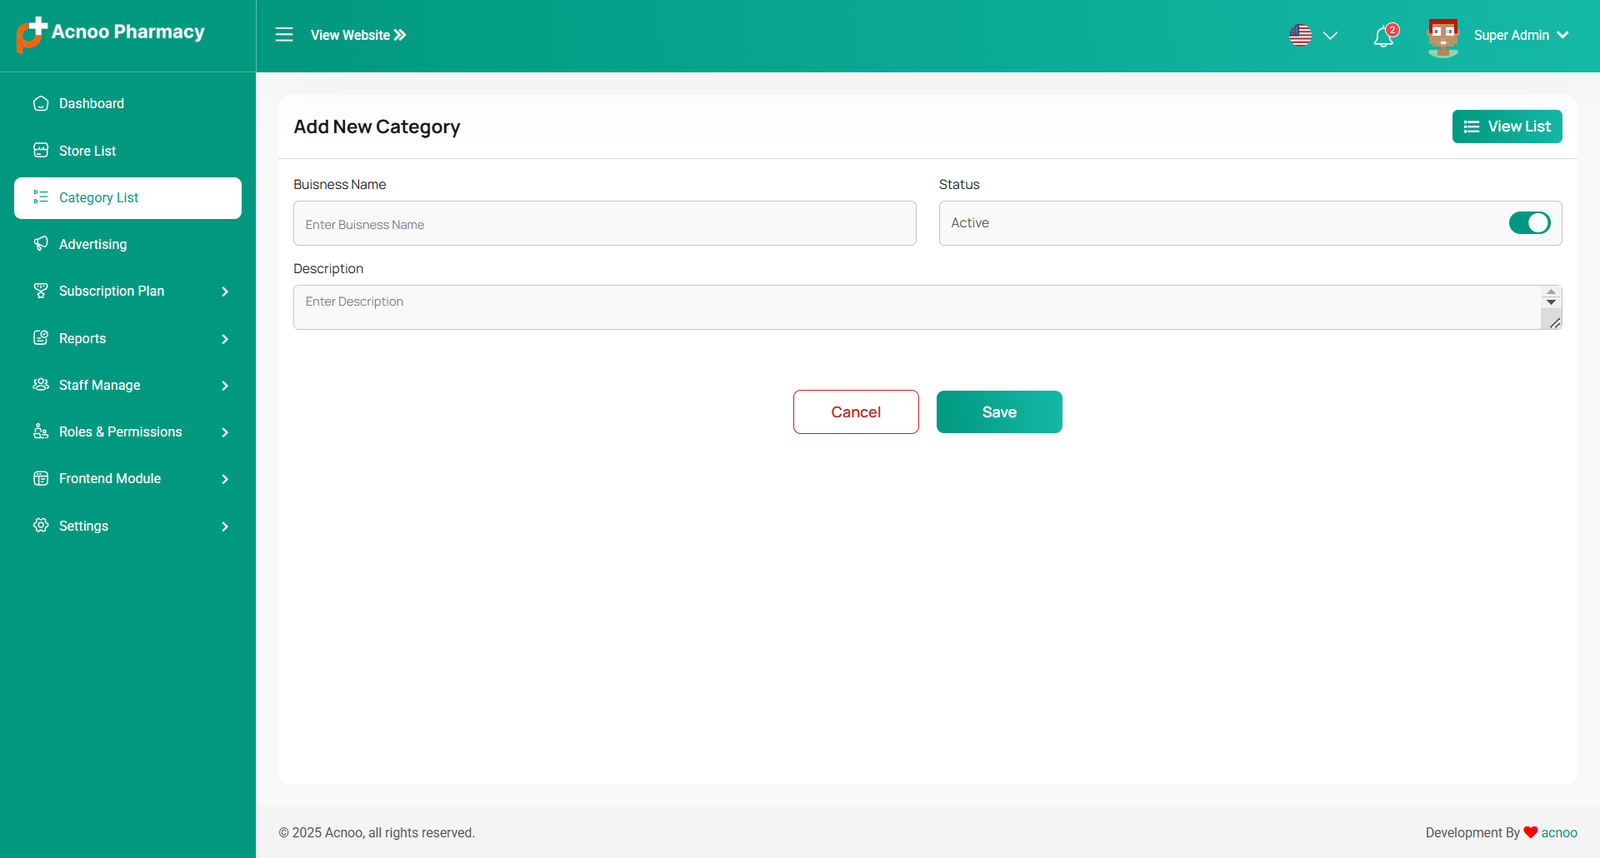
Add New Category
This section outlines the procedure for adding new business categories within the Acnoo Pharmacy system. Business categories are used to classify and organize different types of businesses listed in the system.
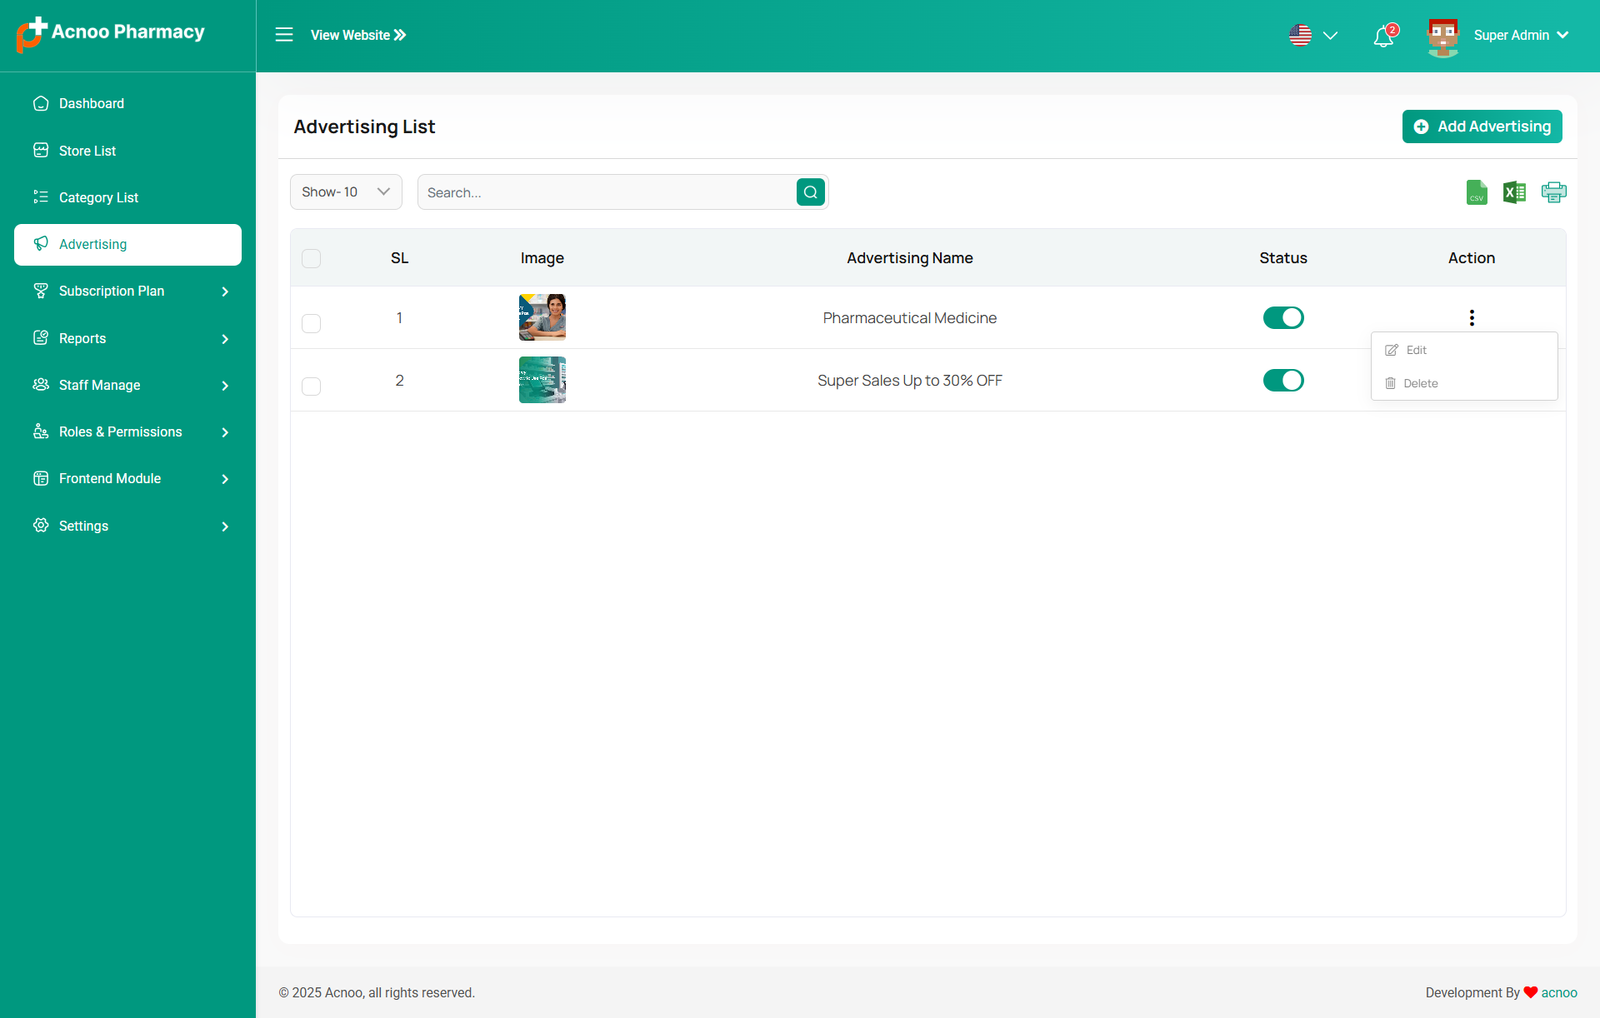
Advertising Section
This list allows you to see the current advertising campaigns with status. To create a new advertise, you can click on the "Create Banner" button at the top right of the screenshot. A pop-up window will open, where you can add an image and change the status.Click the three dot menu where you can edit and delete
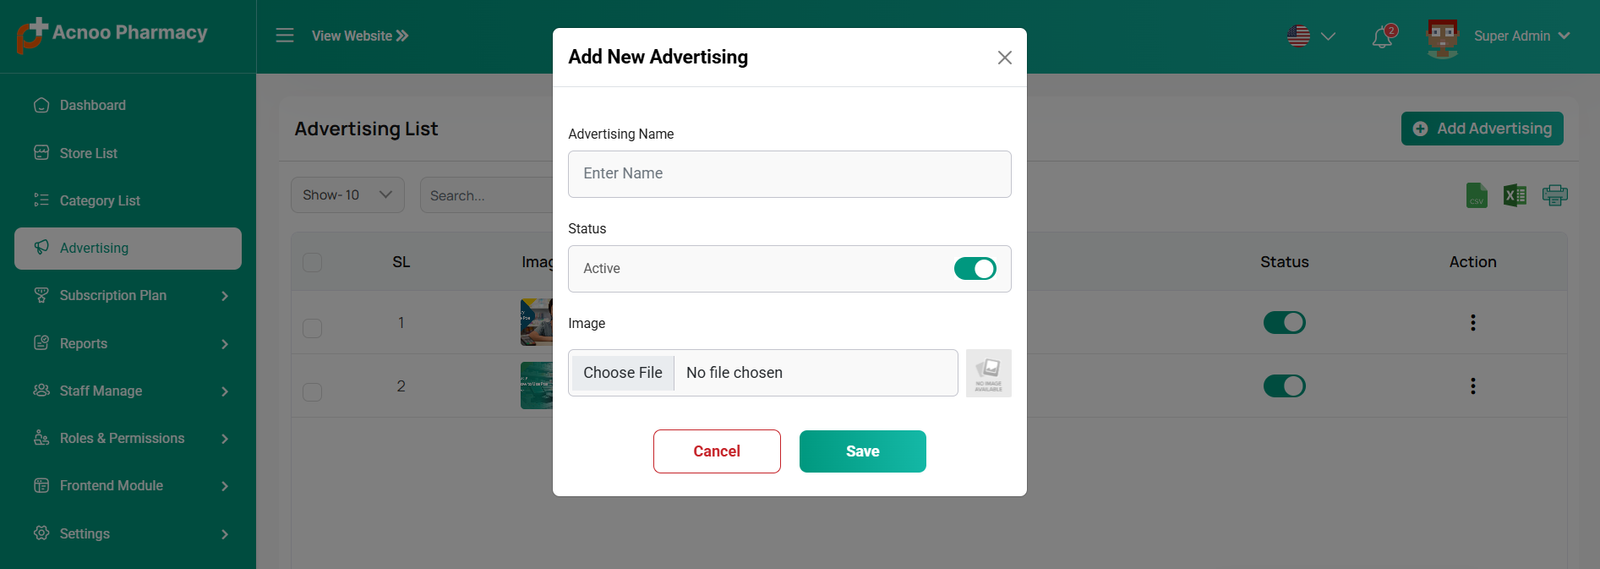
Add Advertising
This section describes the process of adding new advertisements to the Acnoo pharmacy store's system. Advertisements are used to promote products, services, or special offers to customers.
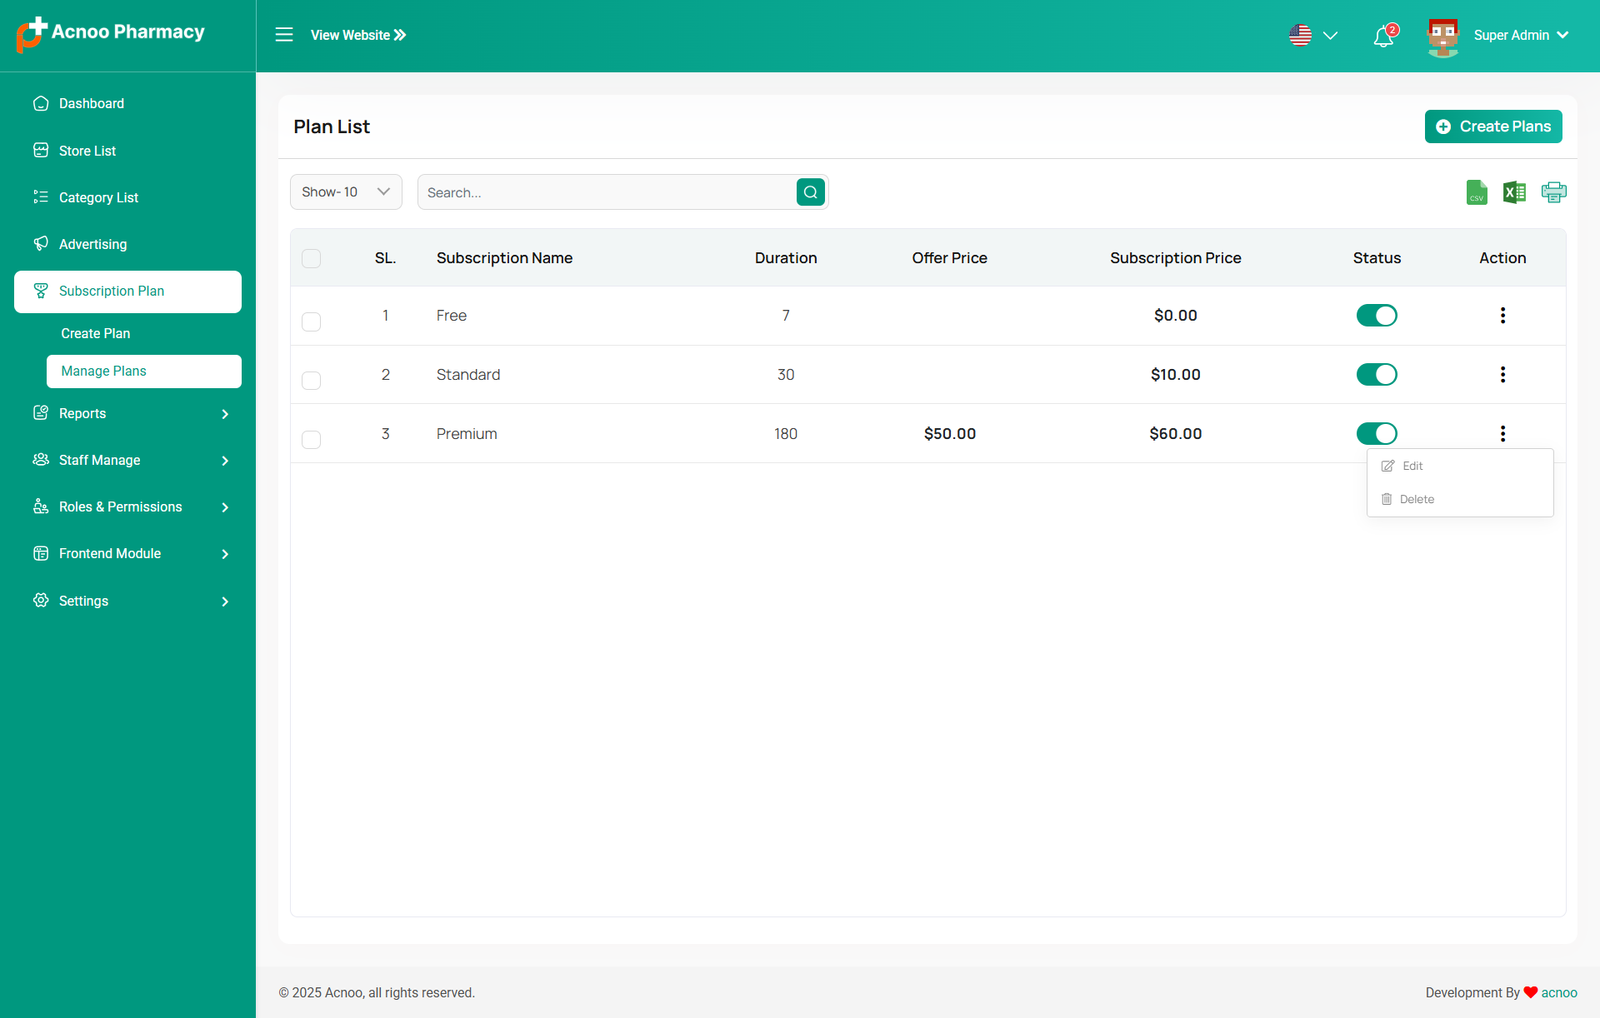
Plan List
Here, you can view a list of available plans with filtering options. You can also change the plan status from this page. Additionally, options to view, edit, delete, and multi-delete plans are available.
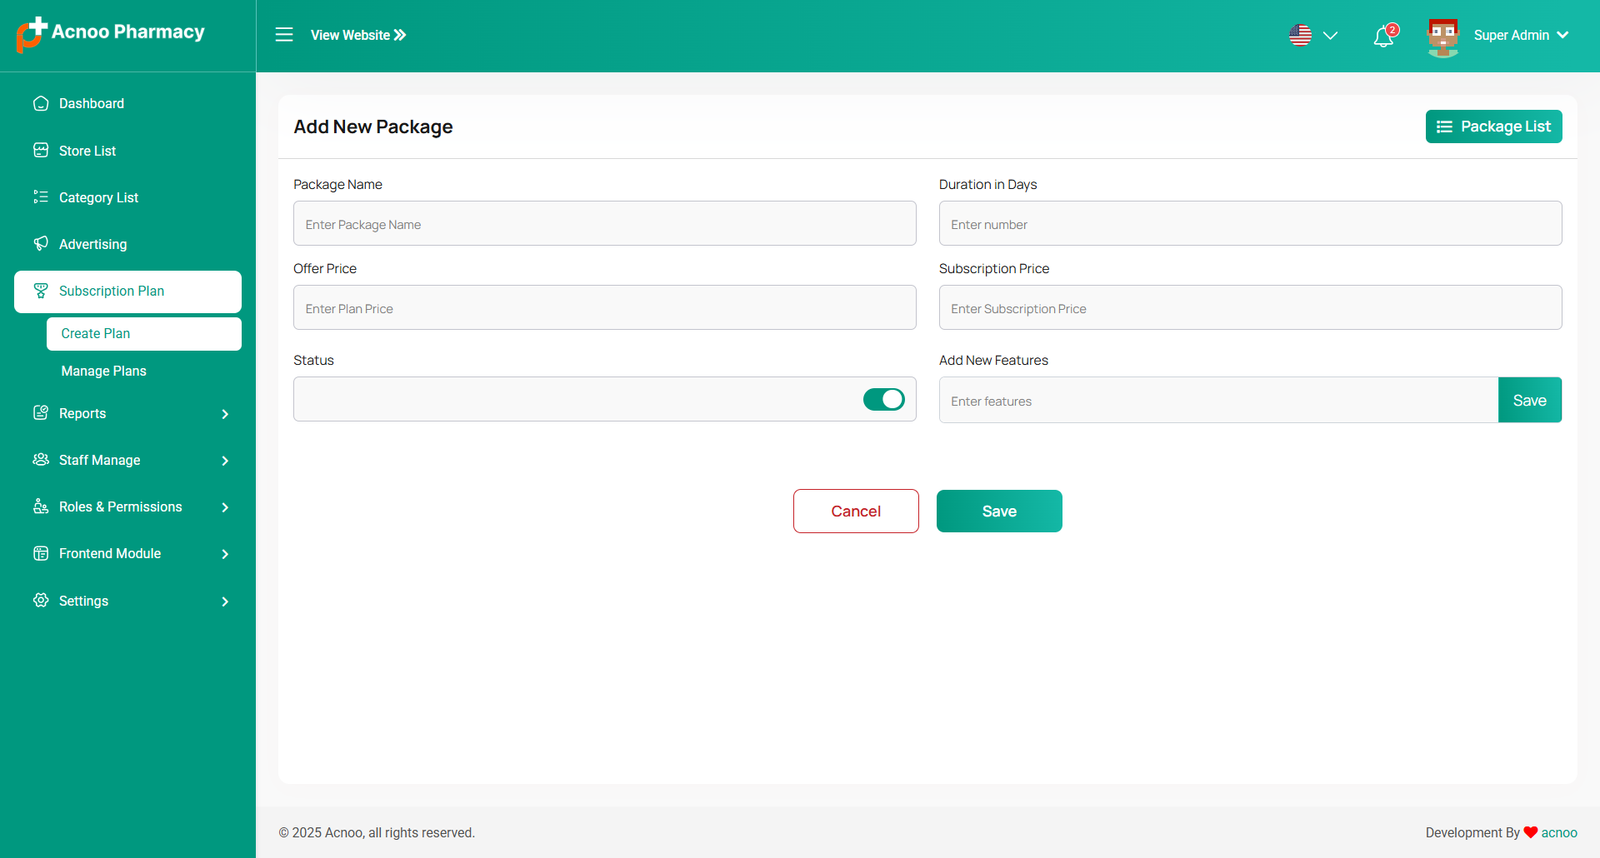
Add New Plan
Here, you have the option to create a plan according to your preferences. You can also add multiple features using the "Add New Feature" input field. Once you have completed filling out the form, simply click the "Save" button.
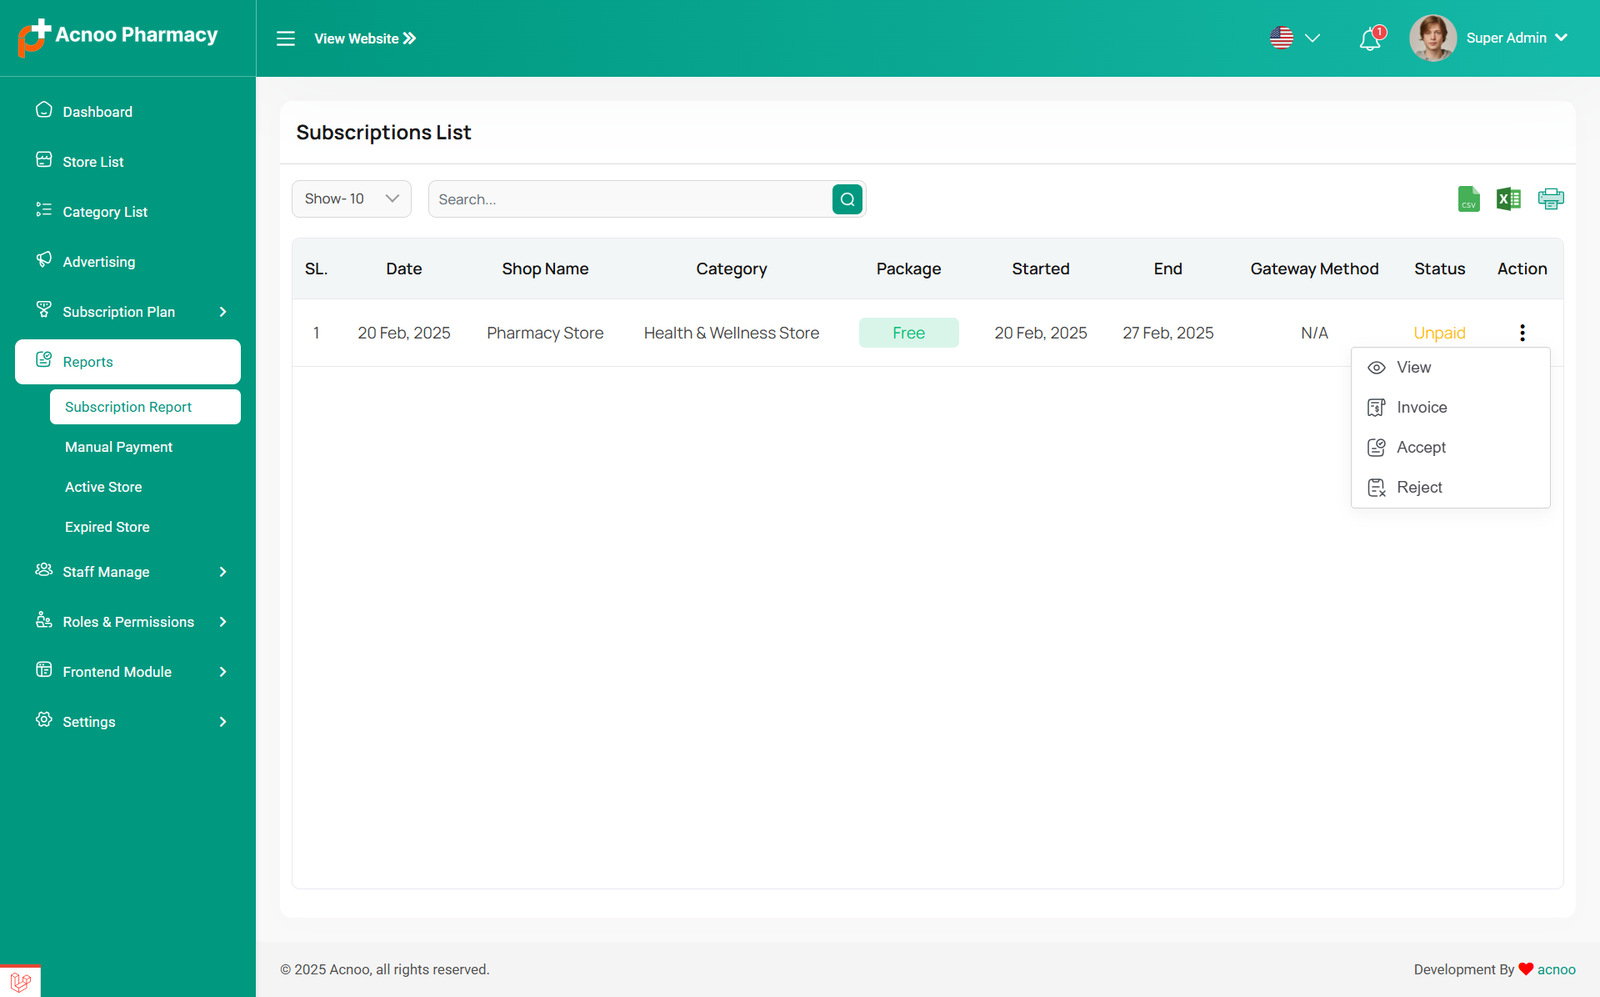
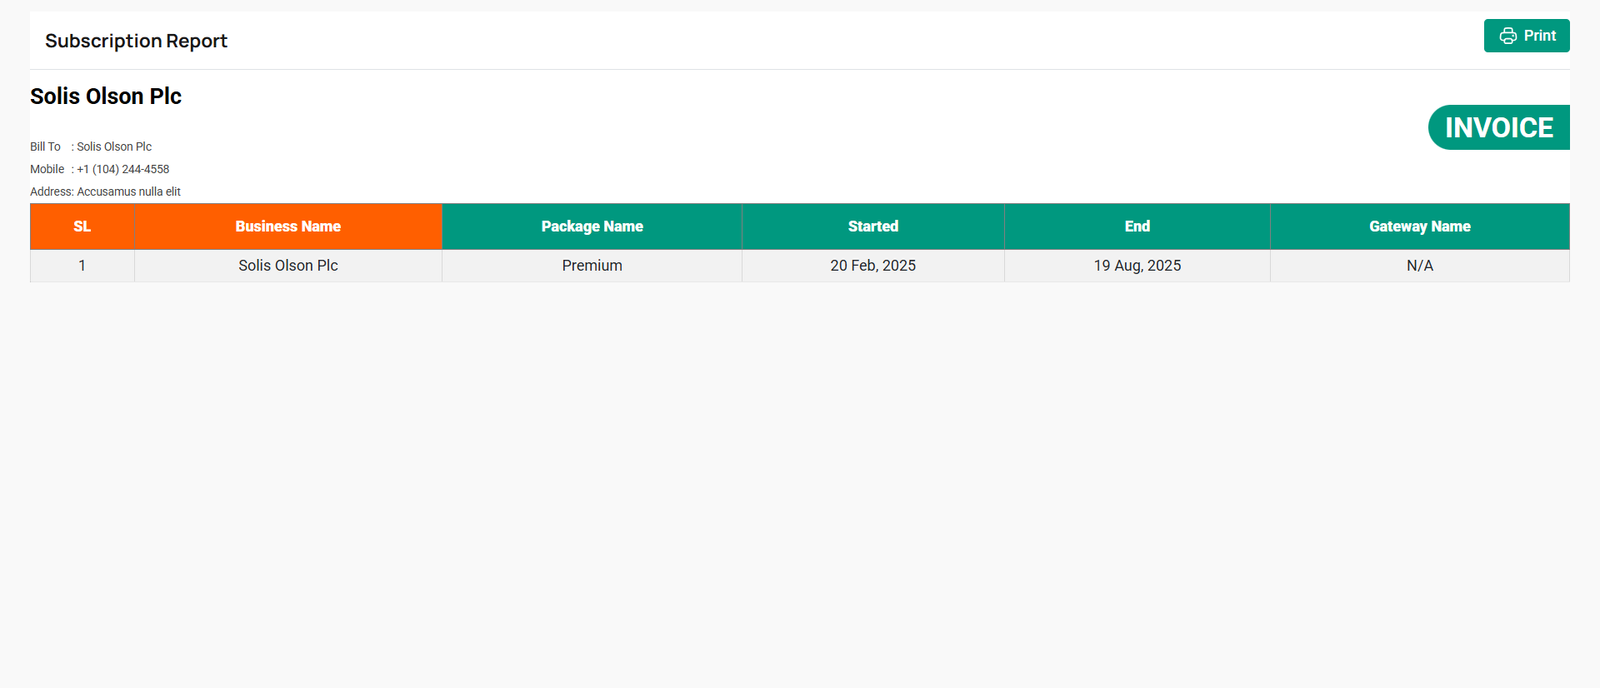
Subscription List
The Subscription reports section allows users to track their current subscriptions.In the action column, clicking on the three dots (...) will display options to mark as "Accept" or "Reject." Clicking either option will allow you to change the status accordingly.Provides access to the invoice associated with the subscription.
Manual Payment List
The Manual Payment List provides a comprehensive view of all manual payment requests, including details about the store, subscription plan, payment status, and available actions. This list is essential for tracking and processing payments made outside the automated system.


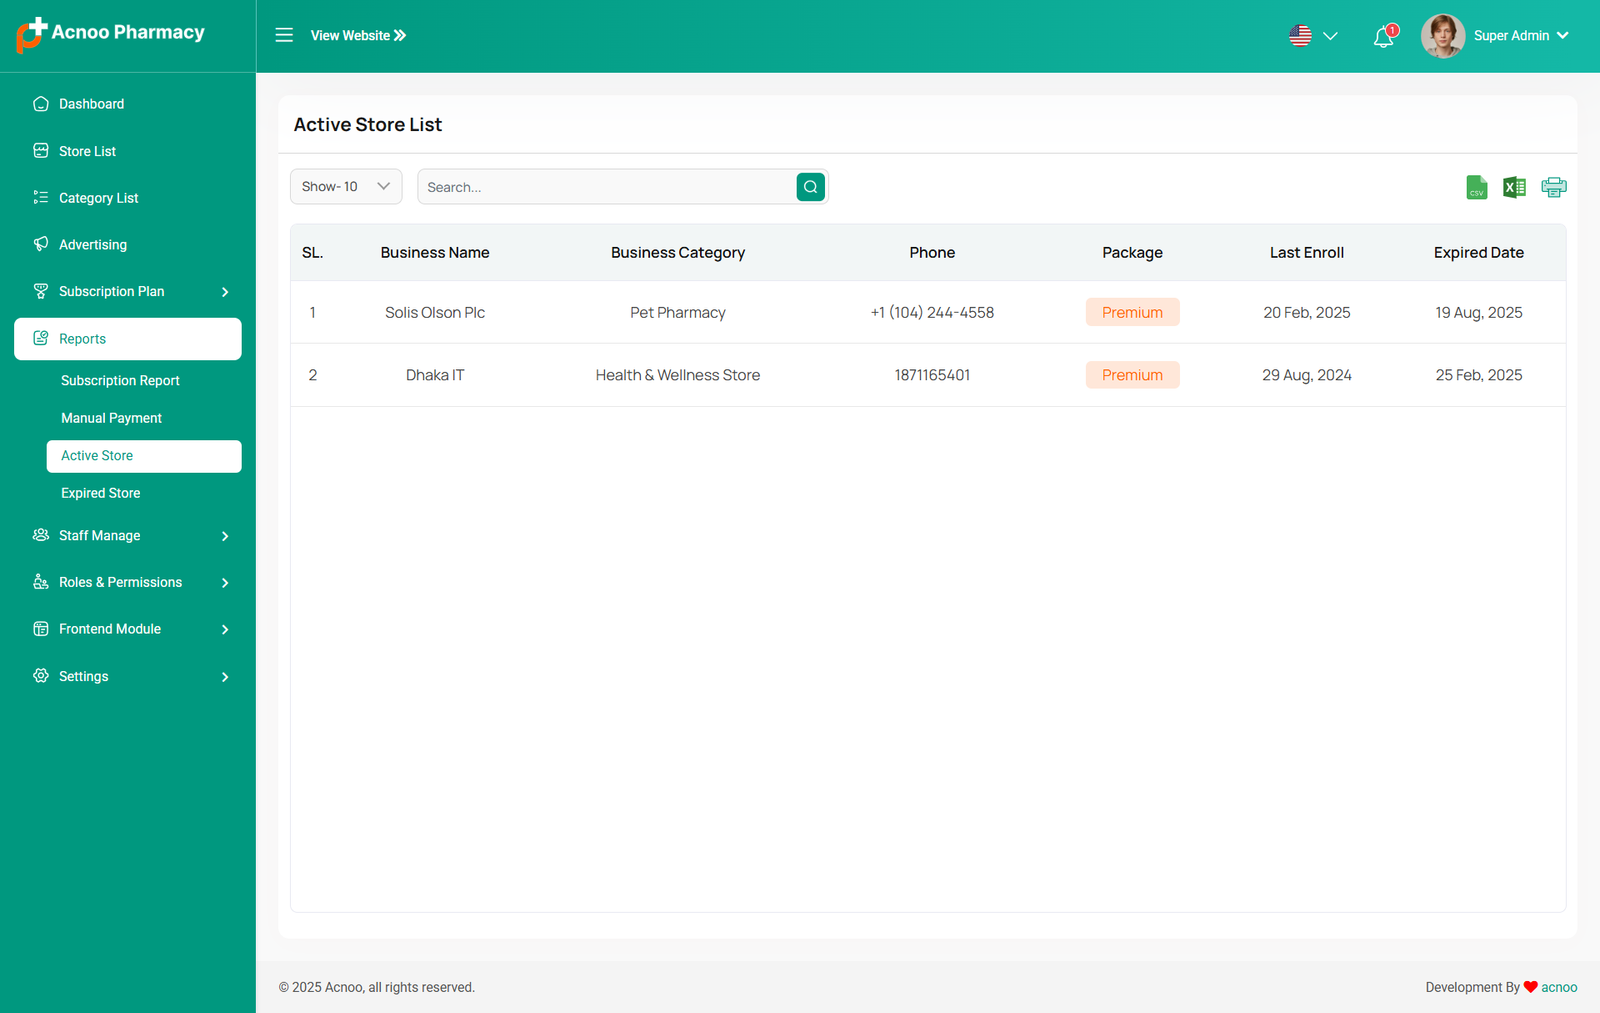
Active Store List
The Active Store List page is designed to provide a streamlined view of all active stores. Users can search, filter, and export store information while keeping track of enrollment and expiration dates. With intuitive navigation and dynamic data management, this page enhances administrative efficiency within the Acnoo Pharmacy system.
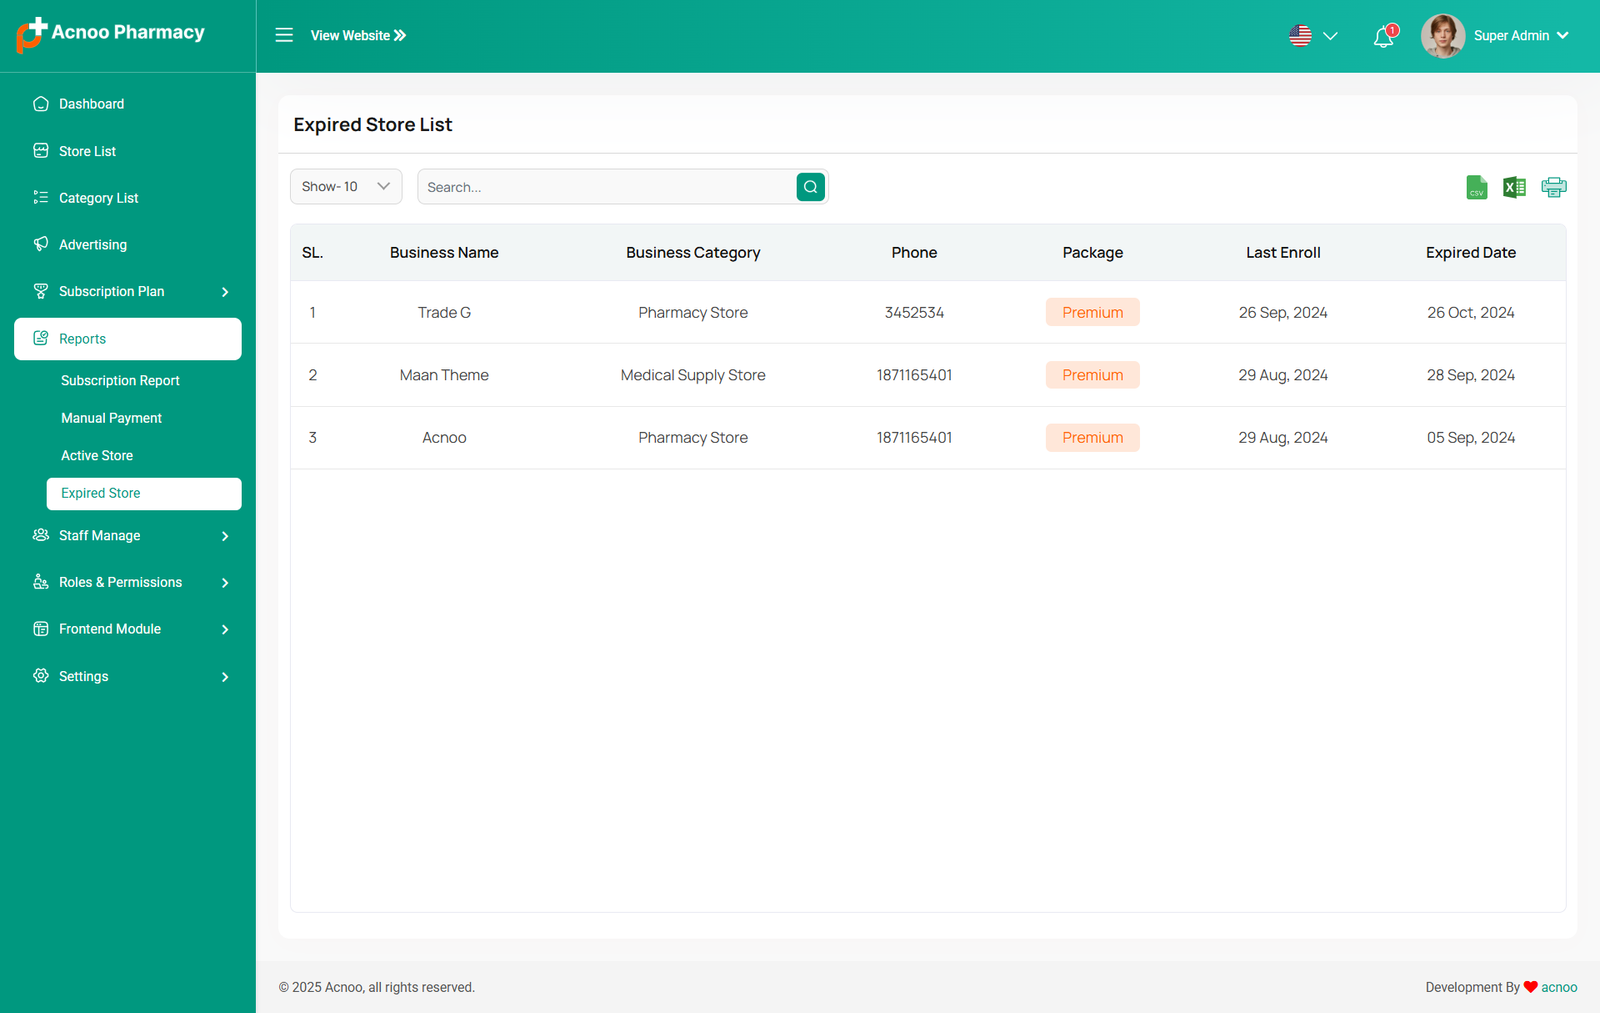
Expired Store List
The "Expired Store List" page displays a list of stores whose subscriptions have expired. This allows administrators to easily identify and manage stores that need renewal or follow-up. The page is part of the "Reports" section of the Acnoo Pharmacy system.
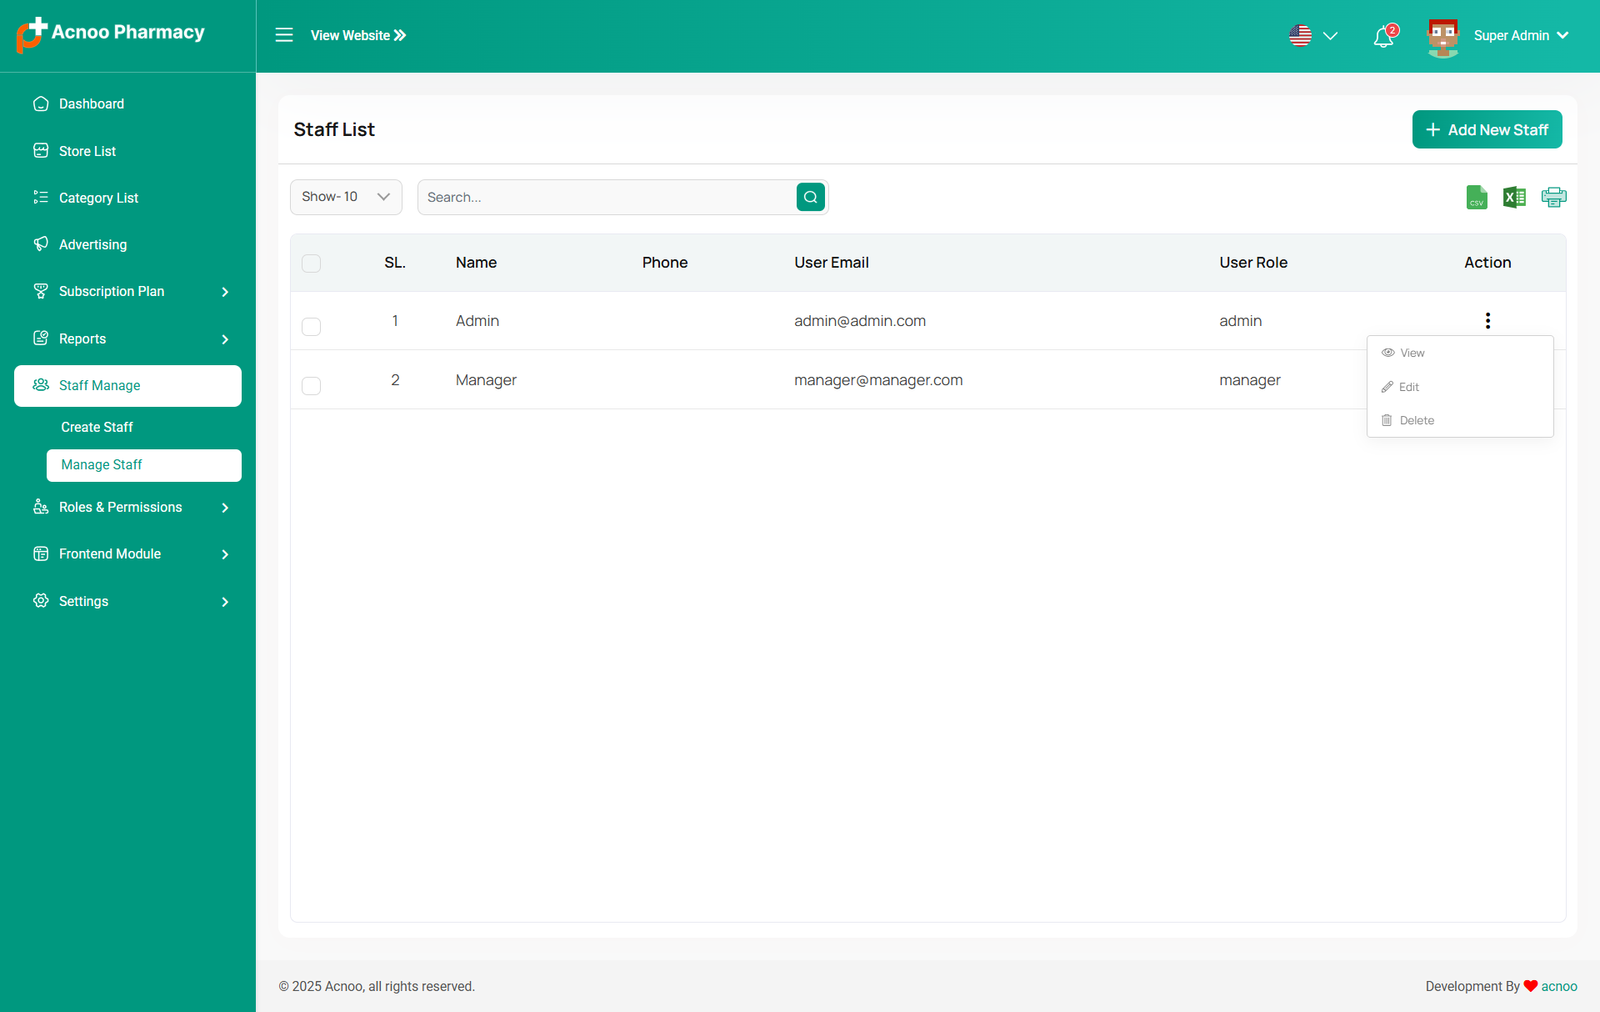
Staff List
Here, you can view the list of staff members along with a search filter. Additionally, you have the option to edit, delete individual entries, and perform multi-delete operations.
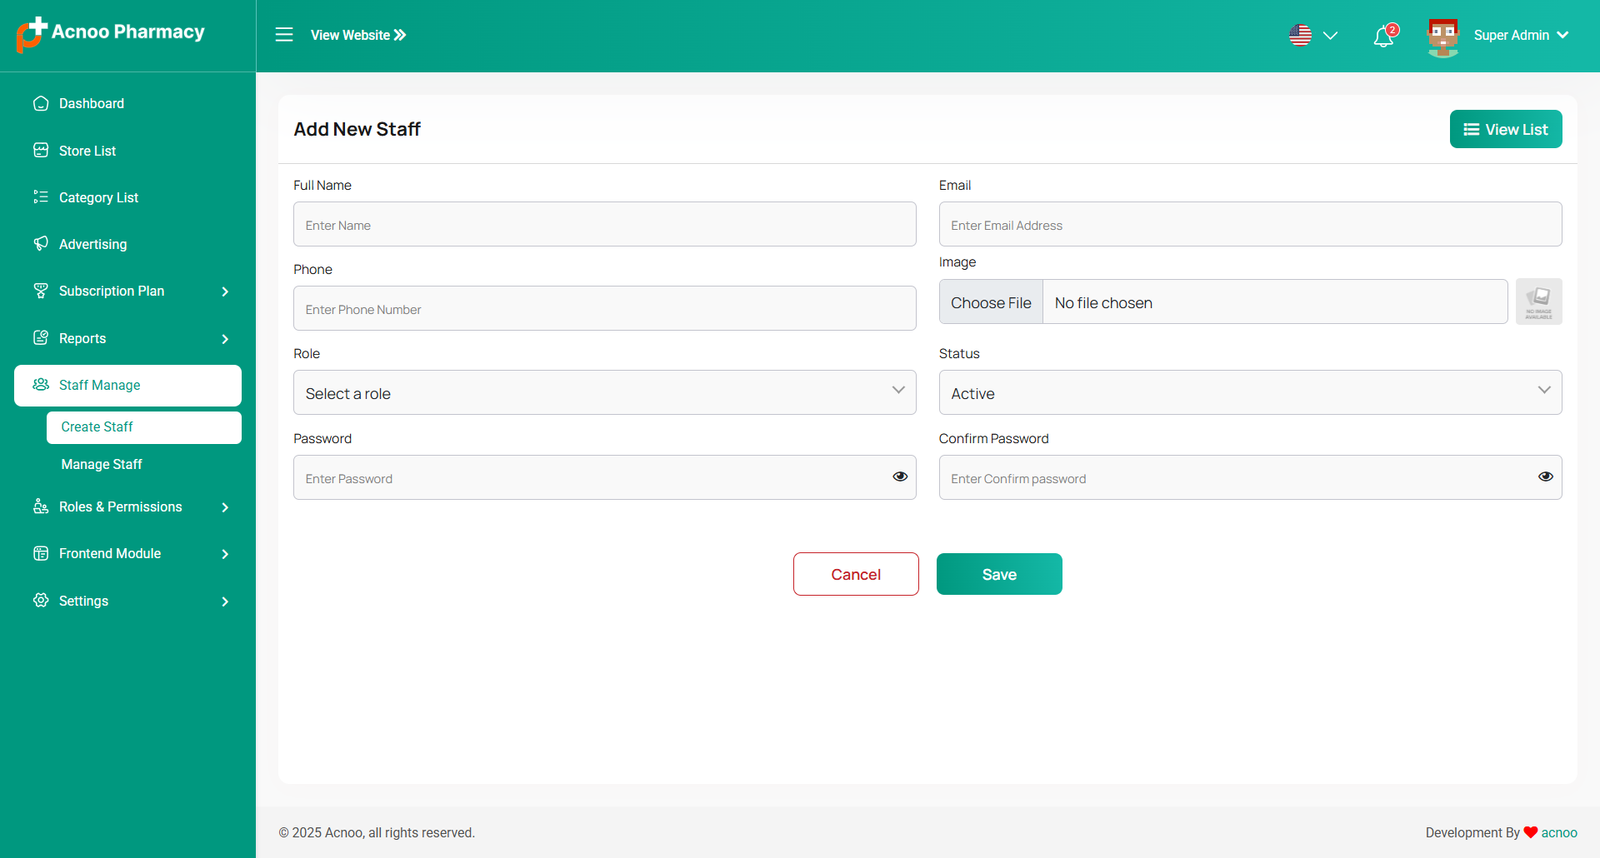
Add New Staff
You can create a staff member here by completing the necessary fields.
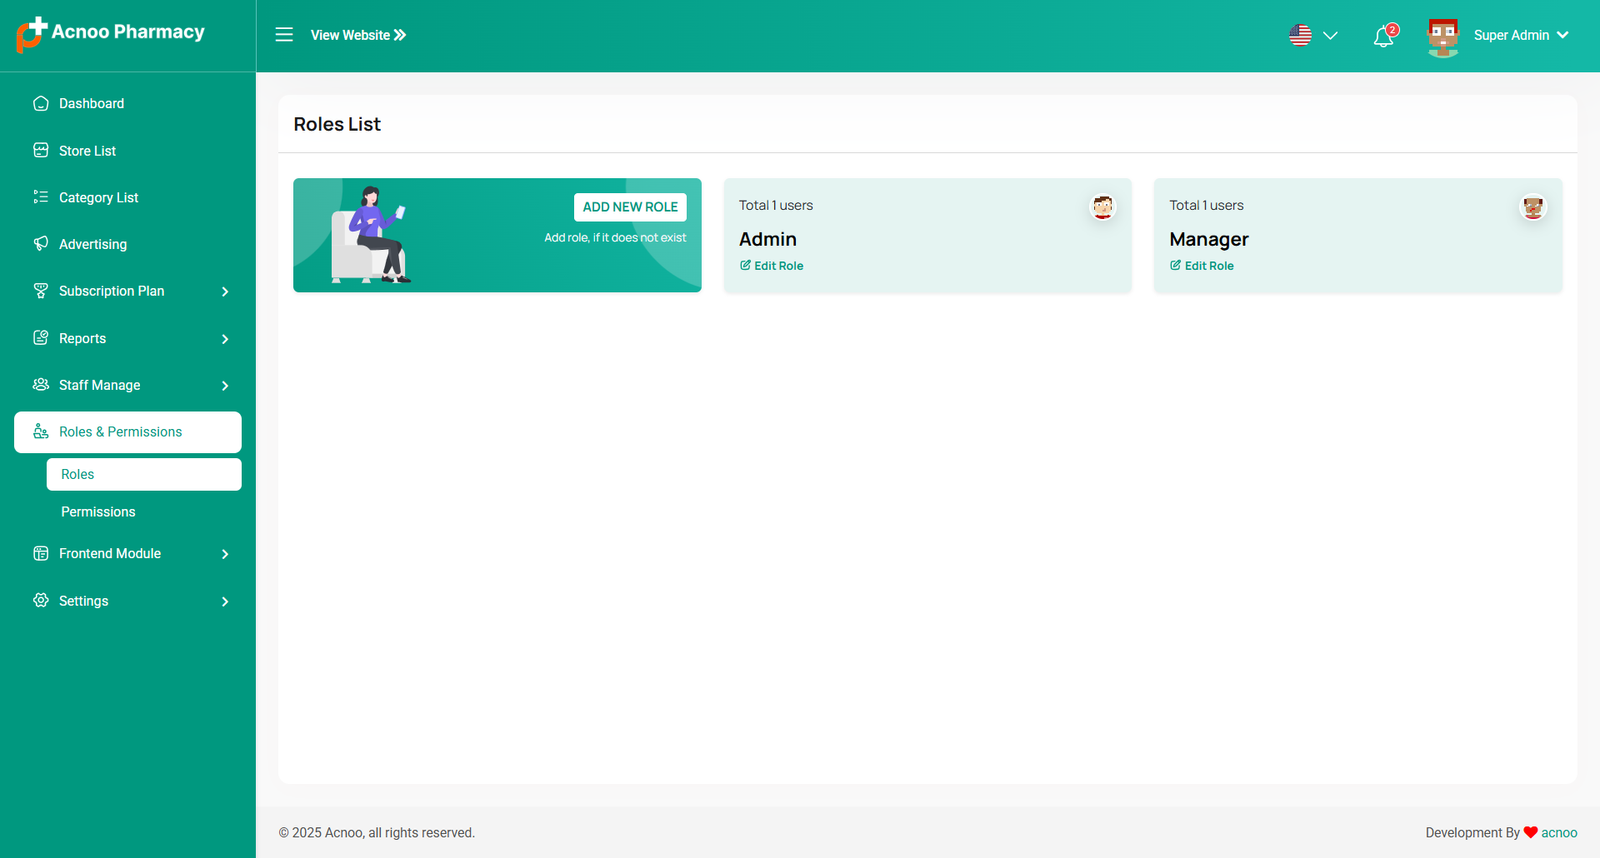
Roles & Permissions
In this section, you have the ability to define roles and allocate specific permissions to different users as needed.
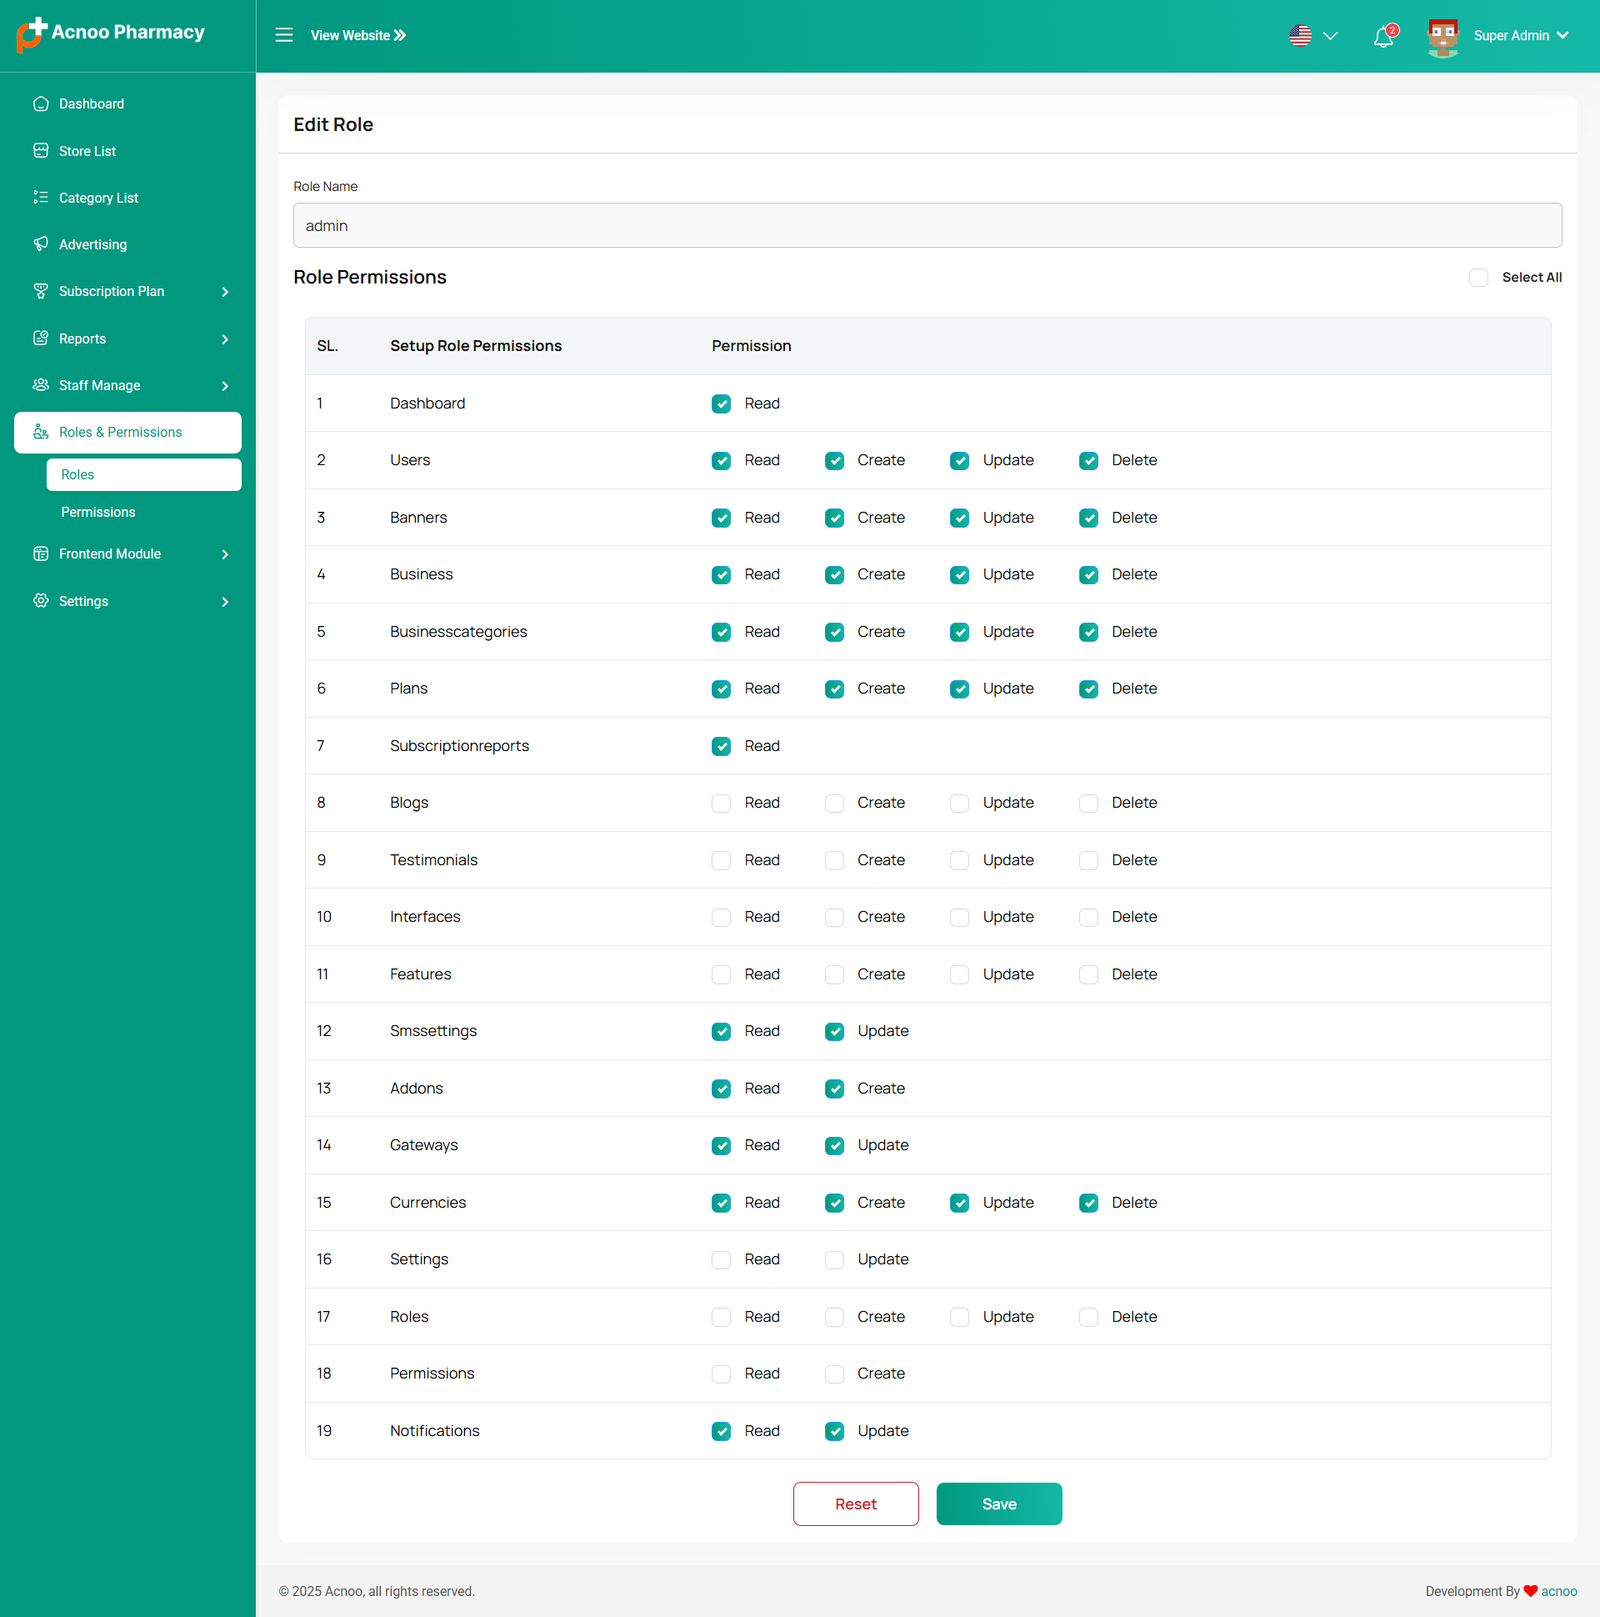
Roles
In this section, you have the capability to create new roles and update existing ones. When updating roles, you can configure their specific role permissions, granting or restricting access to various features and functionalities as required. This allows you to tailor user roles to your organizational needs and security requirements.
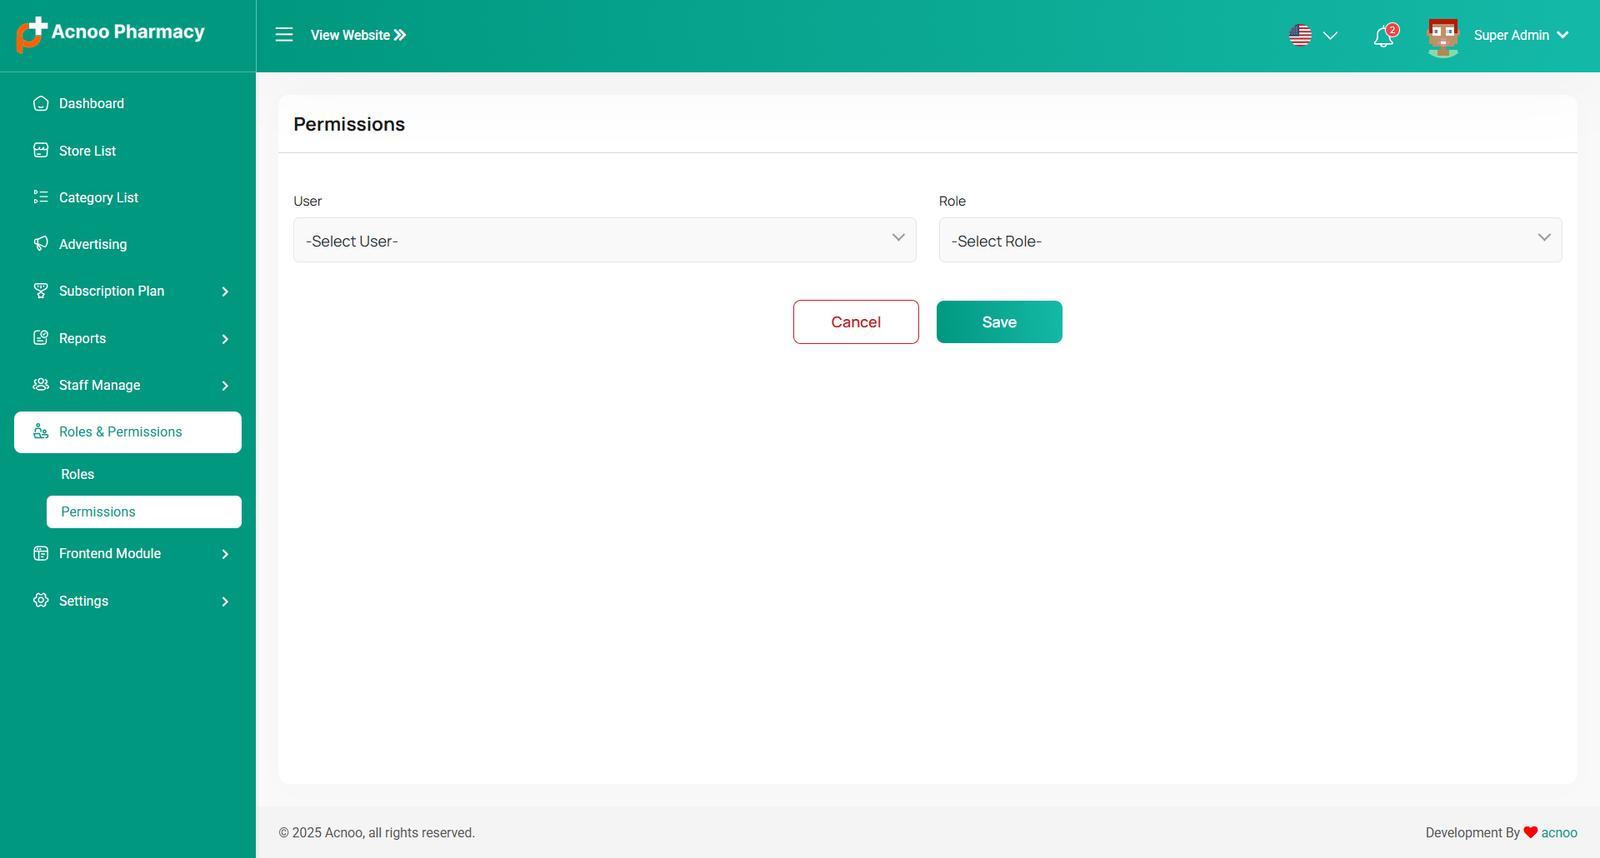
Permissions
In this section, you have the capability to set role-specific permissions, allowing you to fine-tune and control access rights for each role according to your organization's needs and security requirements.
Frontend Module
Here you have the ability to perform various actions including handling Manage Pages, Features, Blogs, Testimonials, Interface, Terms & Condition, Privacy & Policy and Message.
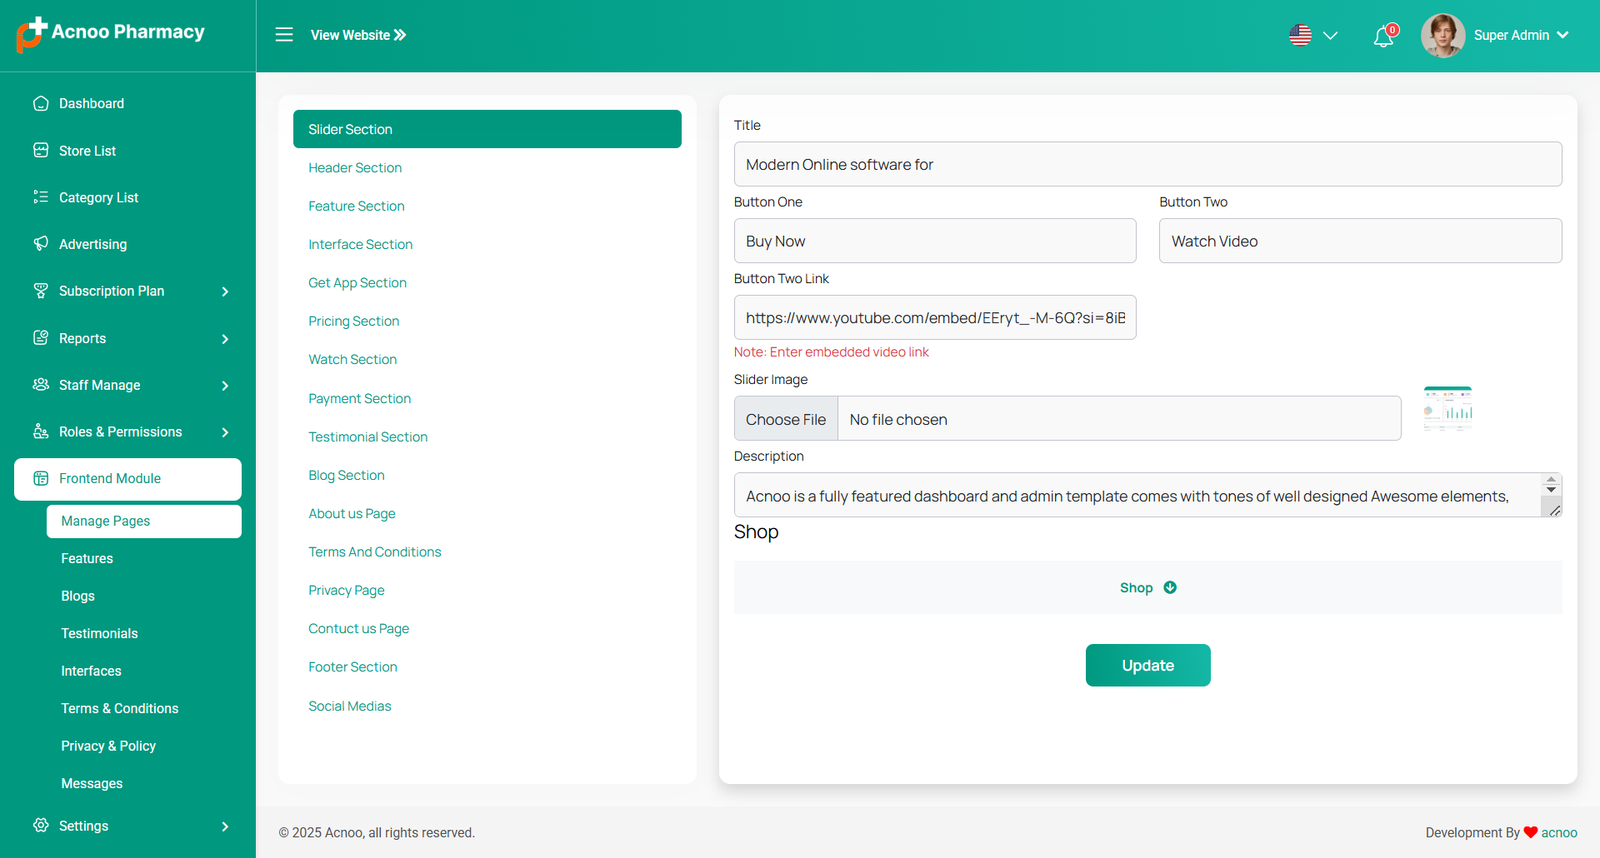
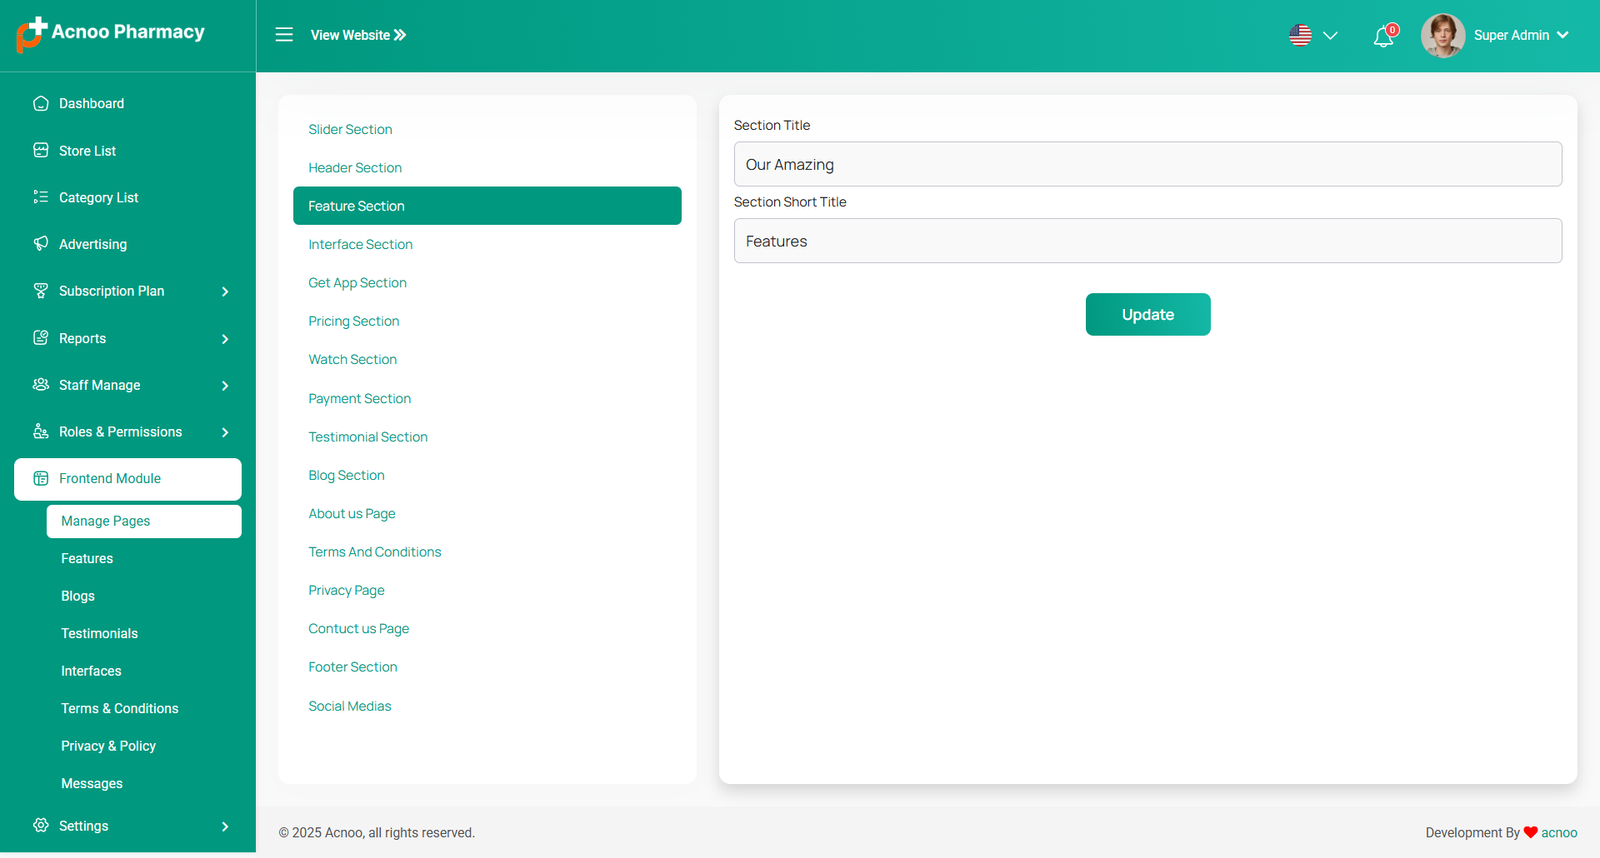
Manage Pages
You can modify various sections of the pages, including the slider,header,features, interface, watch, testimonial, blog, about us contuct us, pricing, footer, socila media and etc.
You can update the Slider section and its link of your landing page.
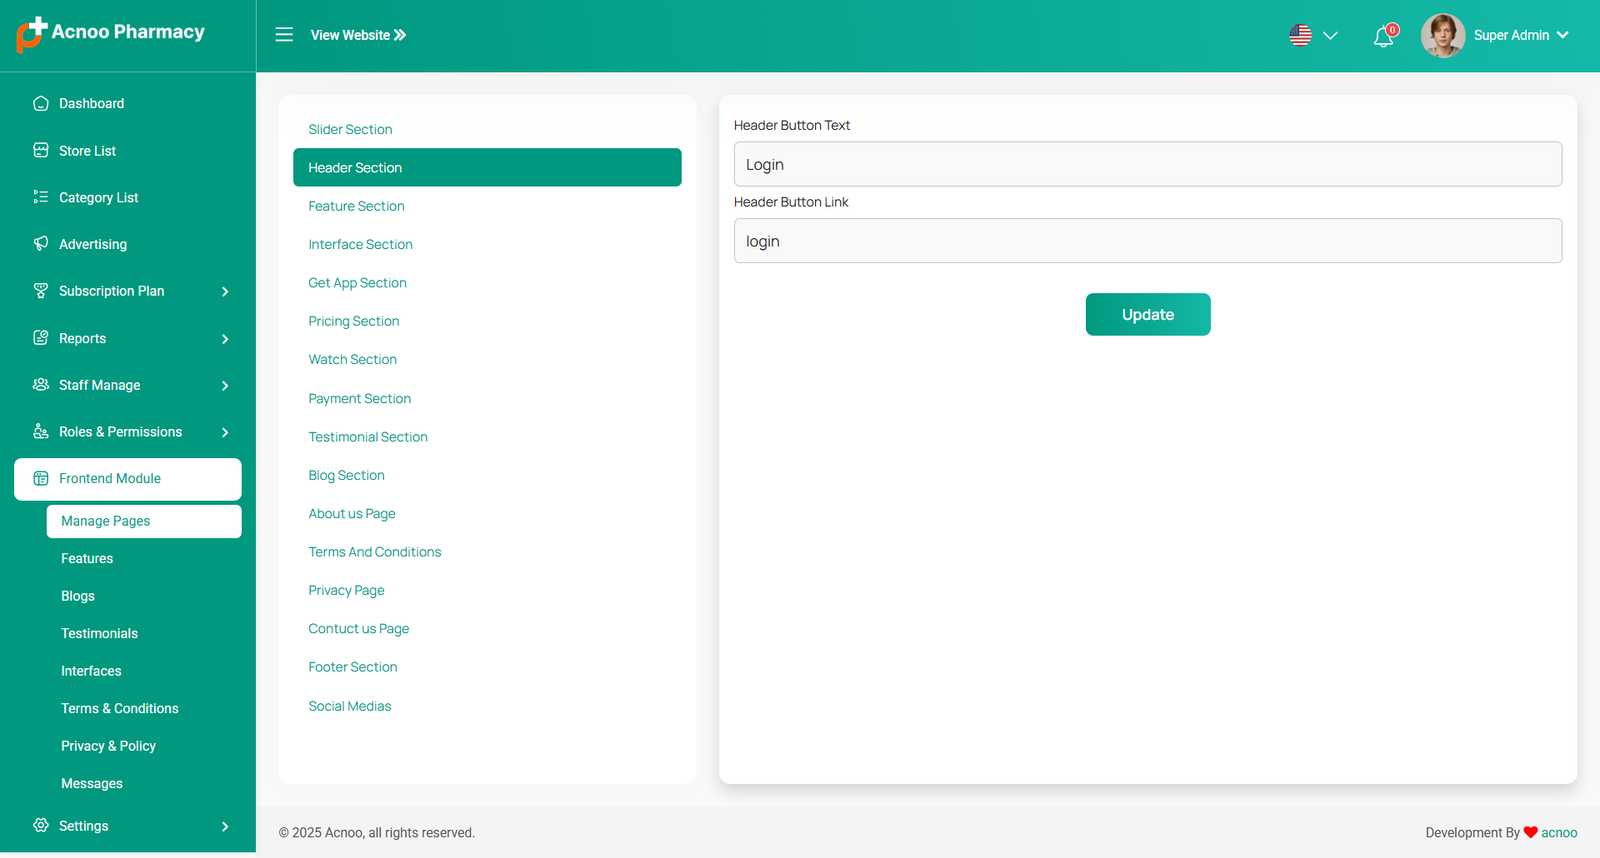
You can update the header "button" and its link of your landing page.
Here, you can update the feature title of the Landing page.
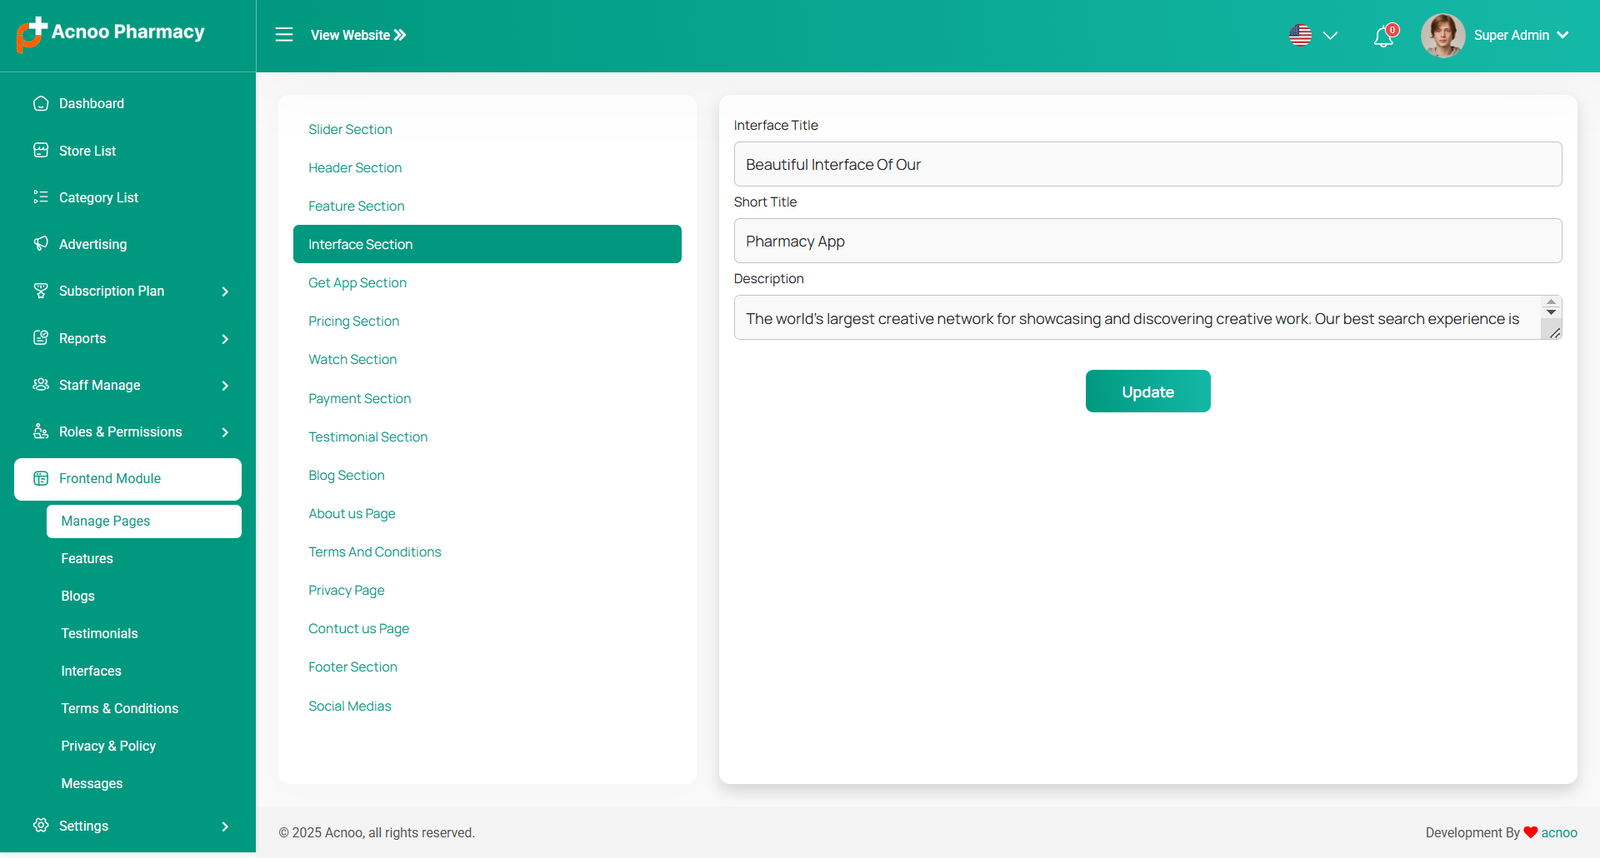
Here, you can update the interface title and description of the Home Page.
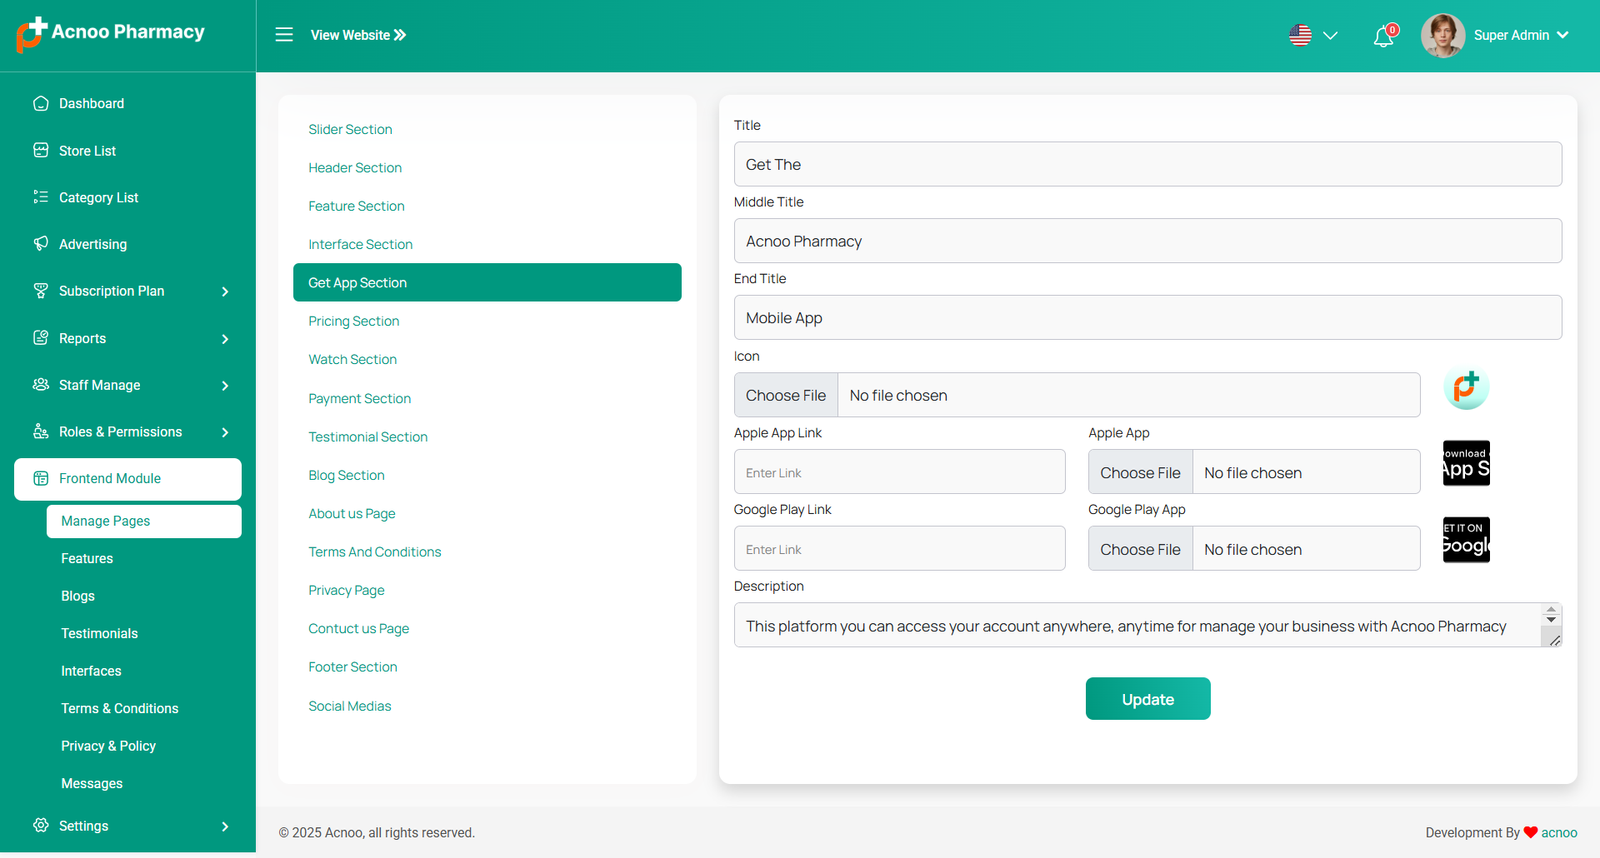
The "Get App" section allows you to customize the information and links related to downloading the mobile app. The following fields are available:
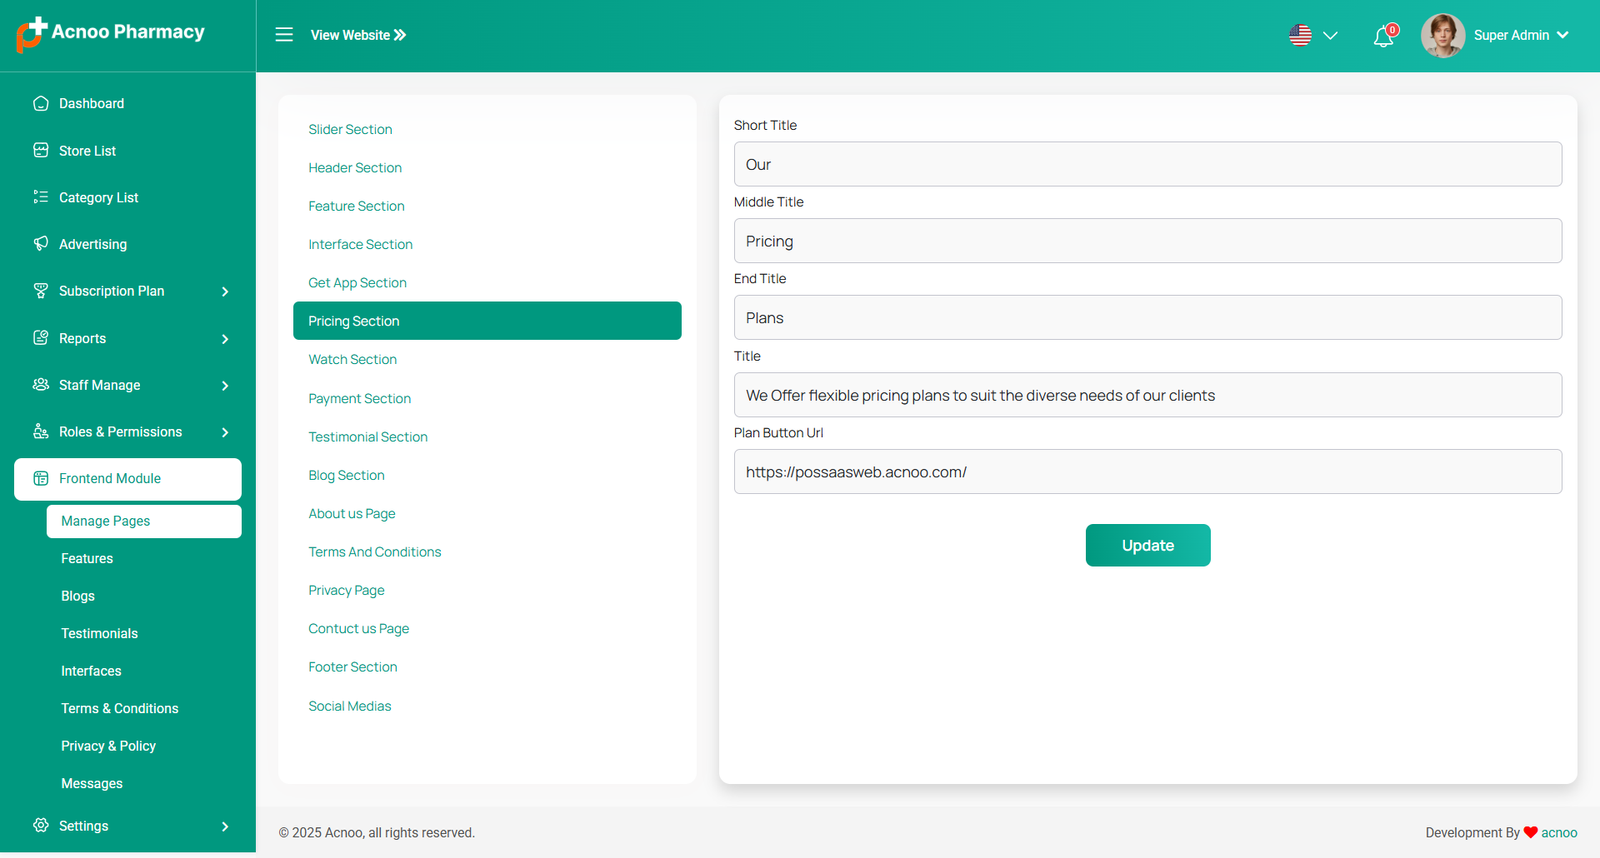
The "Pricing" section allows you to customize the information and details related to the pricing plans offered. The following fields are available:
The "Watch" section appears to be designed for showcasing a video, likely a tutorial or promotional video about the app or pharmacy services. The following fields are available:

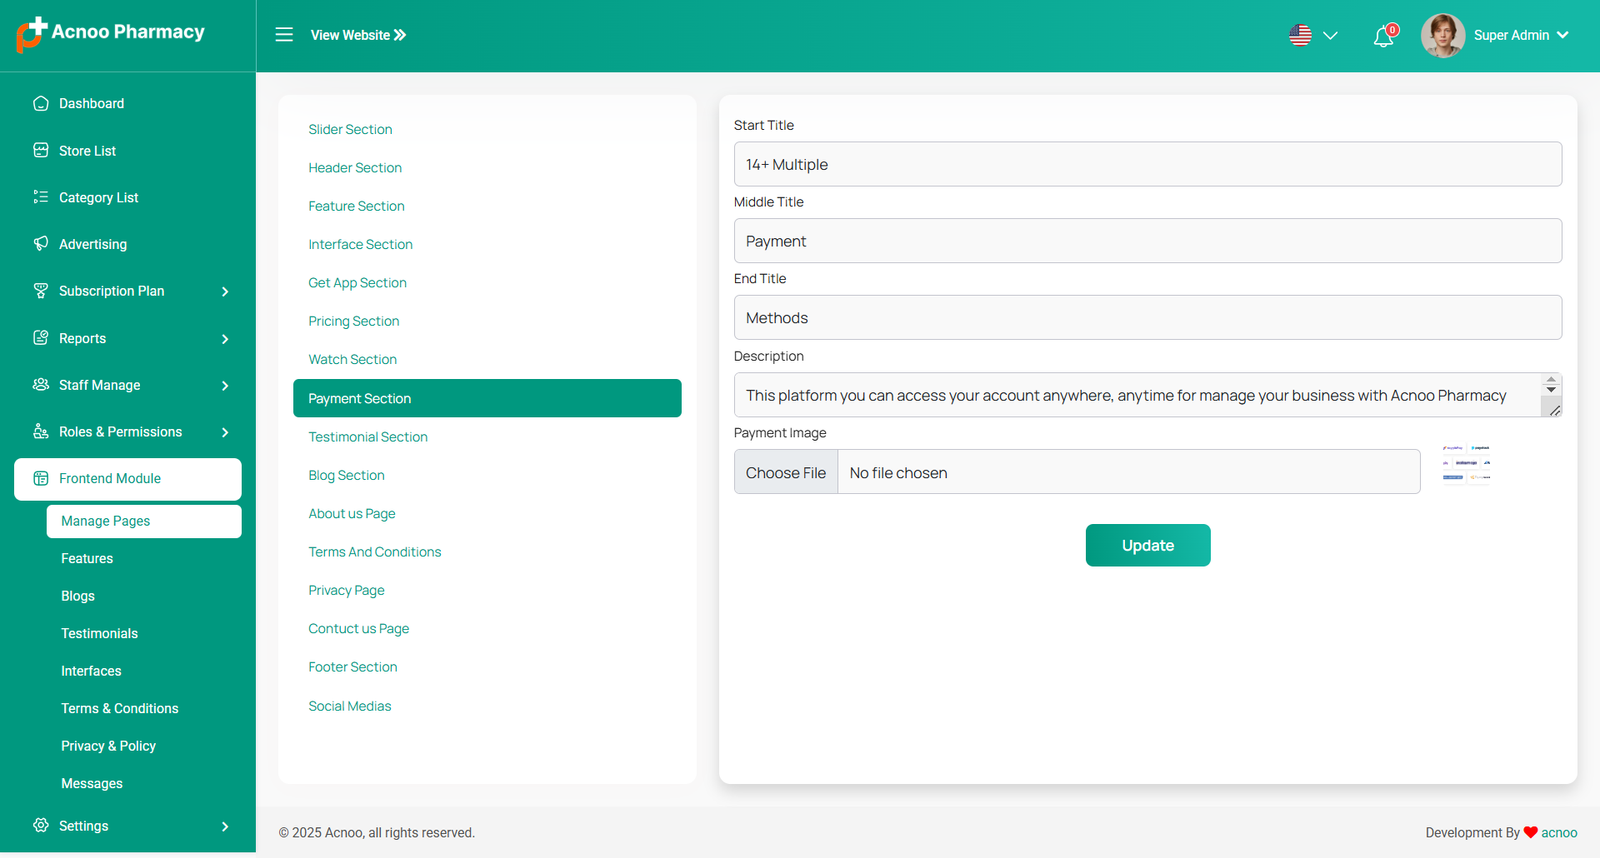
The "Payment" section allows you to customize the information and details related to the payment methods accepted. The following fields are available.This will open the "Landing Module" page, displaying various sections that can be edited.
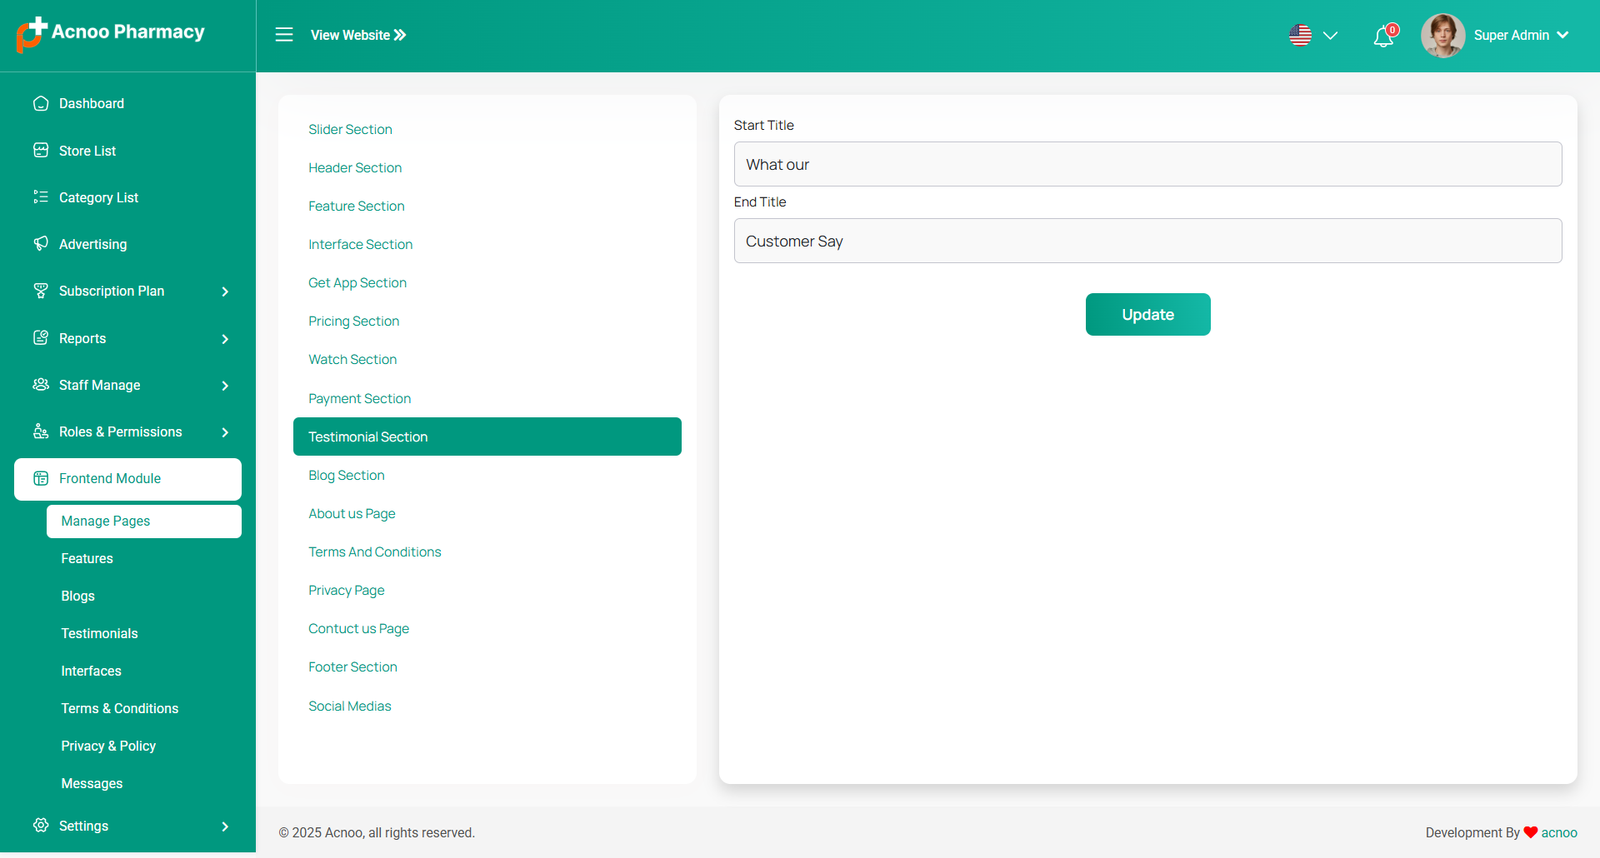
Here, you can update the testimonial section's title of the Home page.
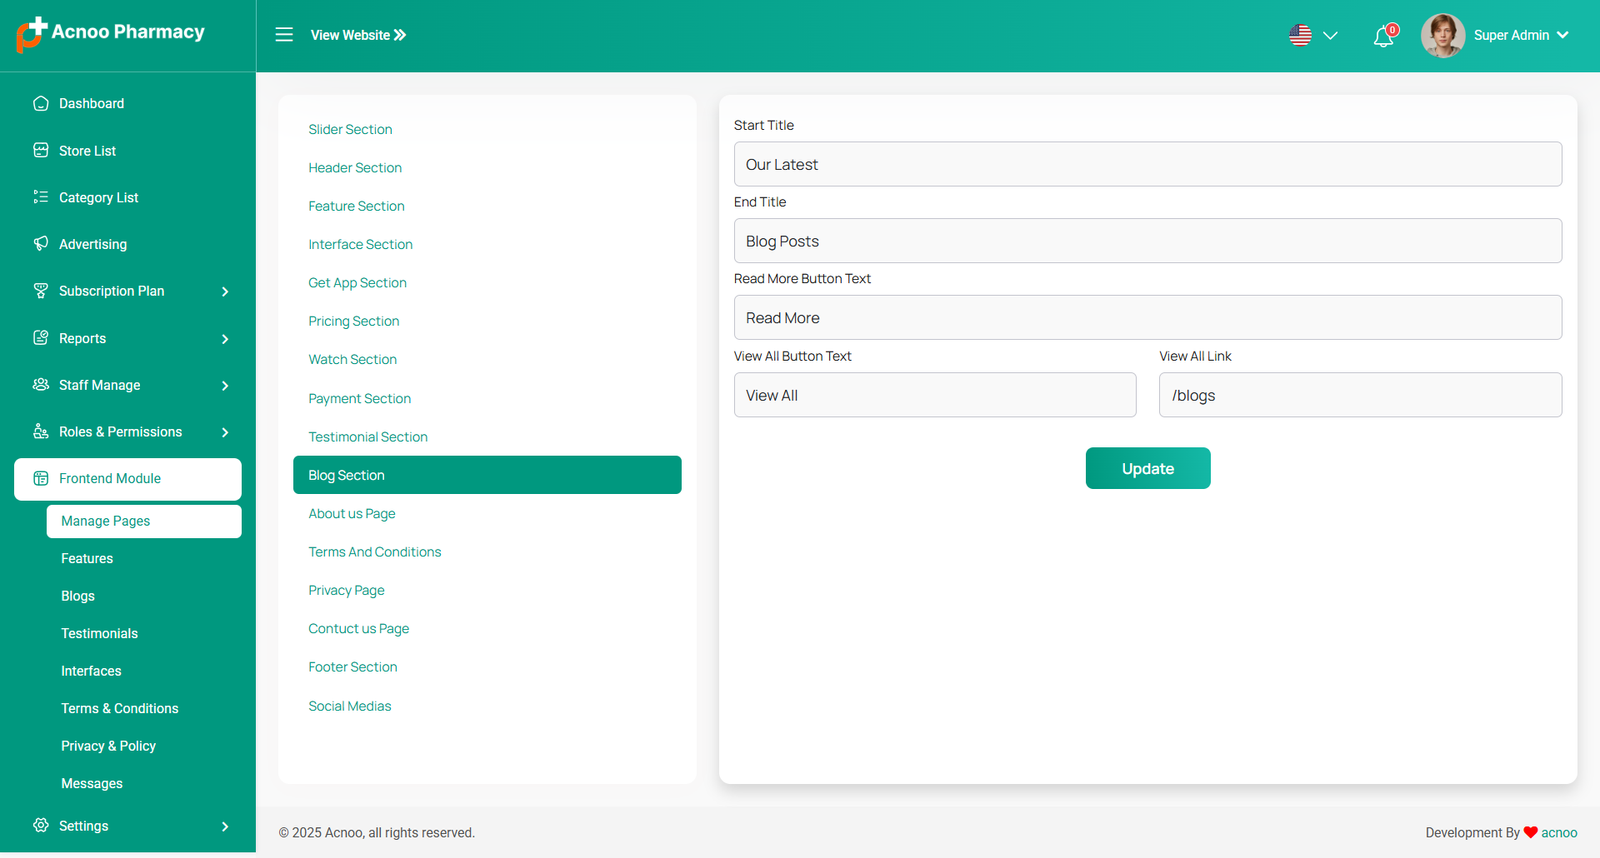
Here, you can update some information of your Blog page.
This document describes how to edit the "About Us" page content using the "Landing Module" within the Acnoo Pharmacy system, as shown in the provided image.
The "About Us" page typically provides information about the pharmacy, its mission, history, team, or other relevant details. The following fields are available.

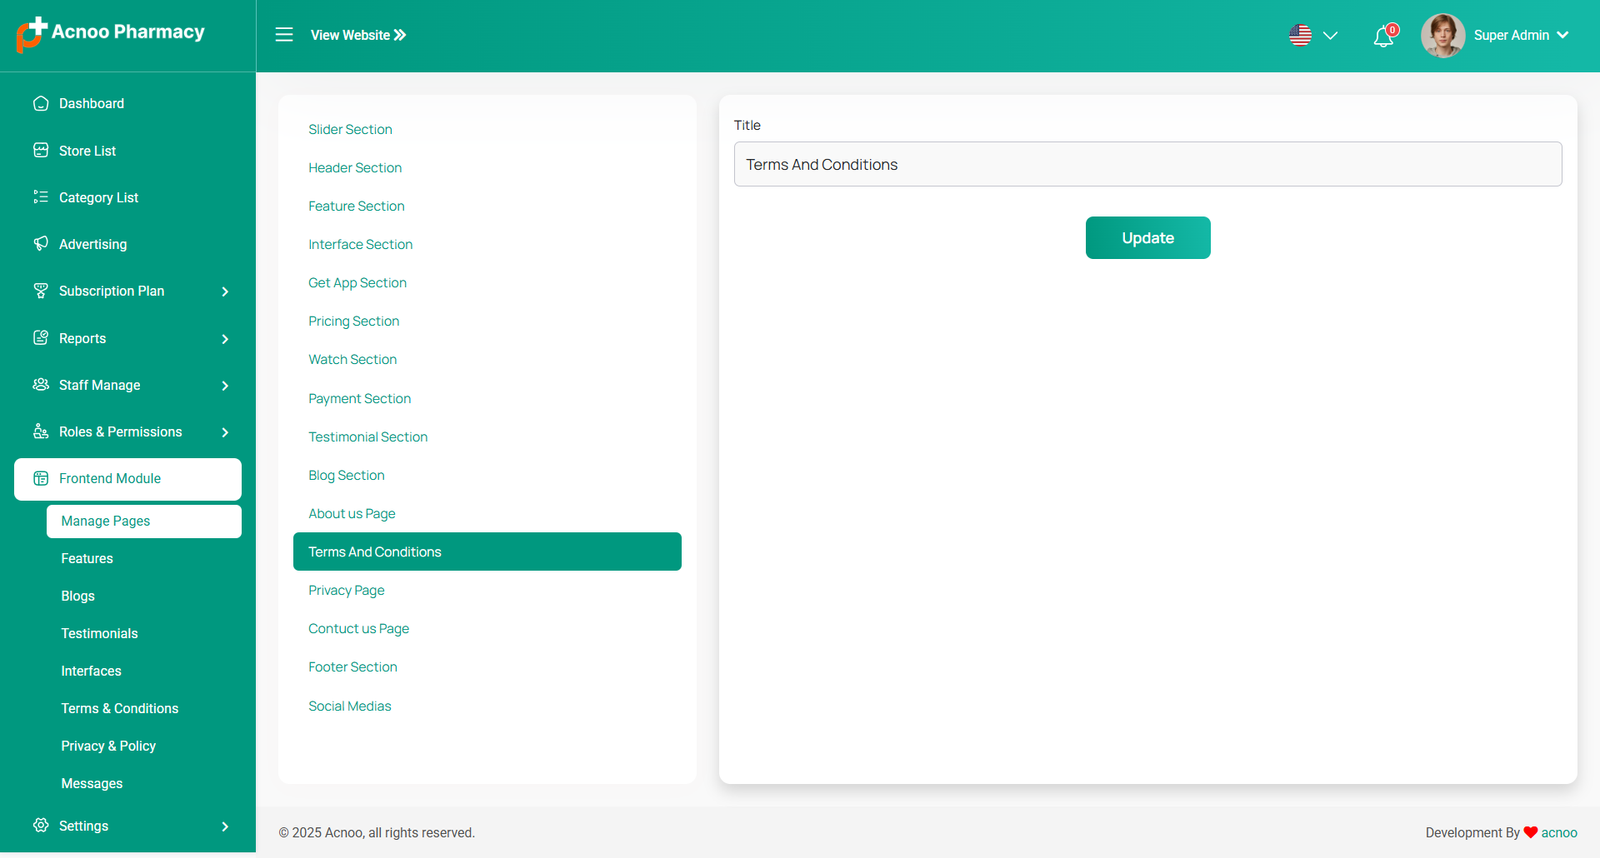
You can update your term and condition "title" in this section.
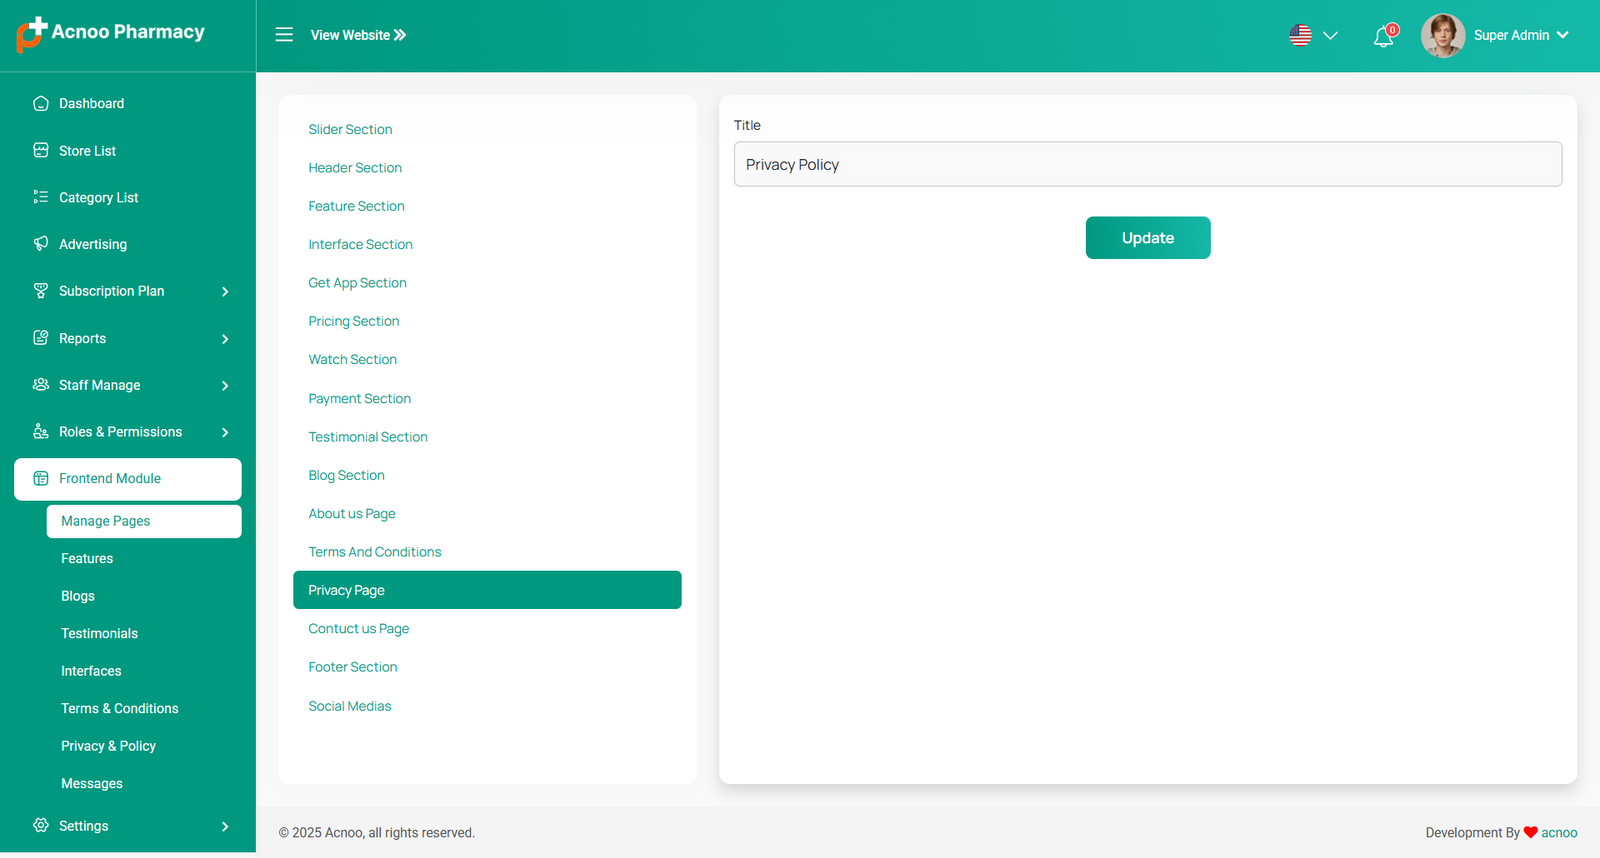
You can update your privacy and policy "title" in this section.
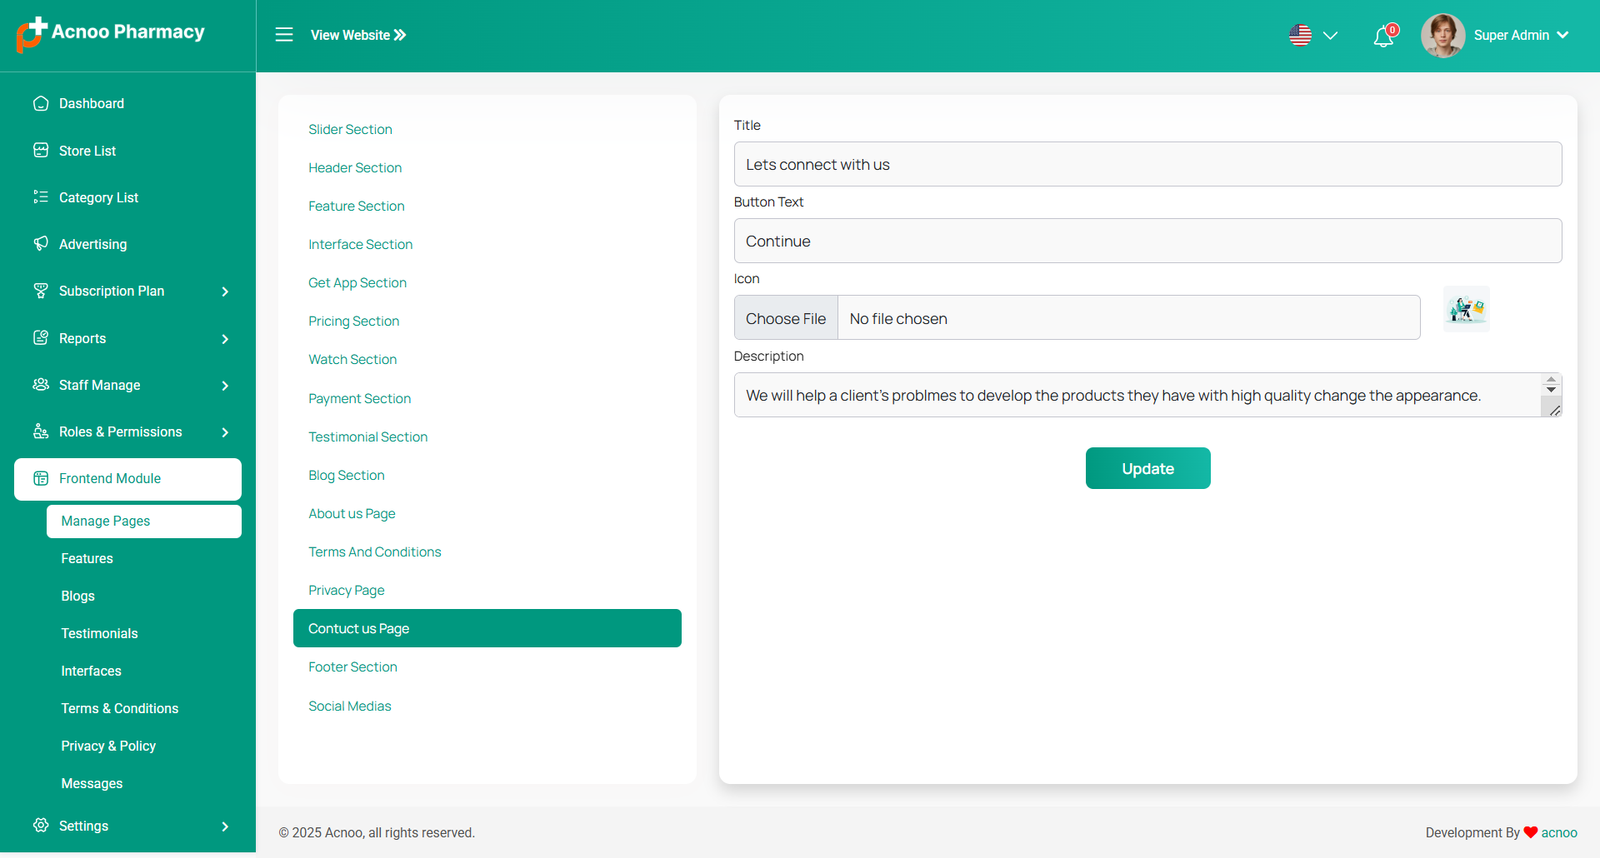
The "Contact Us" page typically provides information and a form for visitors to get in touch with the pharmacy. The following fields are available:
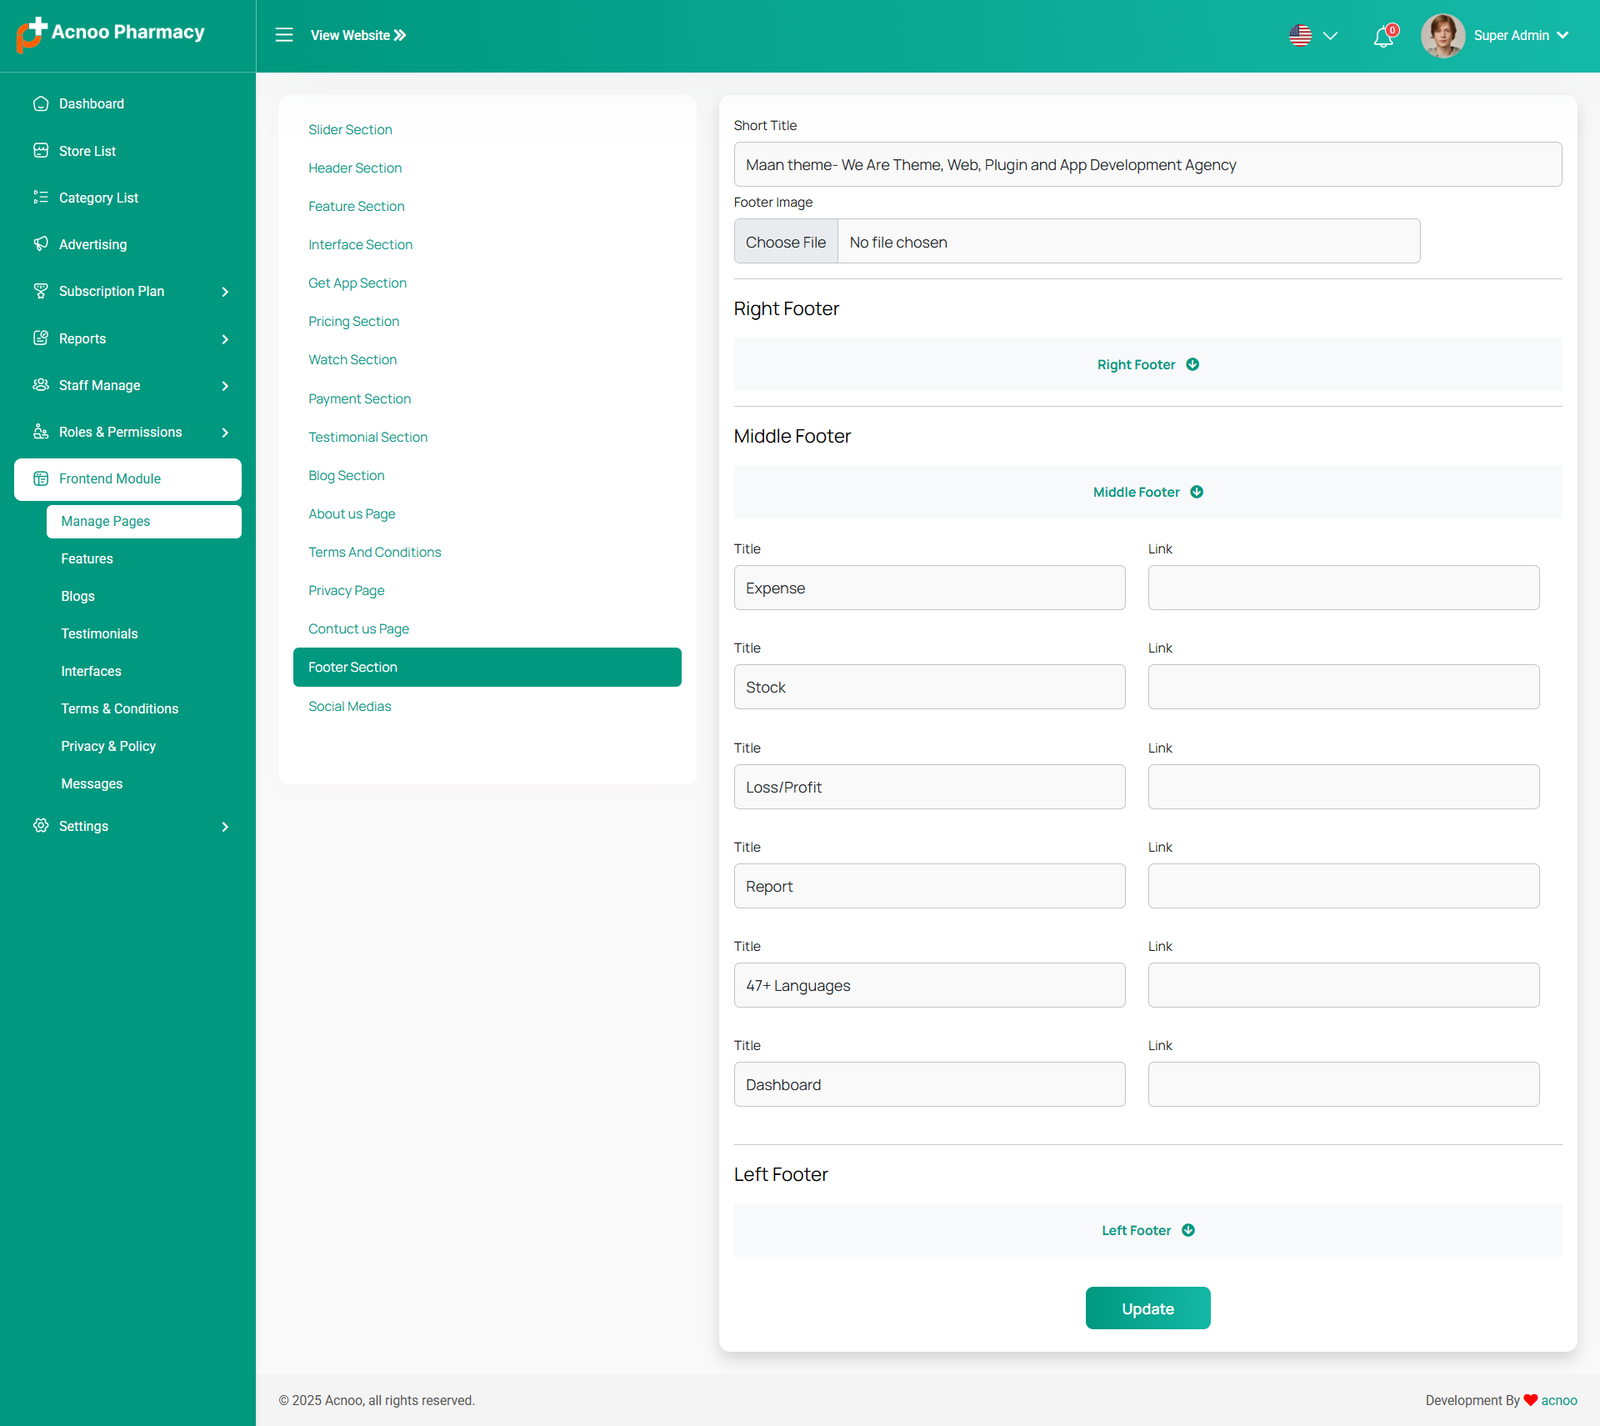
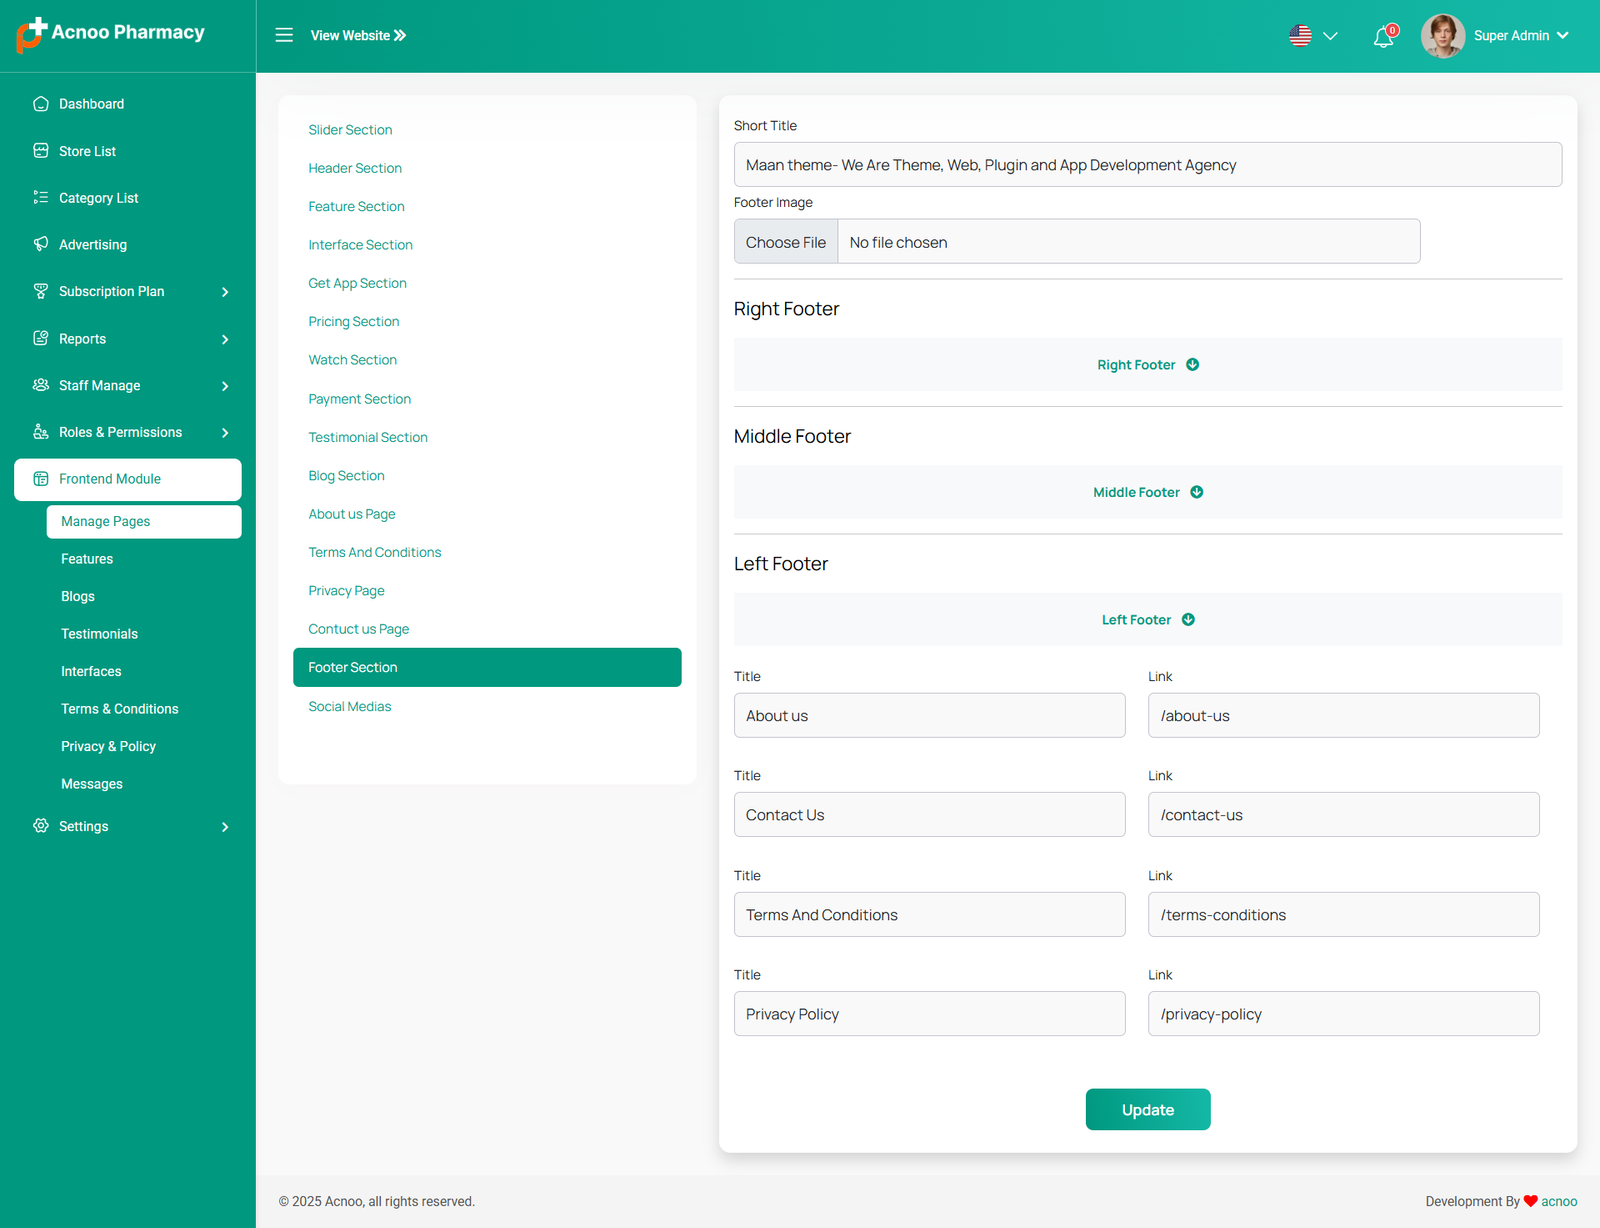
Here, you can view all parts of the footer section of the landing page. You can update them according to your needs.

You can update social icon for footer section of landing page according to your needs.

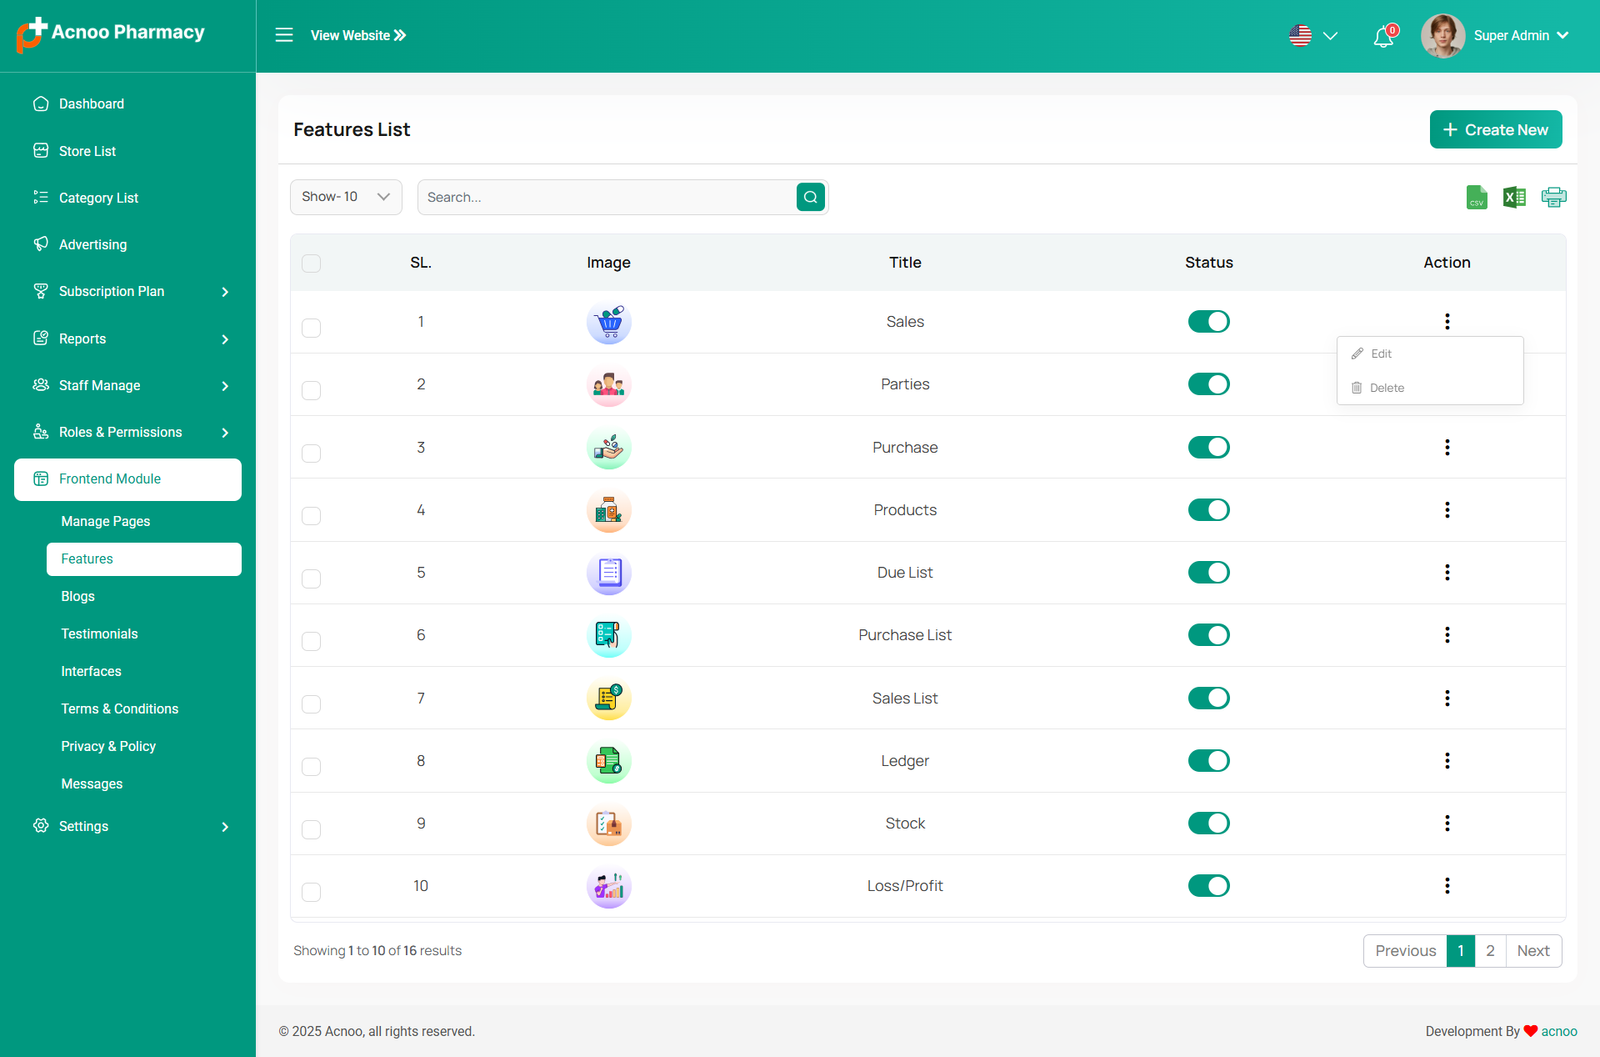
Features List
The features section appears to be a list of features in a software application.Users can add new features by clicking the "Create New" Feature button.The Action column may allow users to perform actions on features, such as "editing" or "deleting" them.
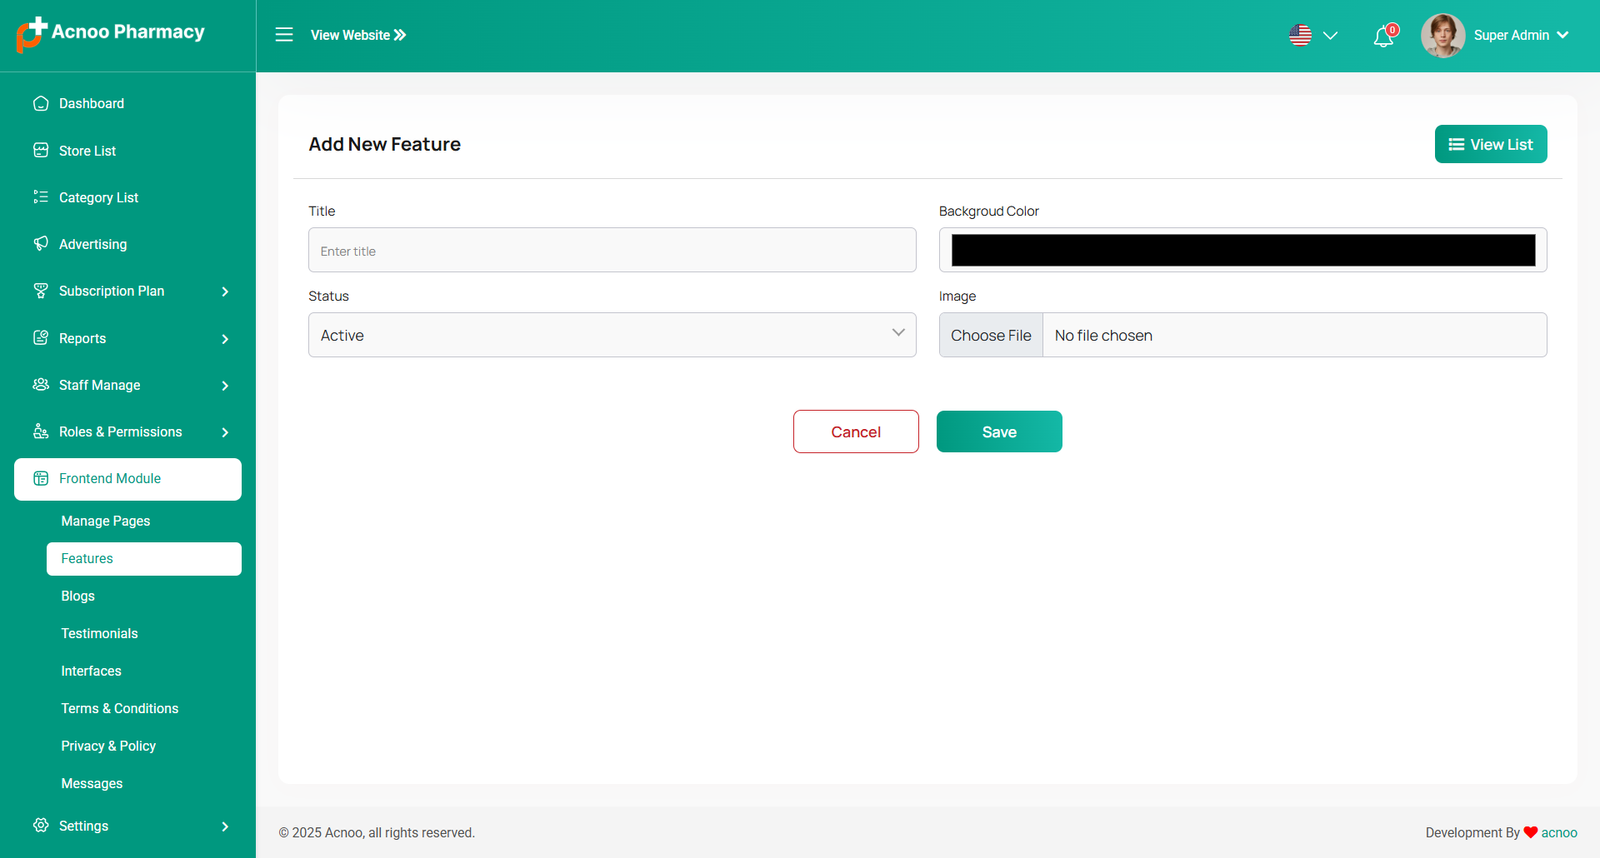
Add New Feature
Here you can see some fields, such as 'Title,' 'Status,' and others, for creating new features.
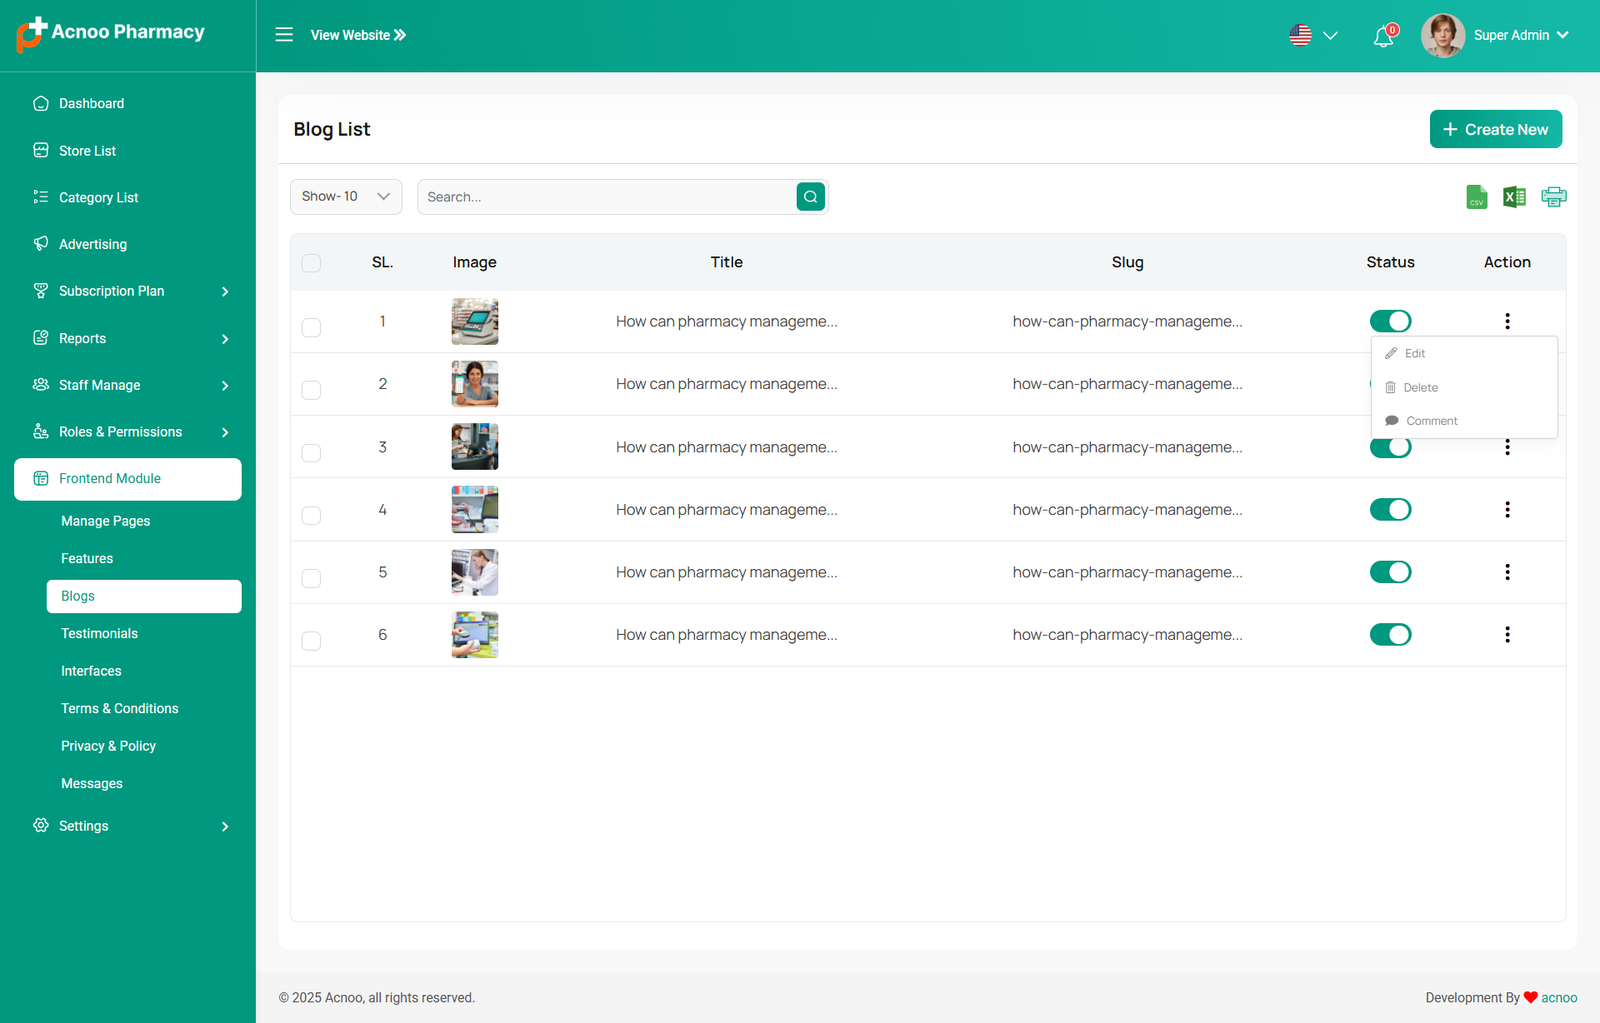
Blog List
Here you have the option to view the blog and comment lists. Additionally, editing and updating options are available. You can also search for specific items, and multi-delete functionality is also provided.
Create Blog
Feel free to utilize this platform to generate a blog post and complete the necessary fields. As you input your content, you'll notice the inclusion of multiple tags. Additionally, you can craft meta titles and meta descriptions for enhanced SEO purposes.

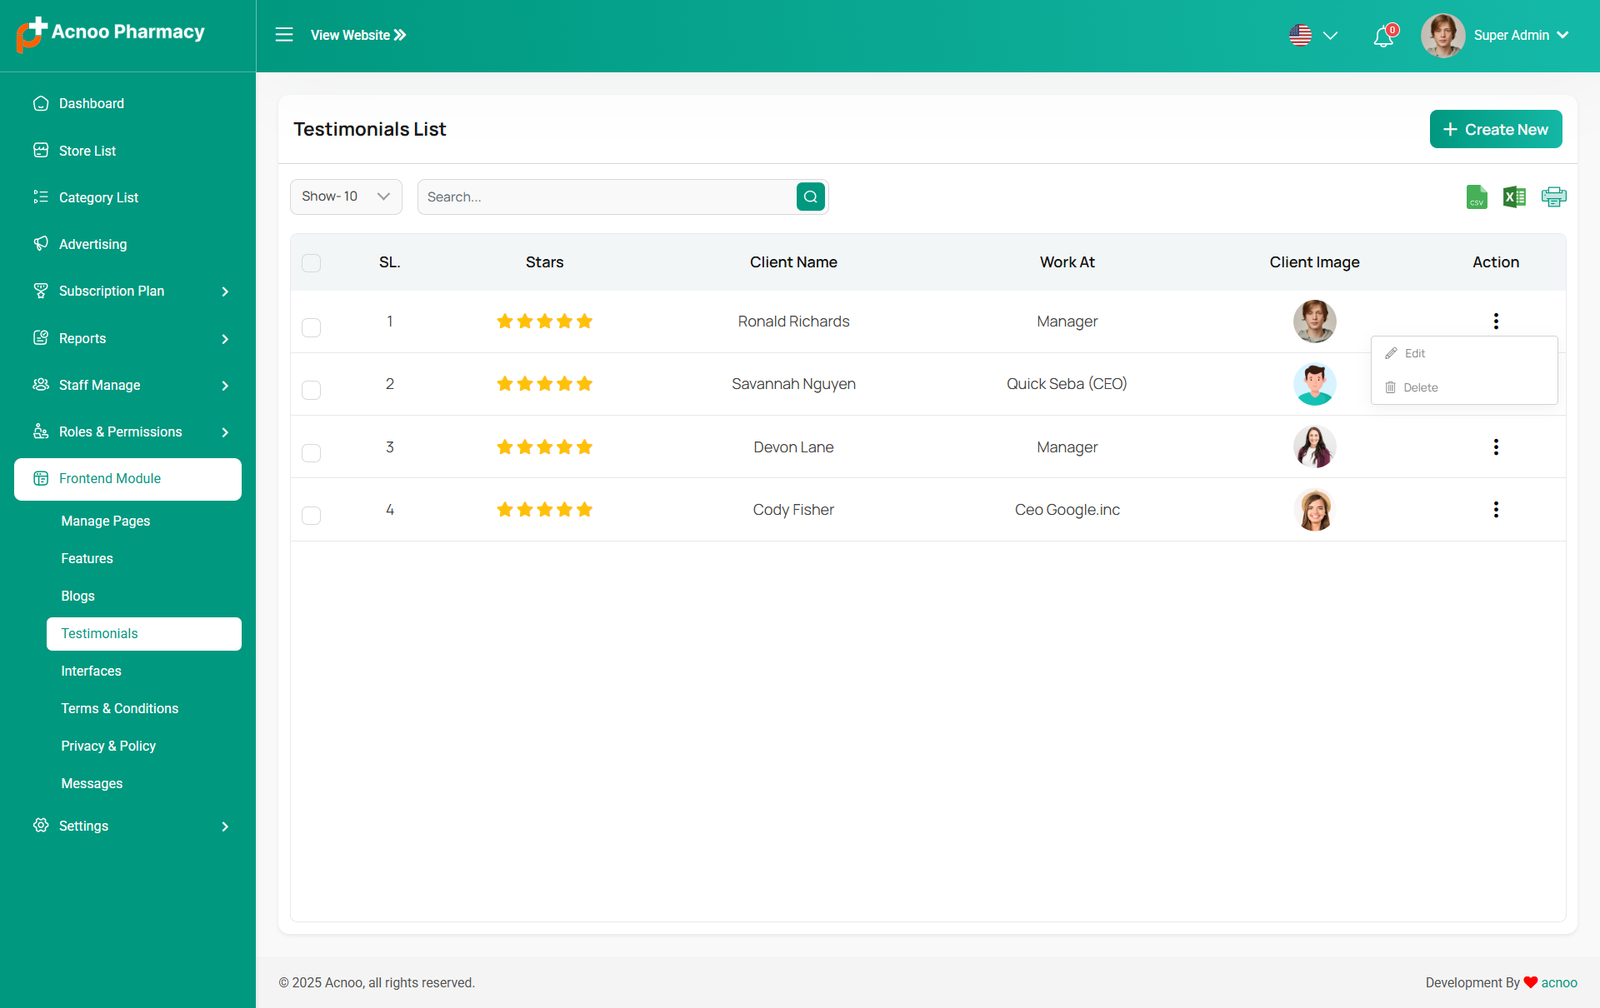
Testimonial List
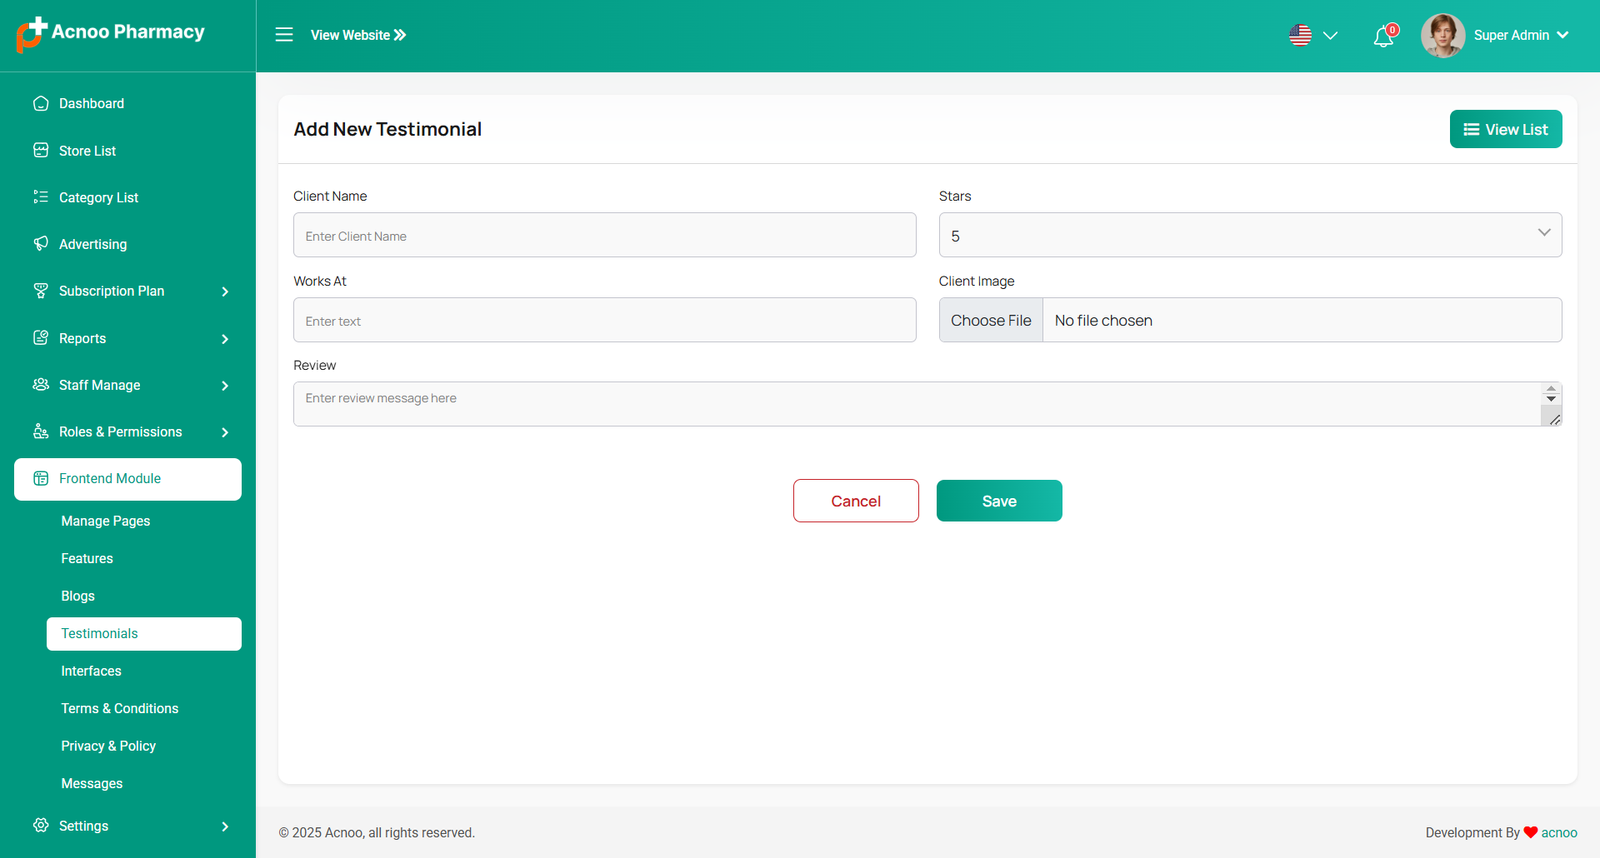
Here, you have the option to view the testimonial list with update and delete options available. Search and multi-delete options are also provided. After clicking the "Create New" button, you will be taken to a new page where you can add a testimonial by filling in the necessary fields.Here, you can provide the client's name, their workplace, the review, and select a star rating from the existing list. You can also add an image.
Add New Testimonial
Here you create Testimonial to fill required field.
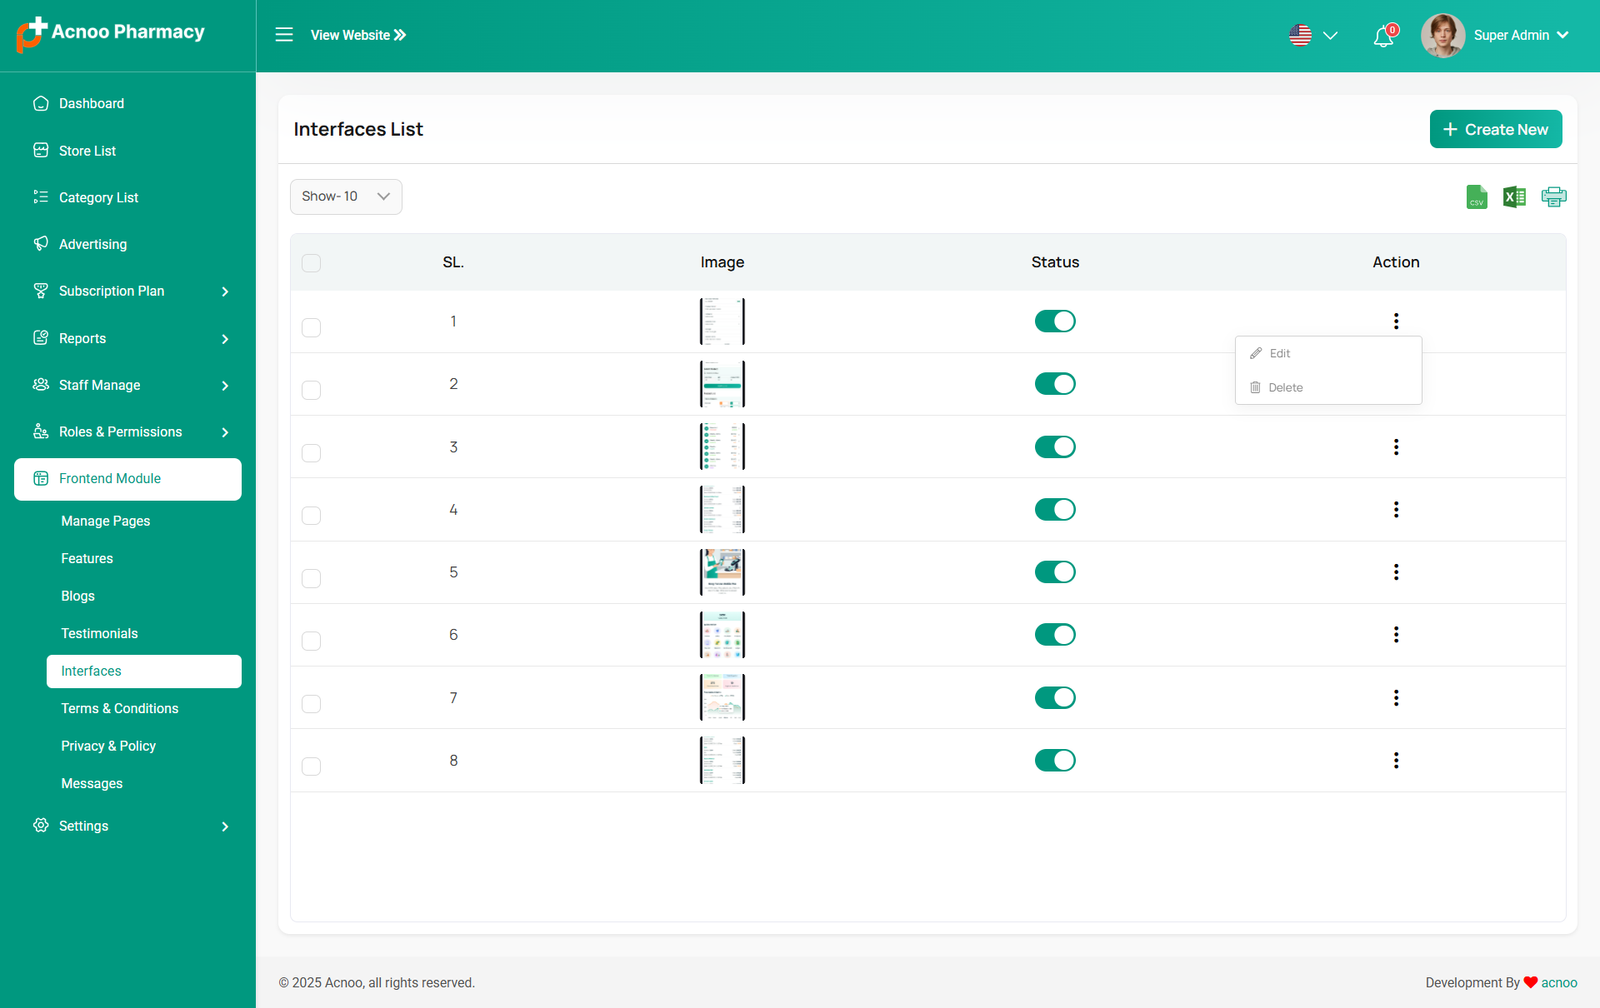
Interface List
Here, you can view the Interfaces List with filtering options. You can change the status for each interface, as well as edit, delete, or multi-delete them.
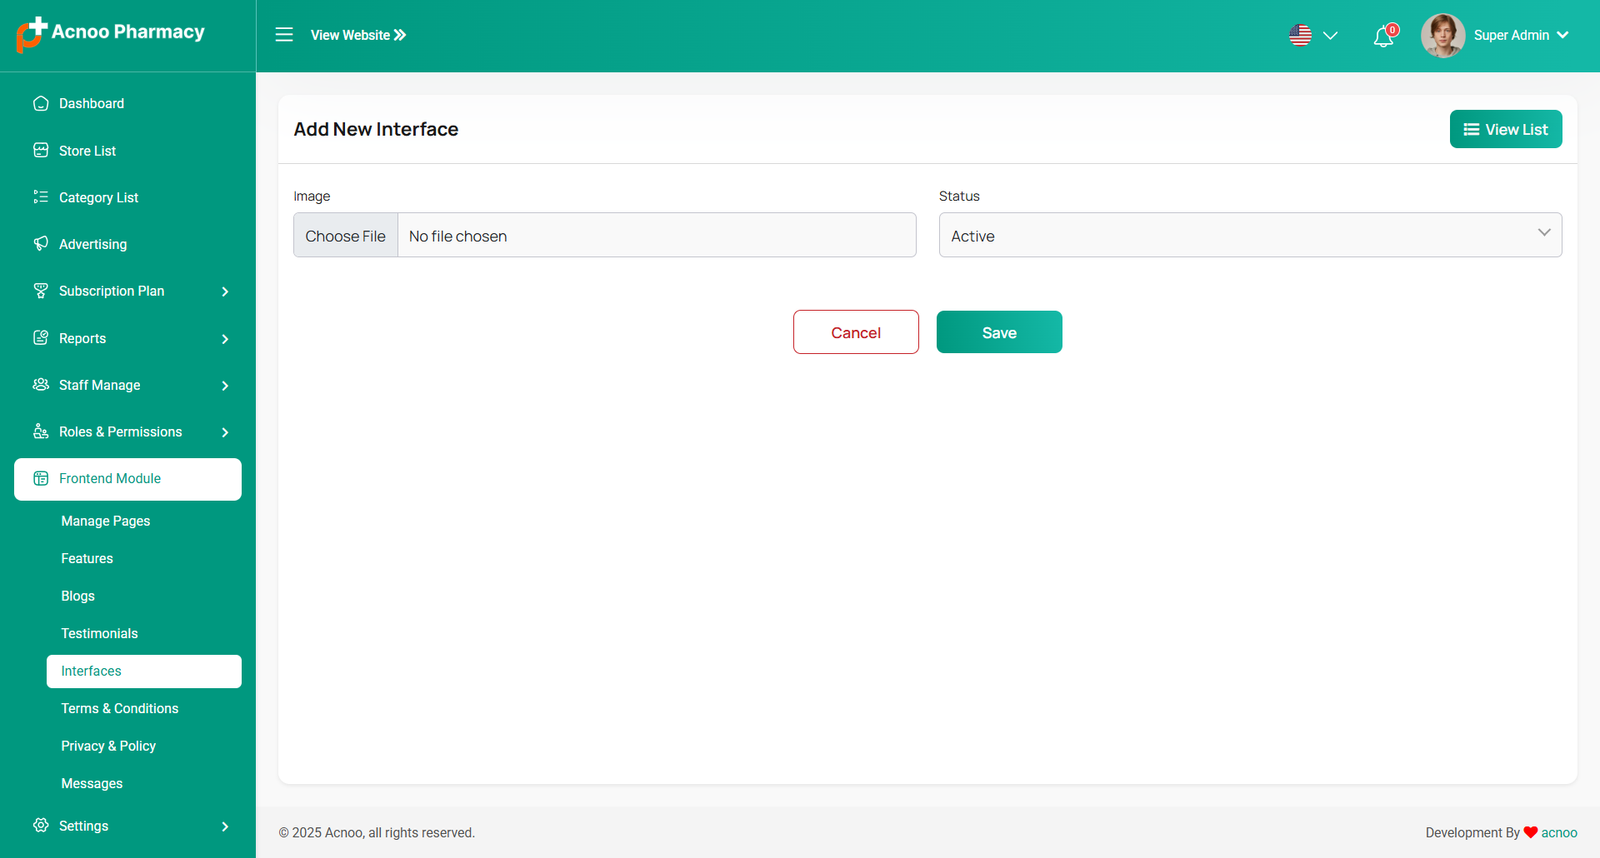
Create Interface
Use images to create a visual representation of the interface within the landing page.
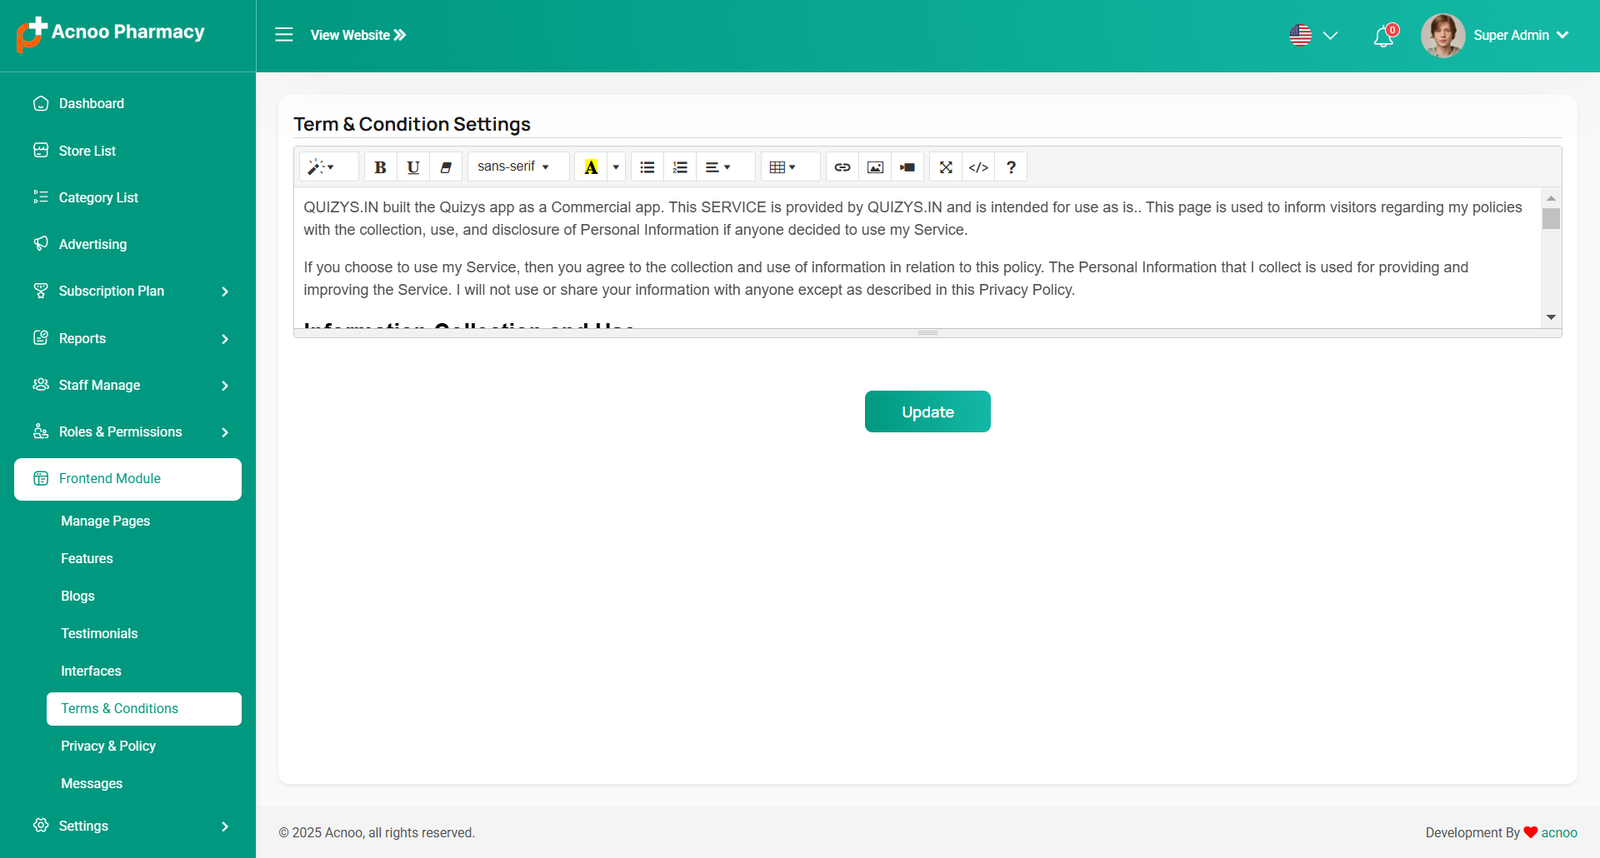
Term & Condition Settings
The "Terms & Conditions" page outlines the rules and regulations that users must agree to when using the pharmacy's services or app. The following fields are available.Where you can update the term and condition
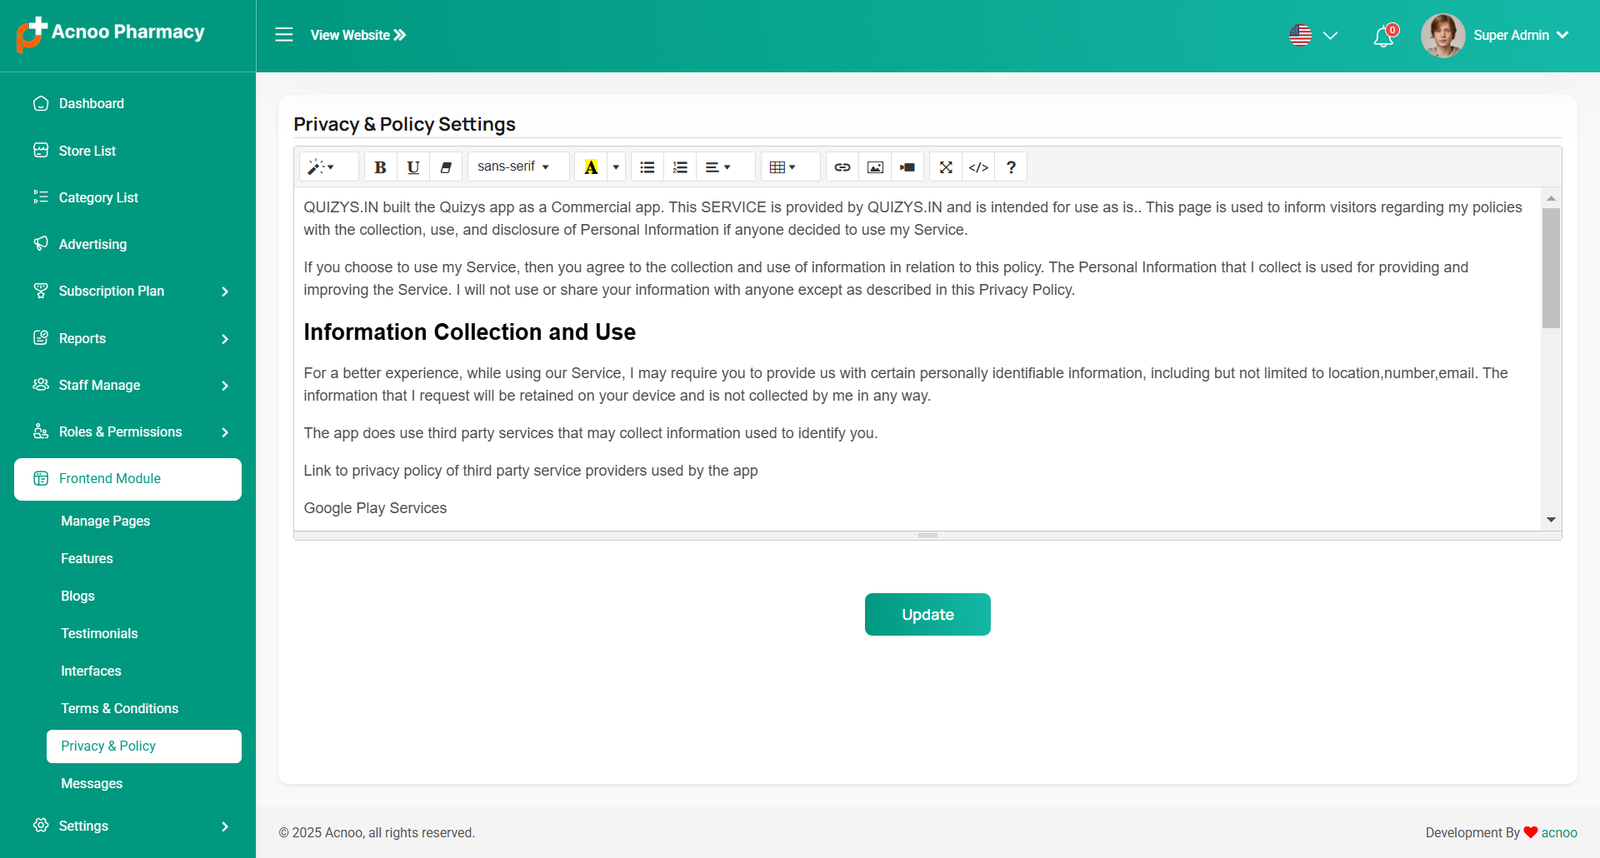
Privacy & Policy Settings
The "Privacy & Policy" page details how the pharmacy collects, uses, and protects user data. The following fields are available.Where you can update the privacy and policy.
Message List
Here you can view messages sent to users from the website. You can filter messages and use options to delete or delete multiple messages simultaneously.

Setting
In the Setting section, you have the capability to configure the fundamental aspects or core elements of this project.
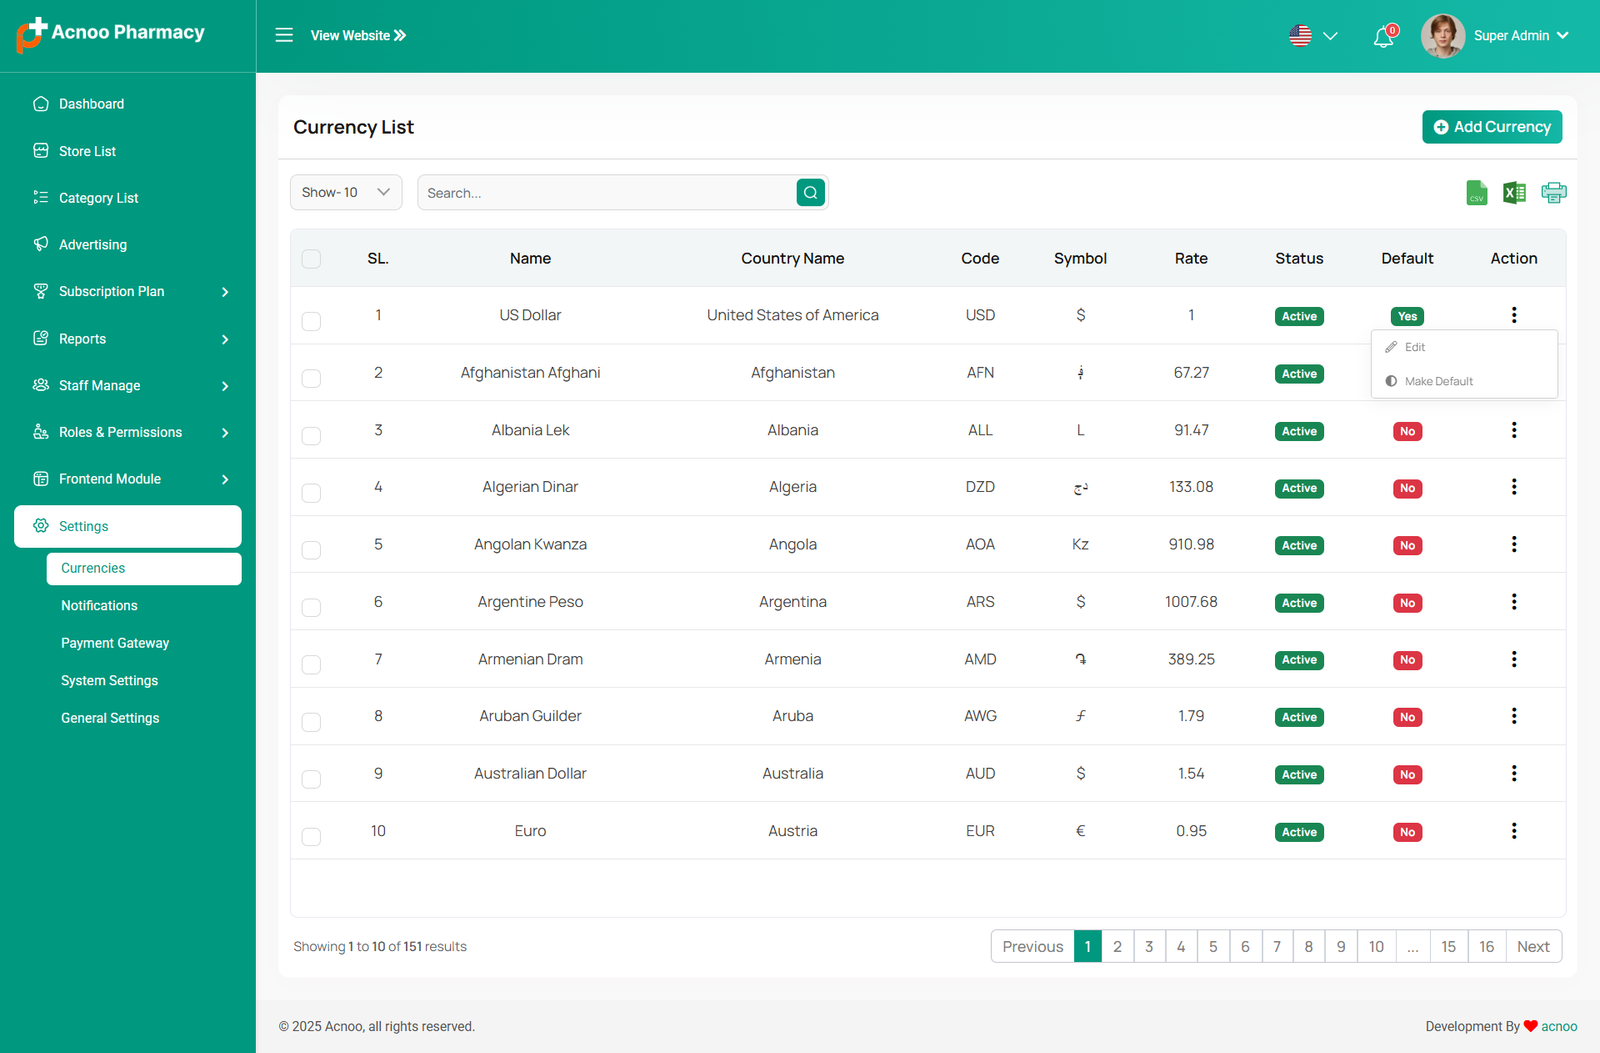
Currency list
Here, you can view a list of currencies with filtering options. Additionally, there is an option to edit currencies, and you can also set a default currency.
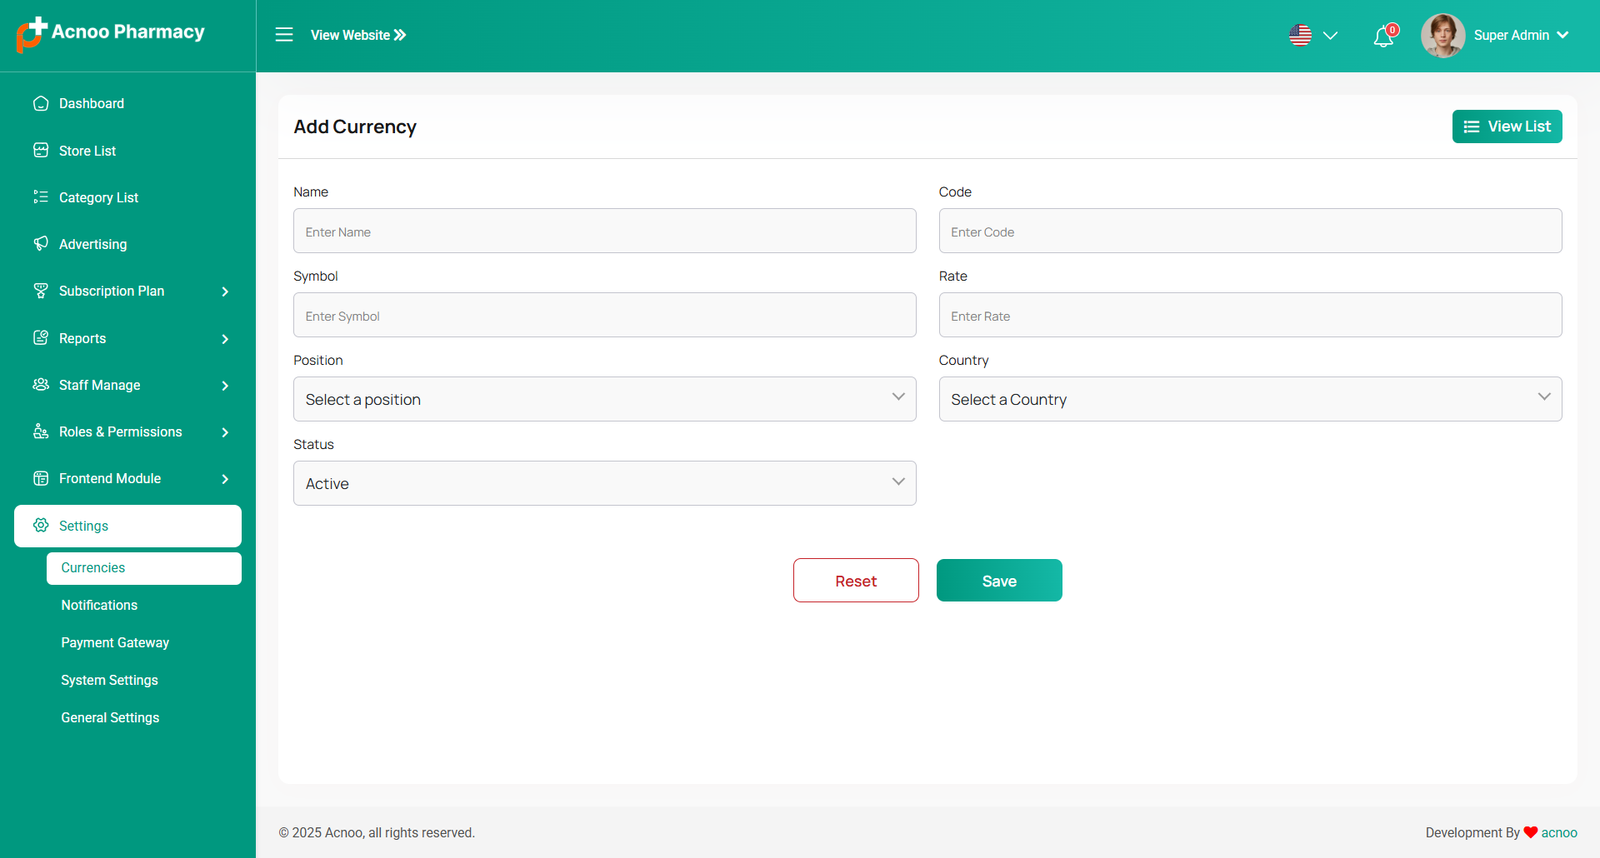
Create Currency
You have the option to include currency from this location.
Notification
Here, you can view a list of various notifications. You also have the option to filter these notifications based on available criteria.In each list, clicking the "View" button allows you to see detailed information.

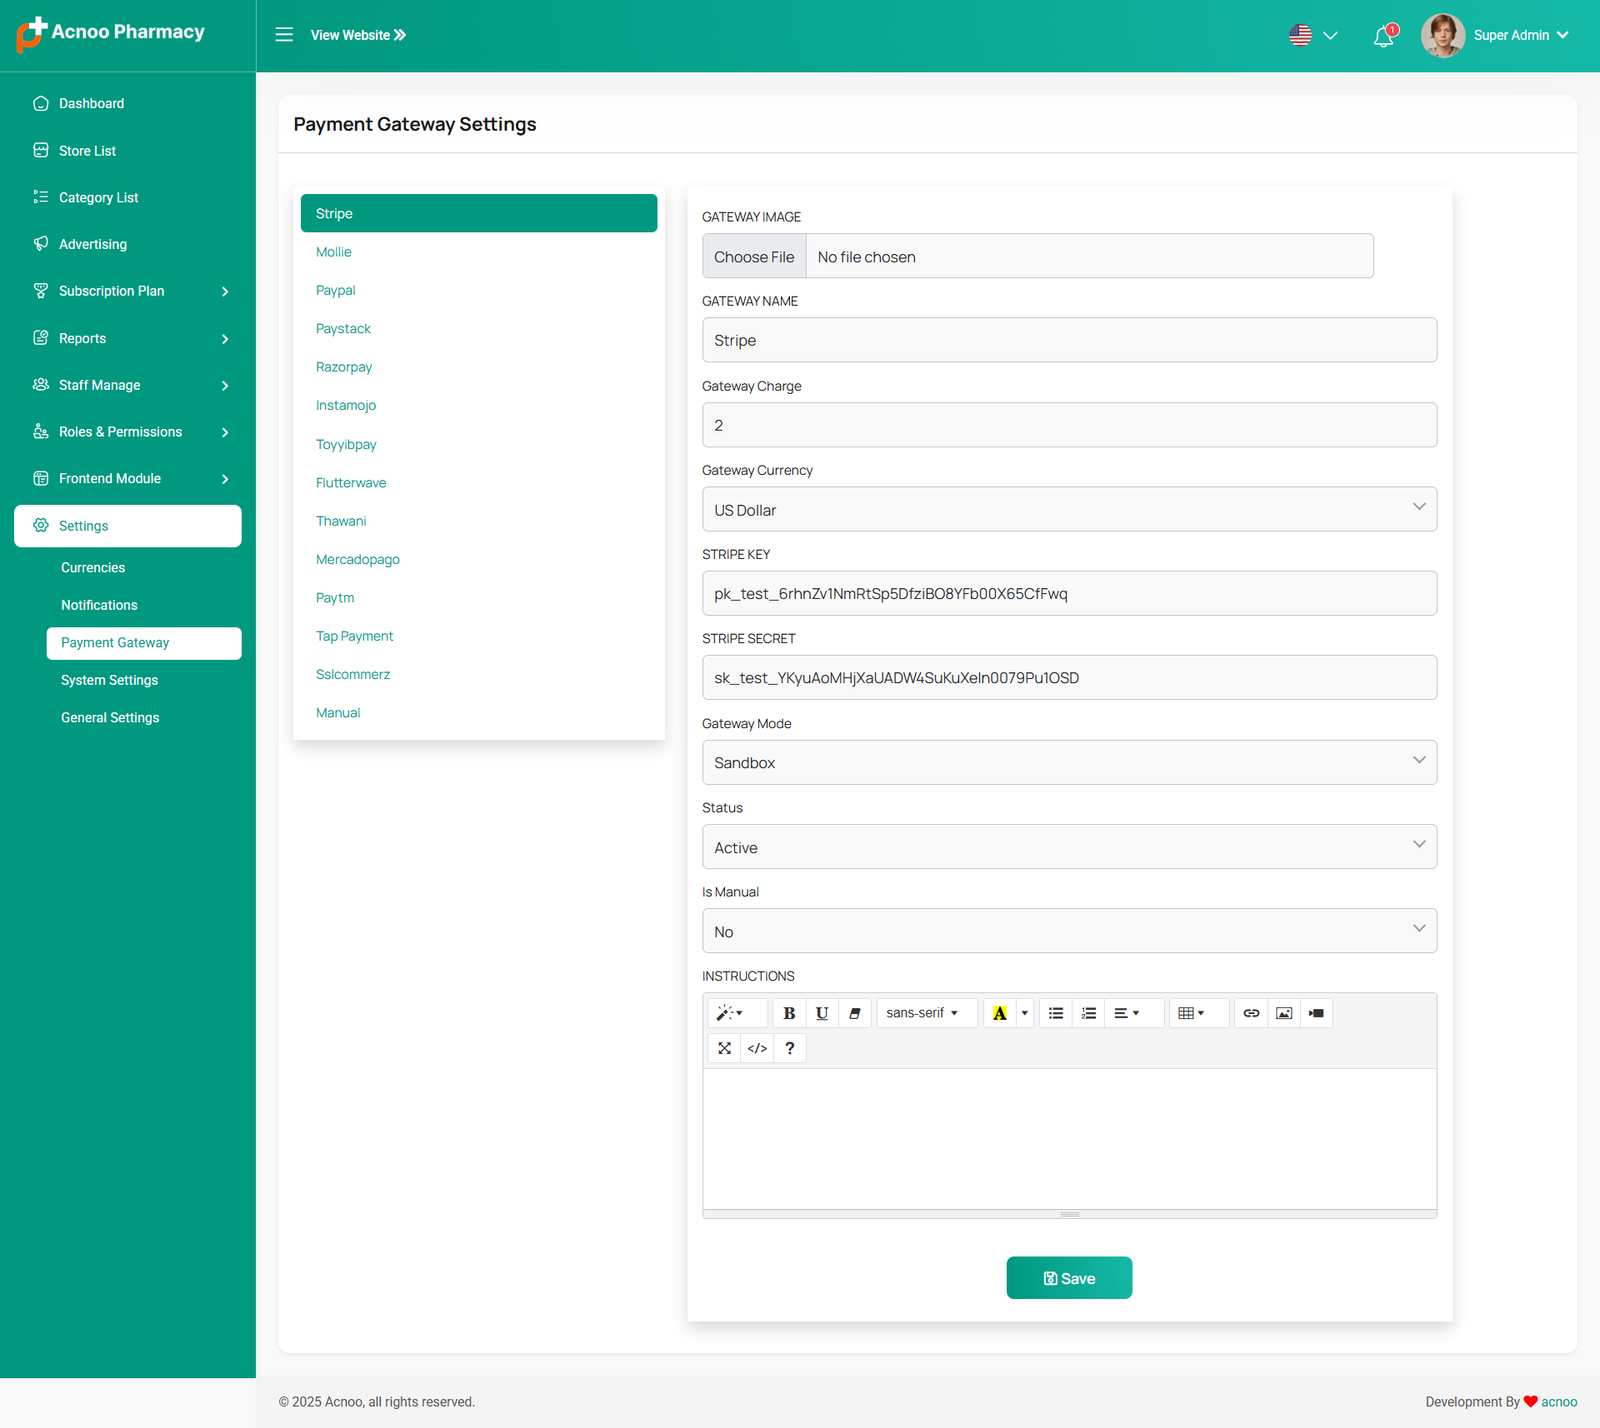
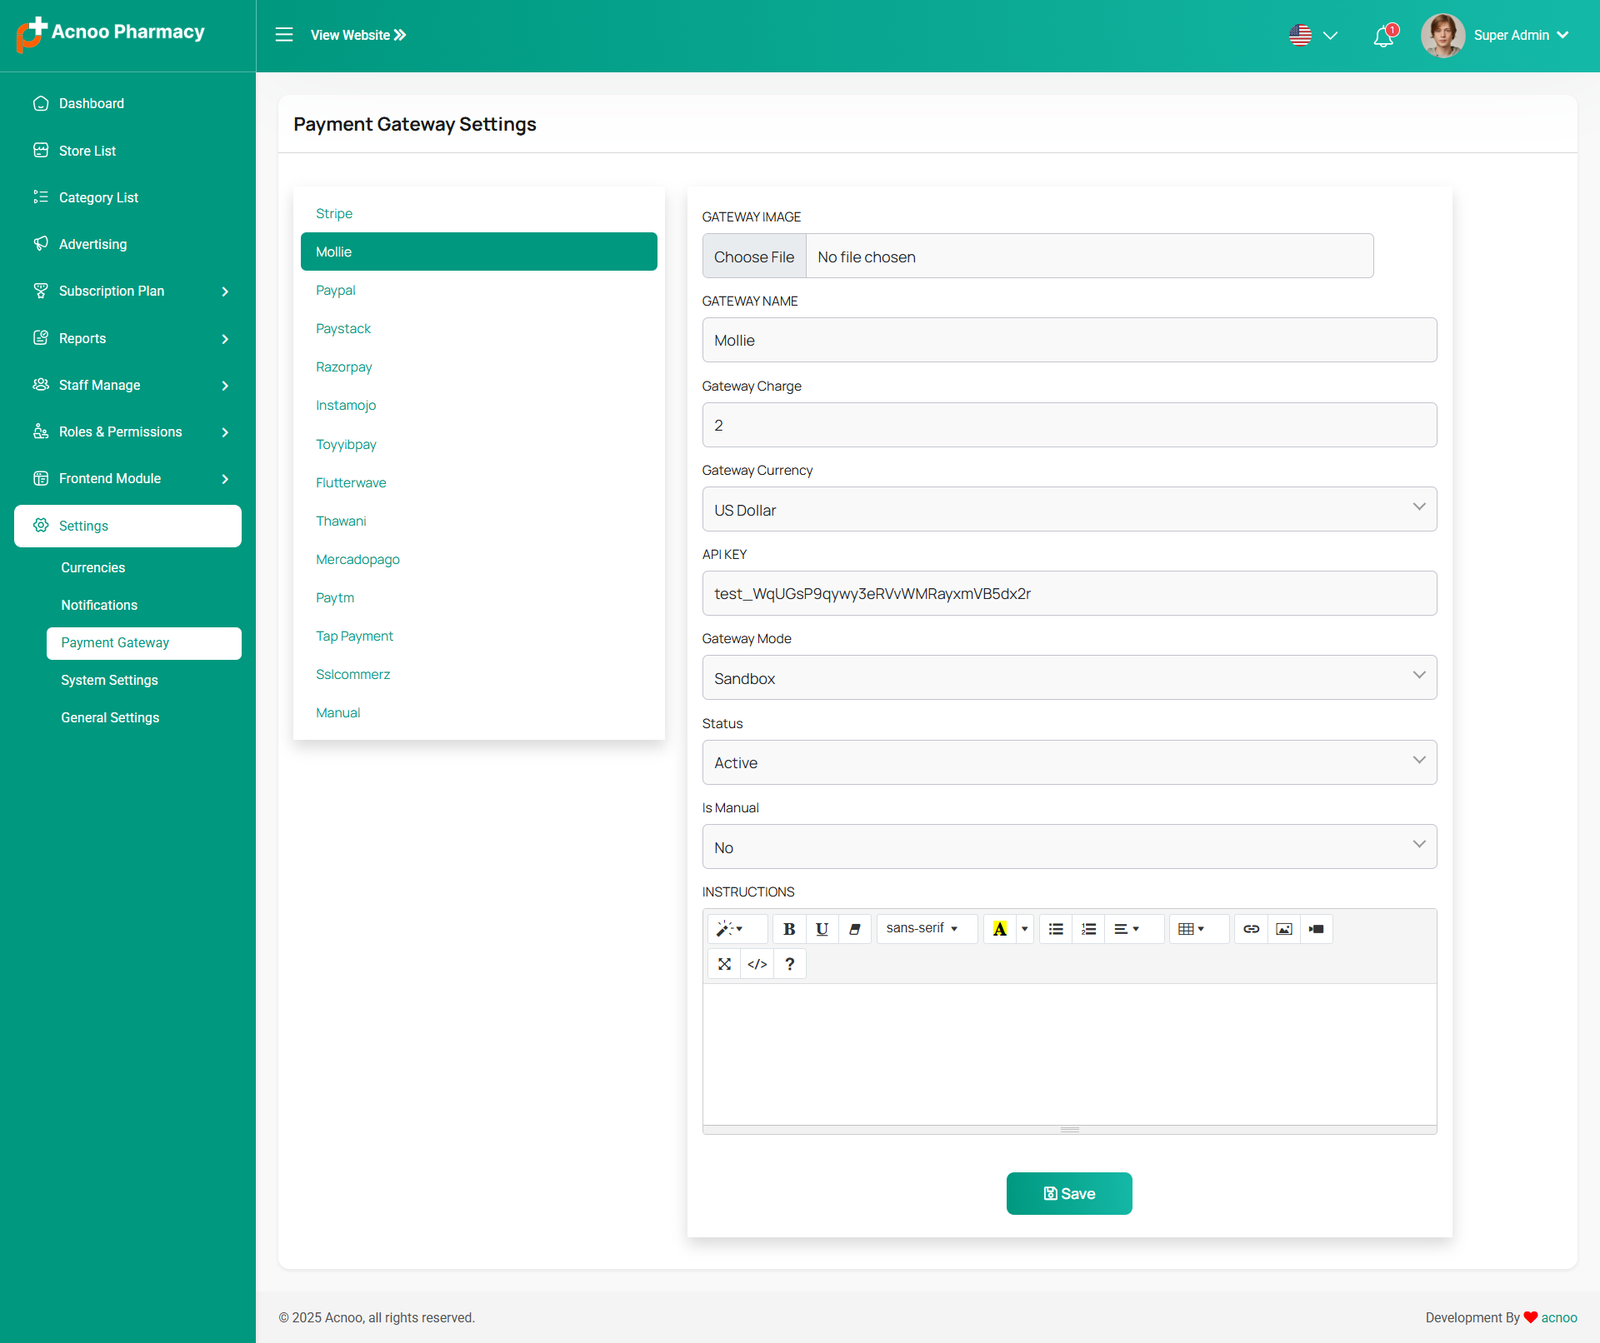
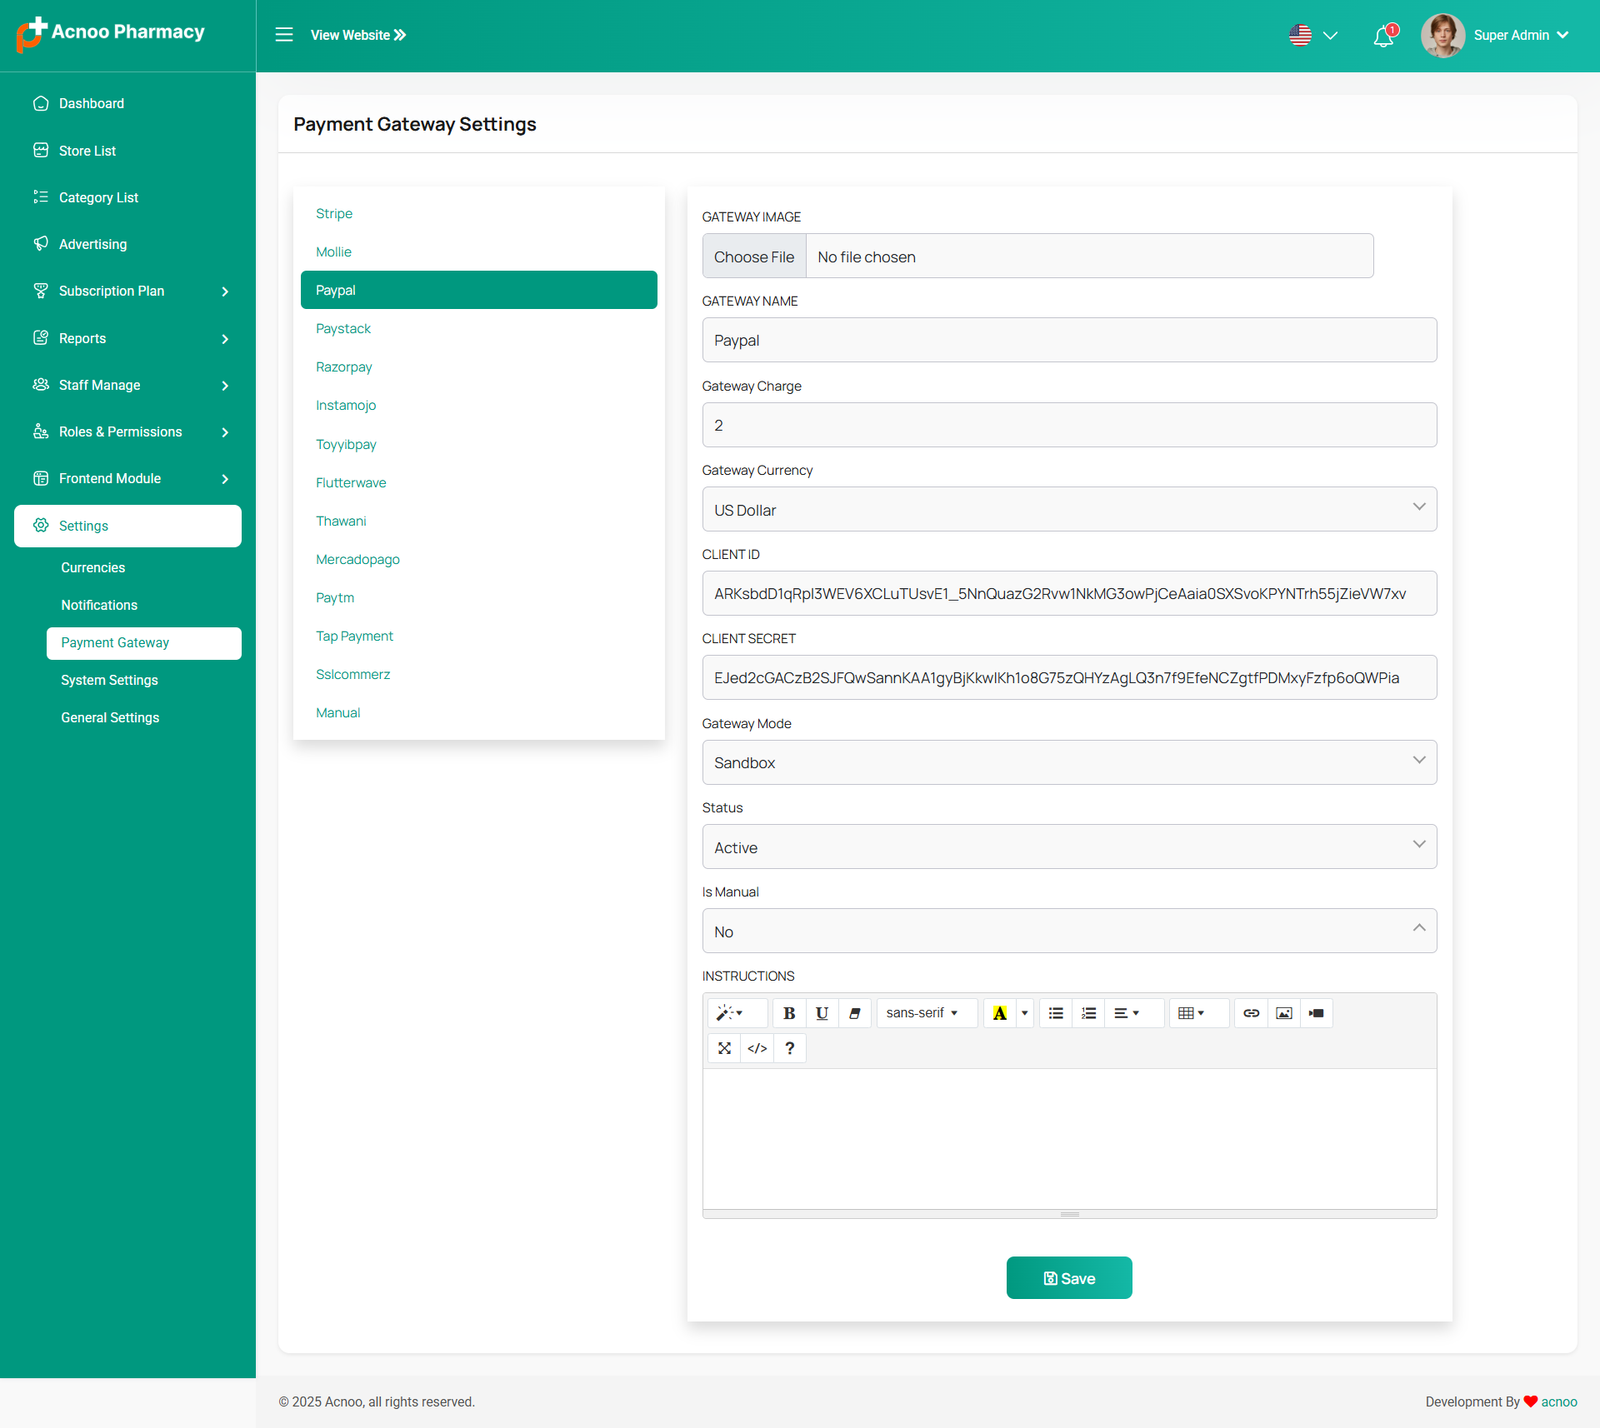
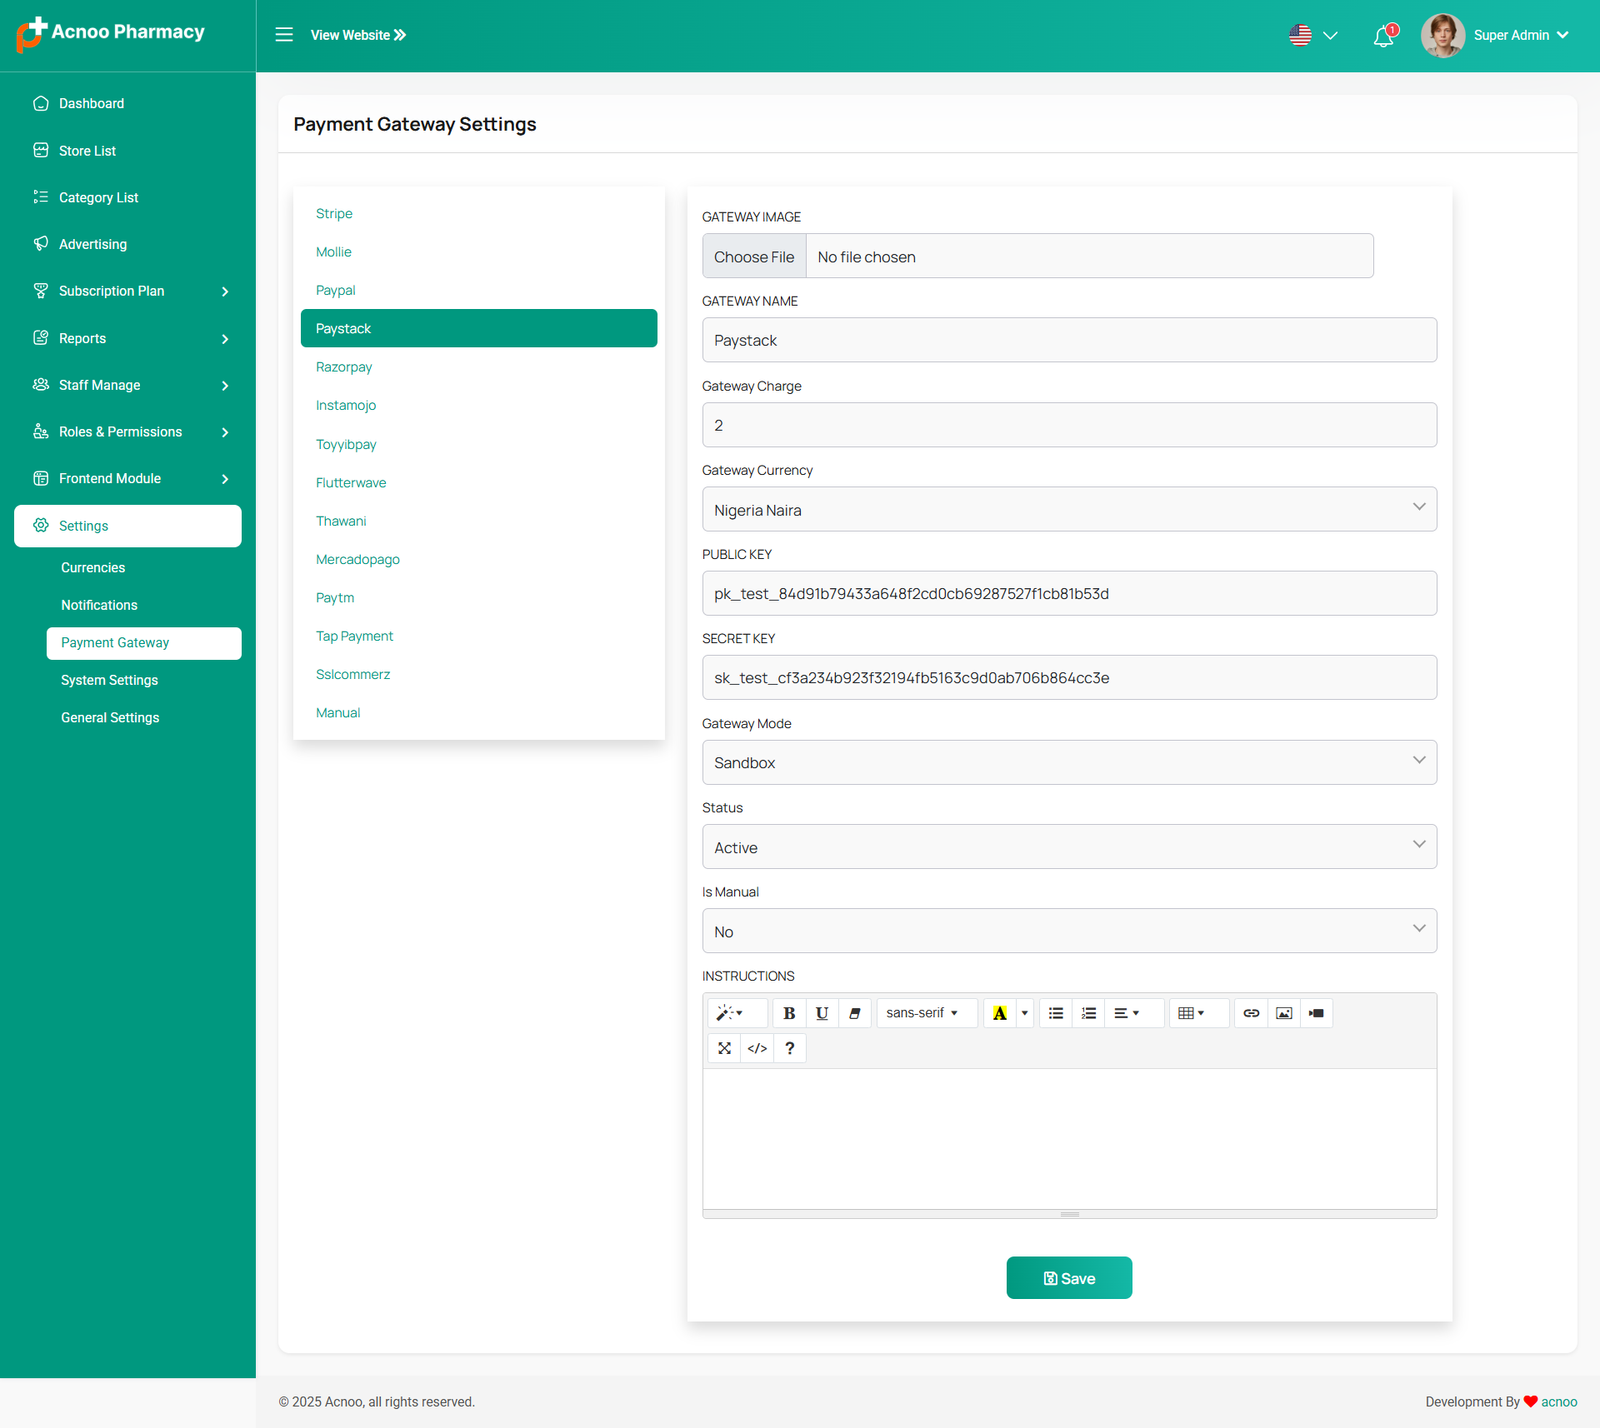
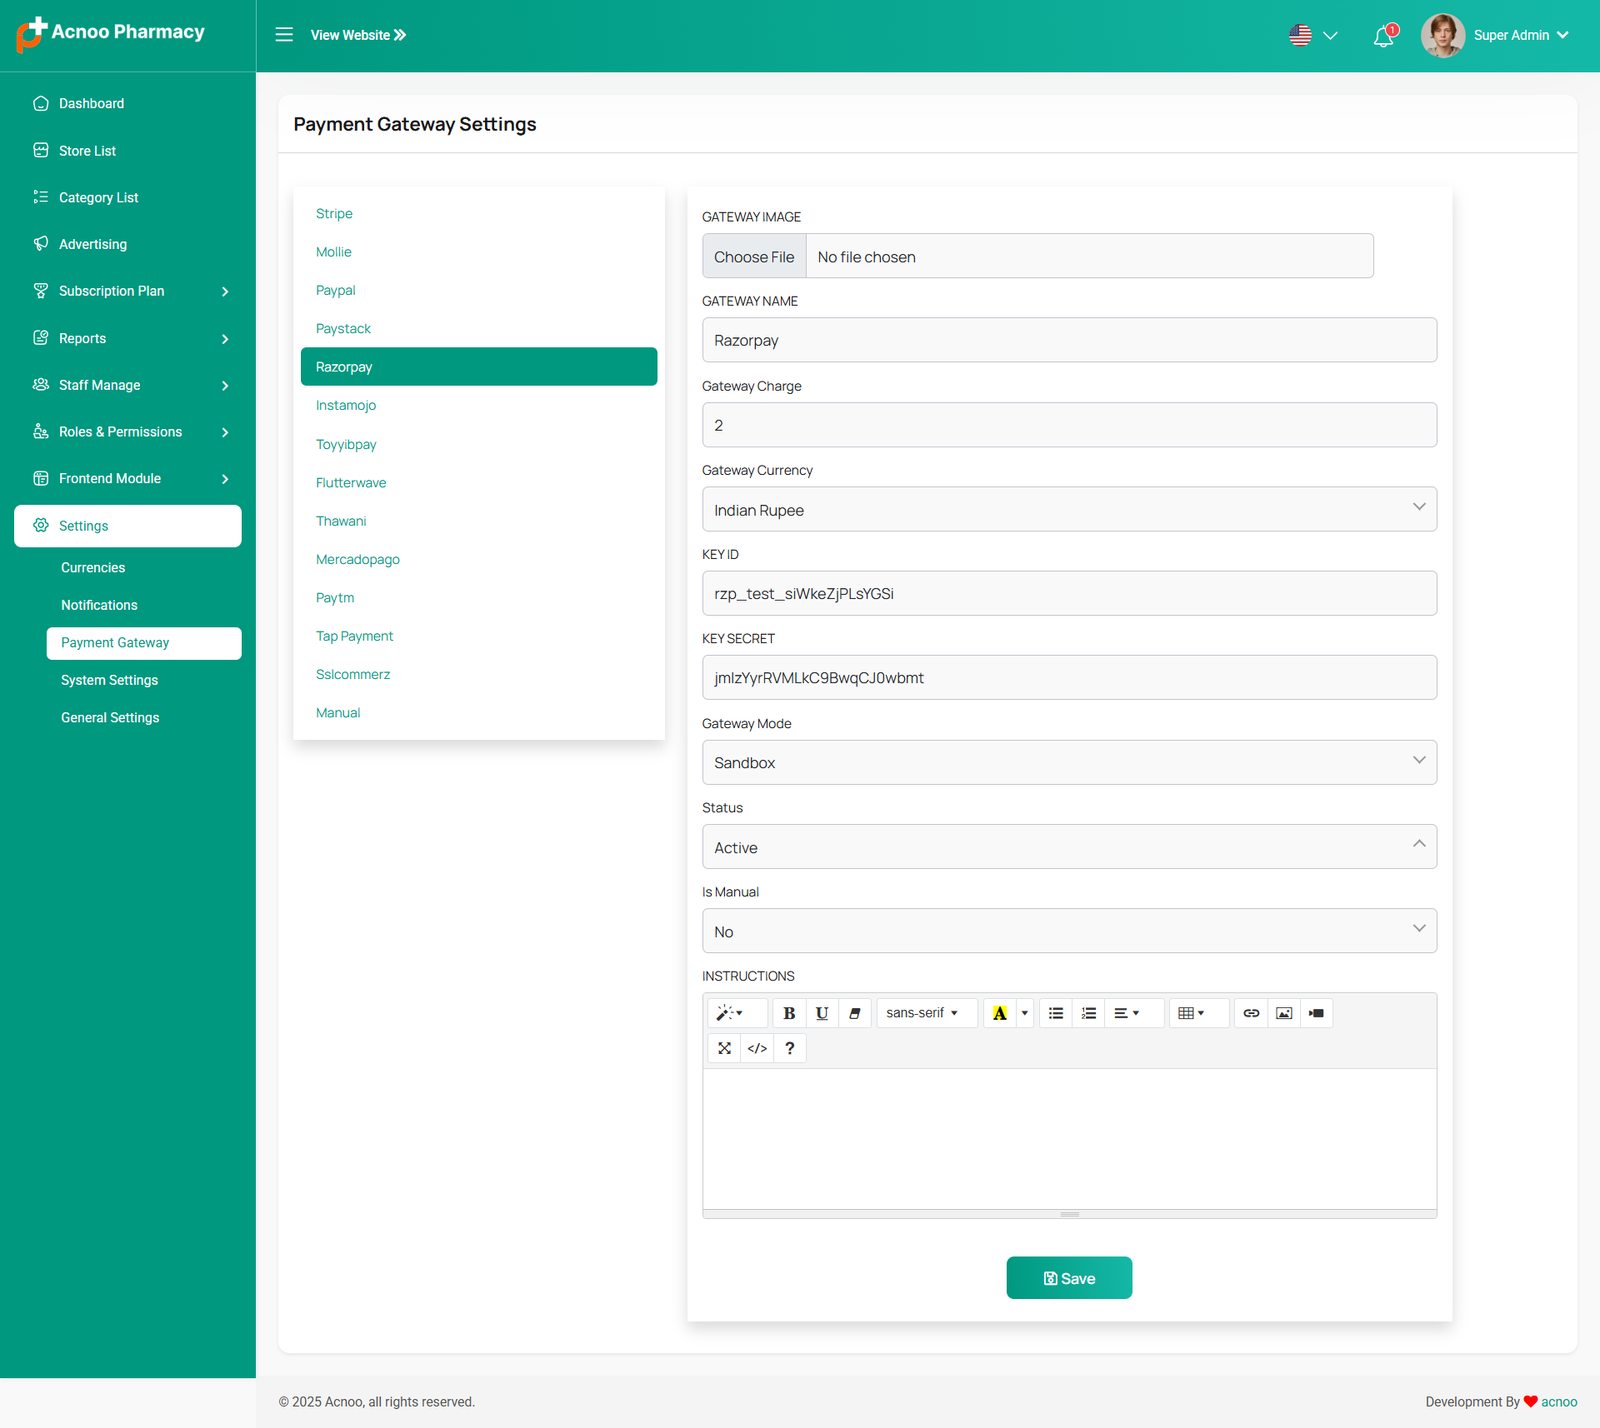
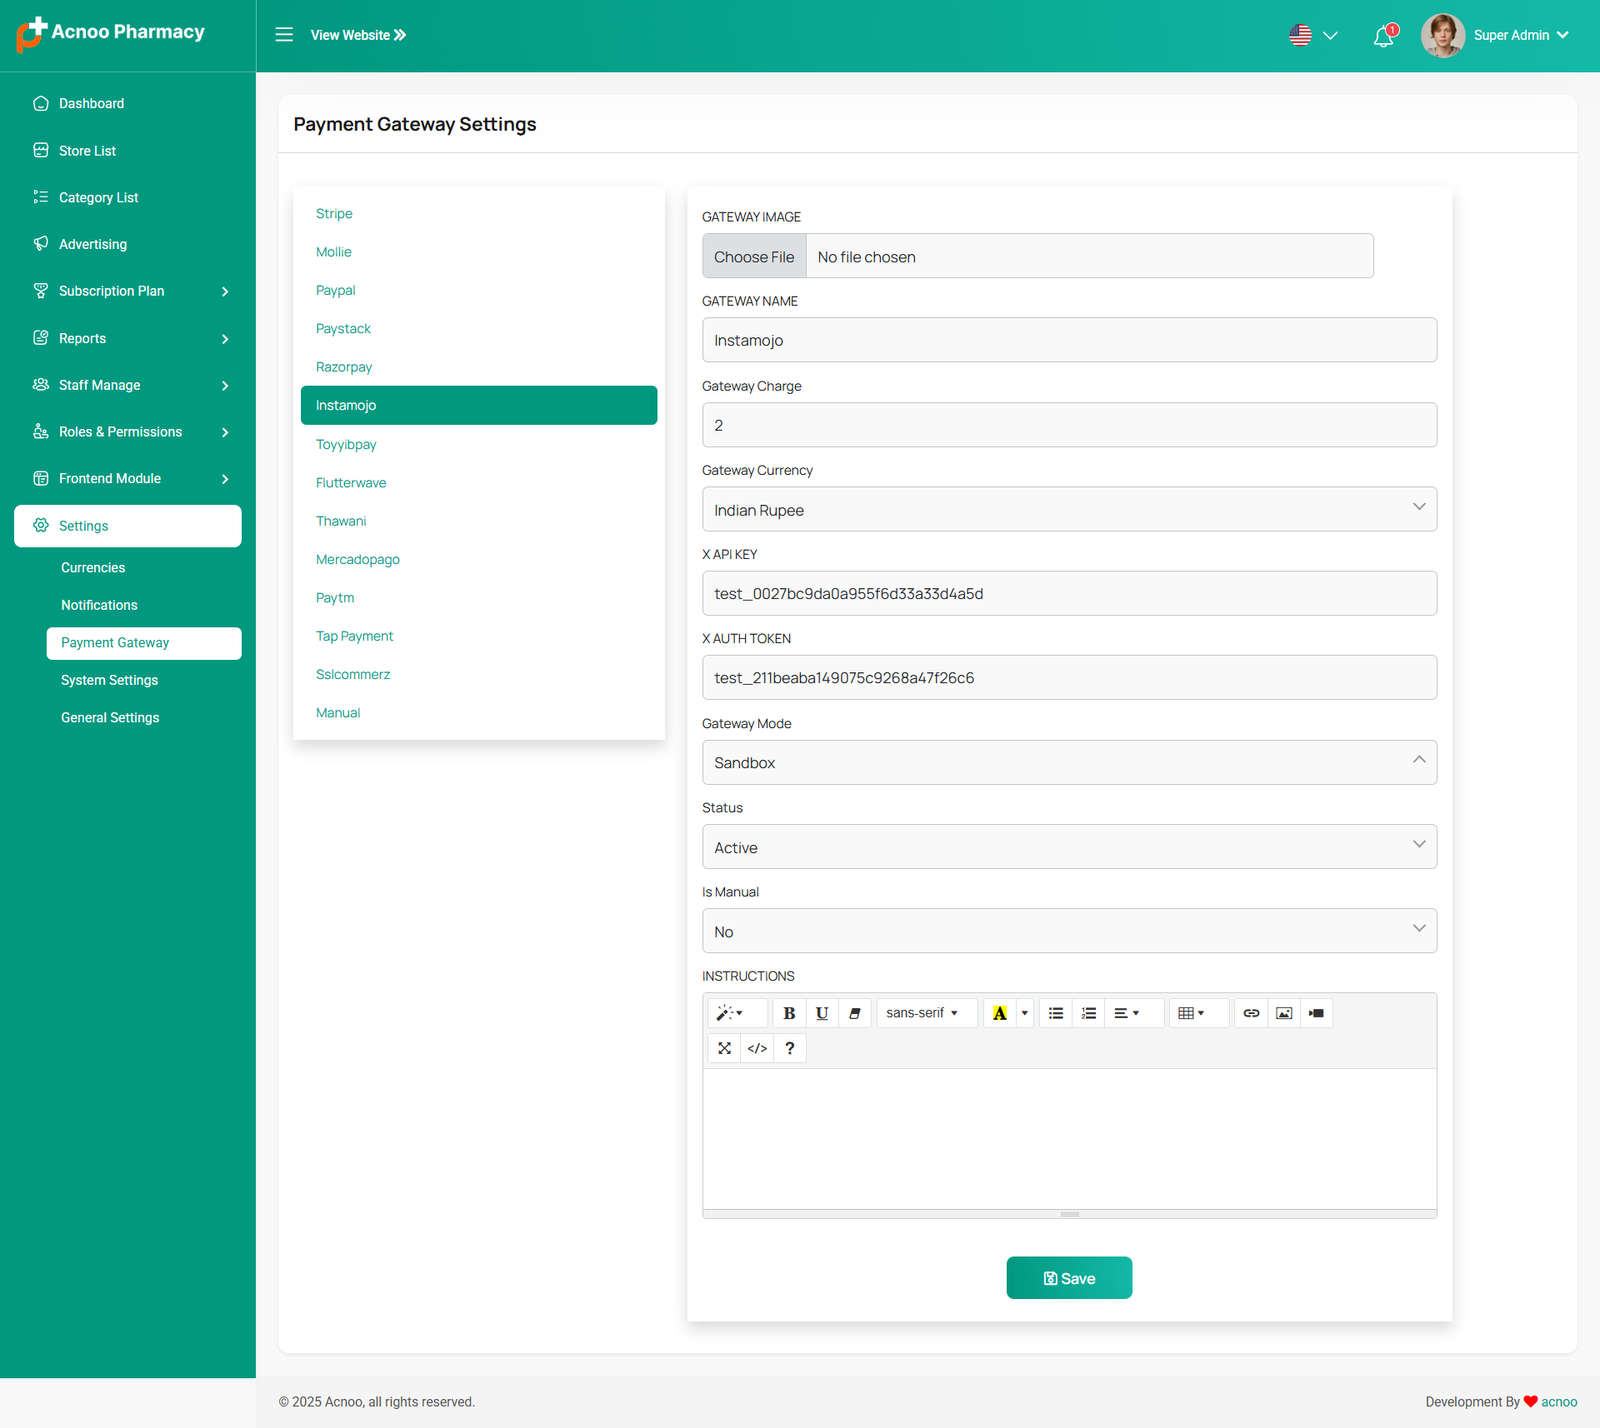
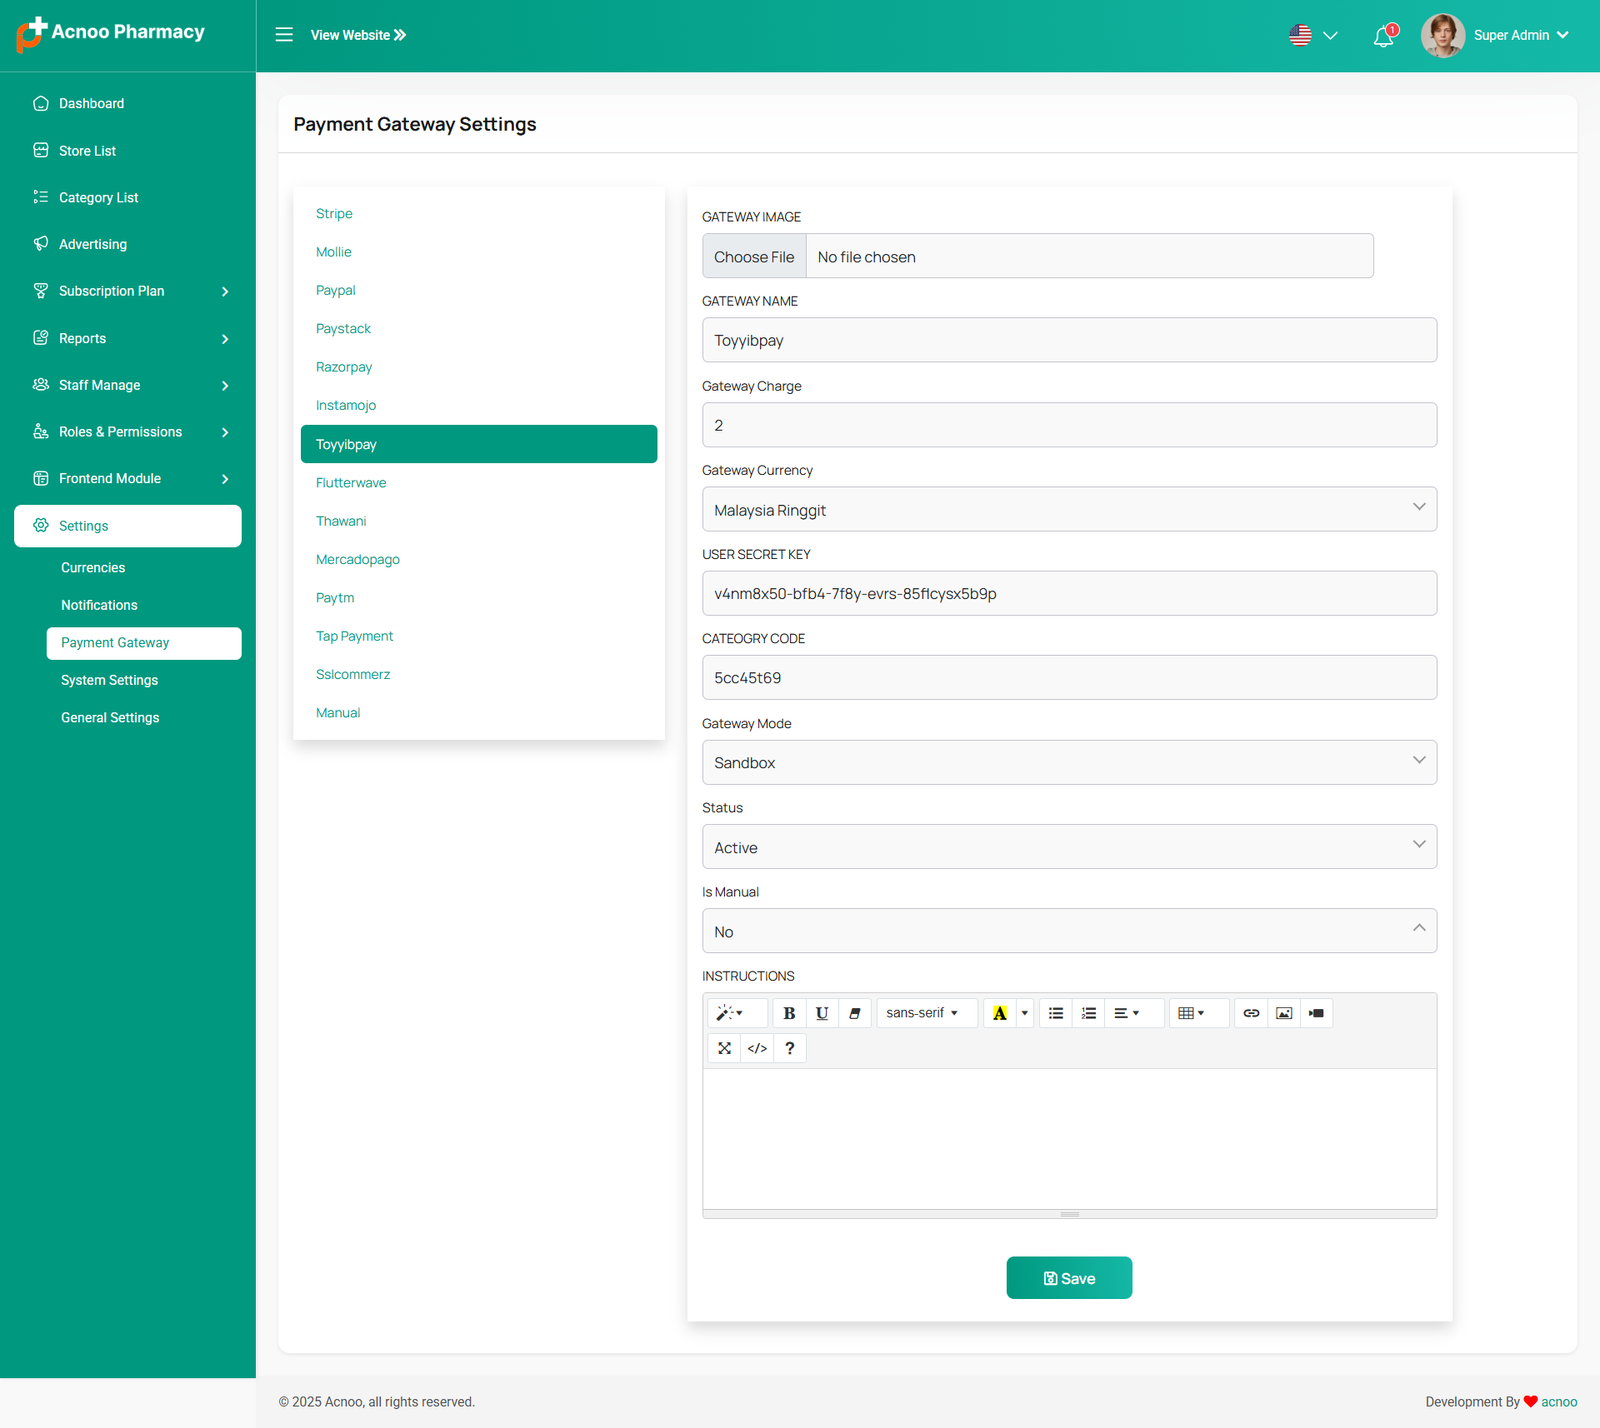
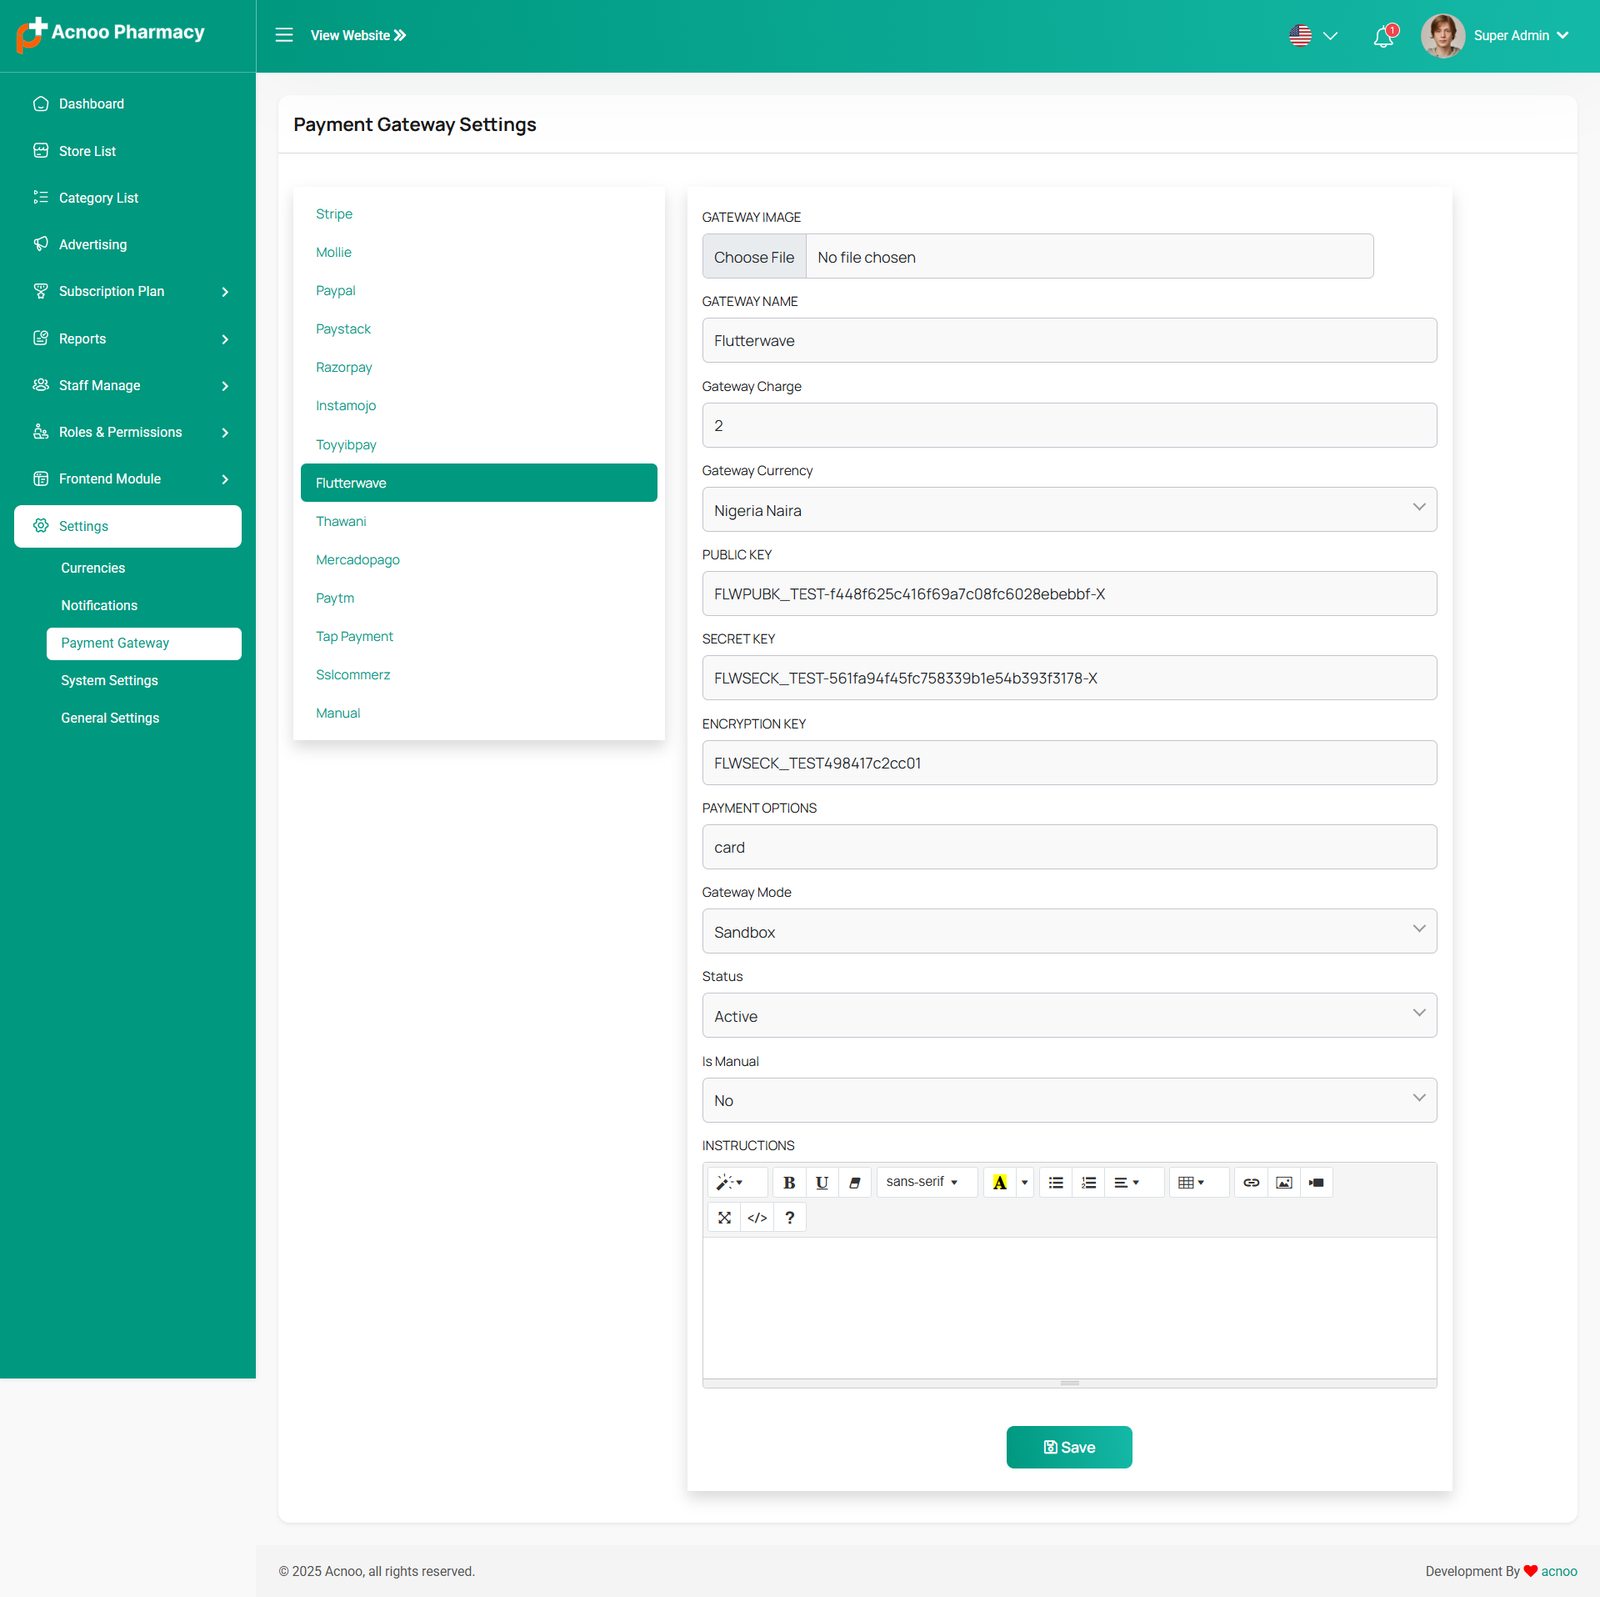
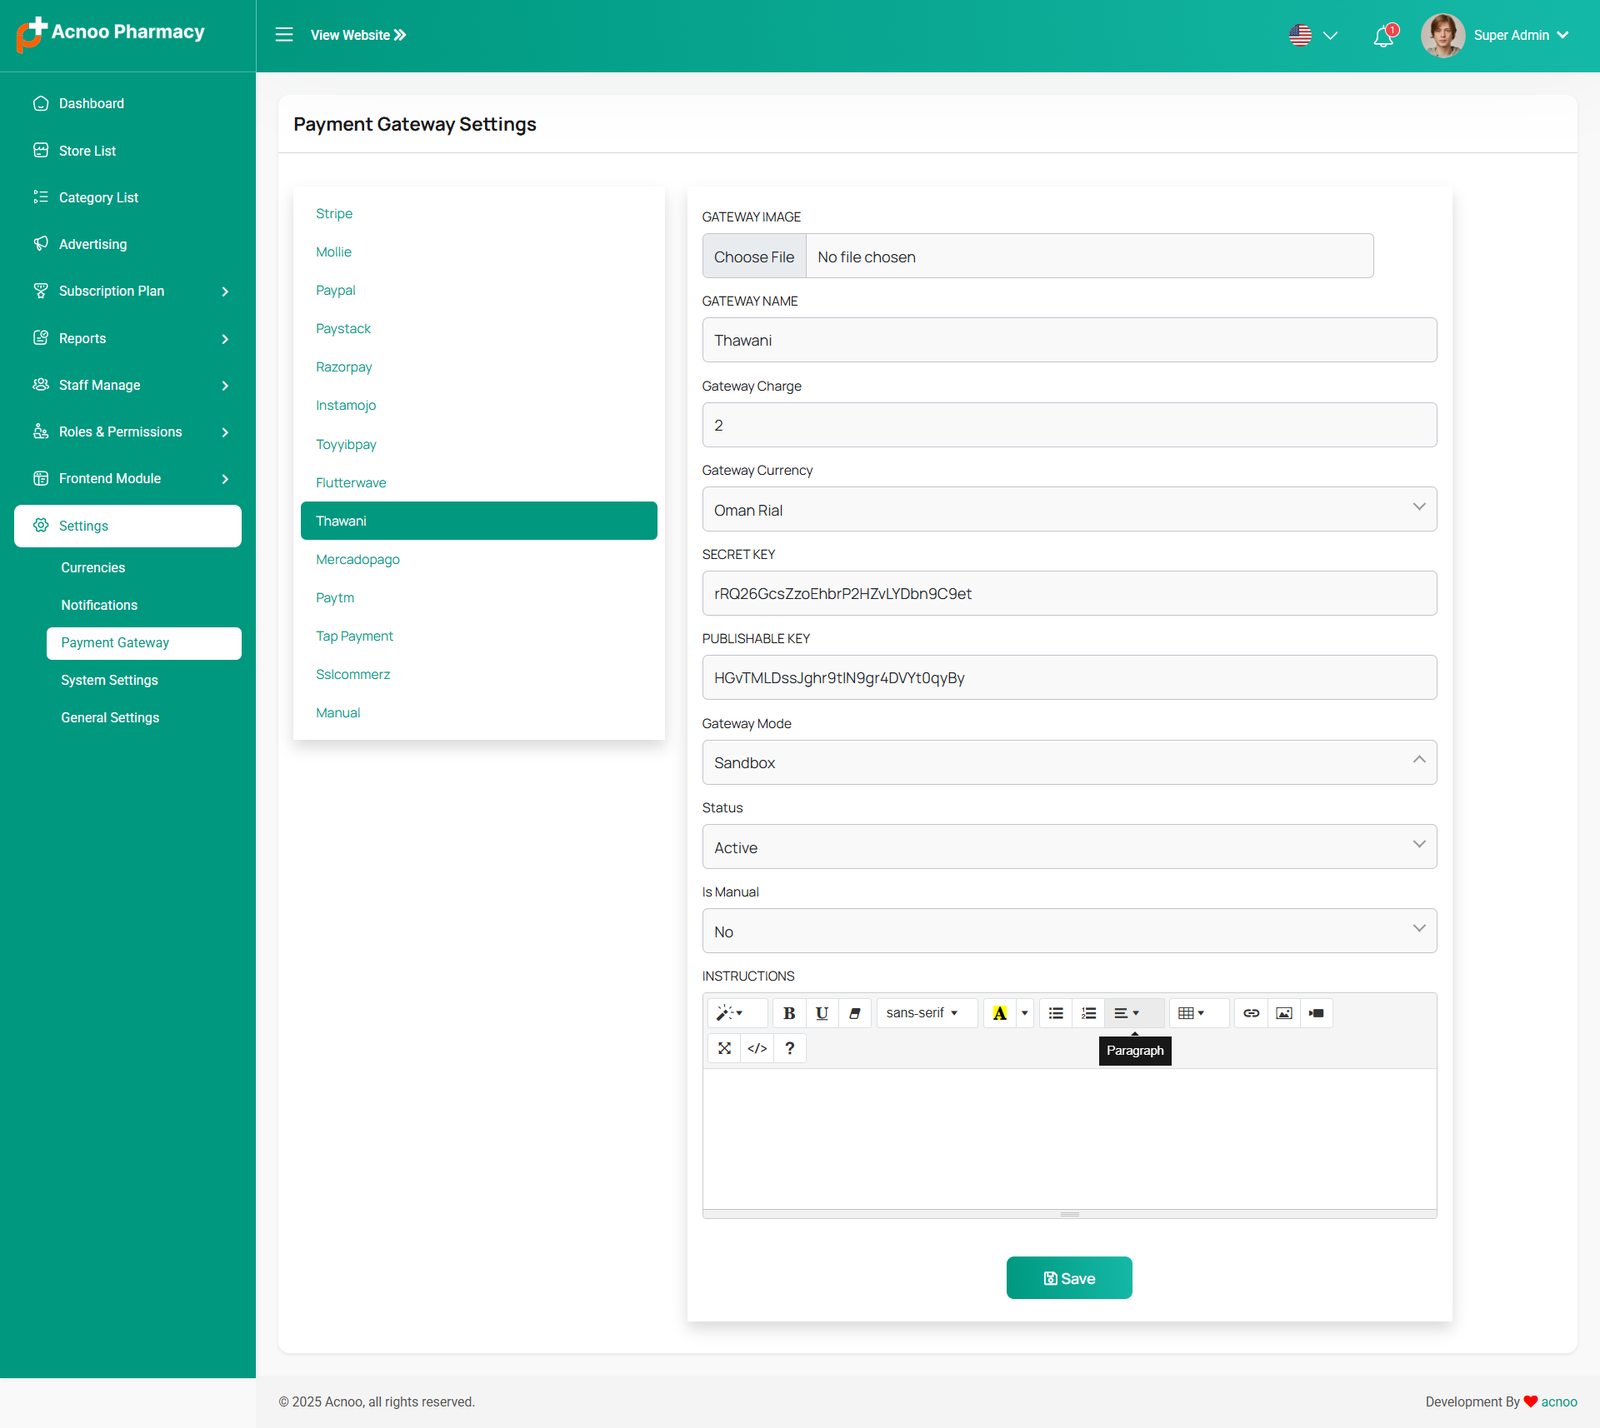
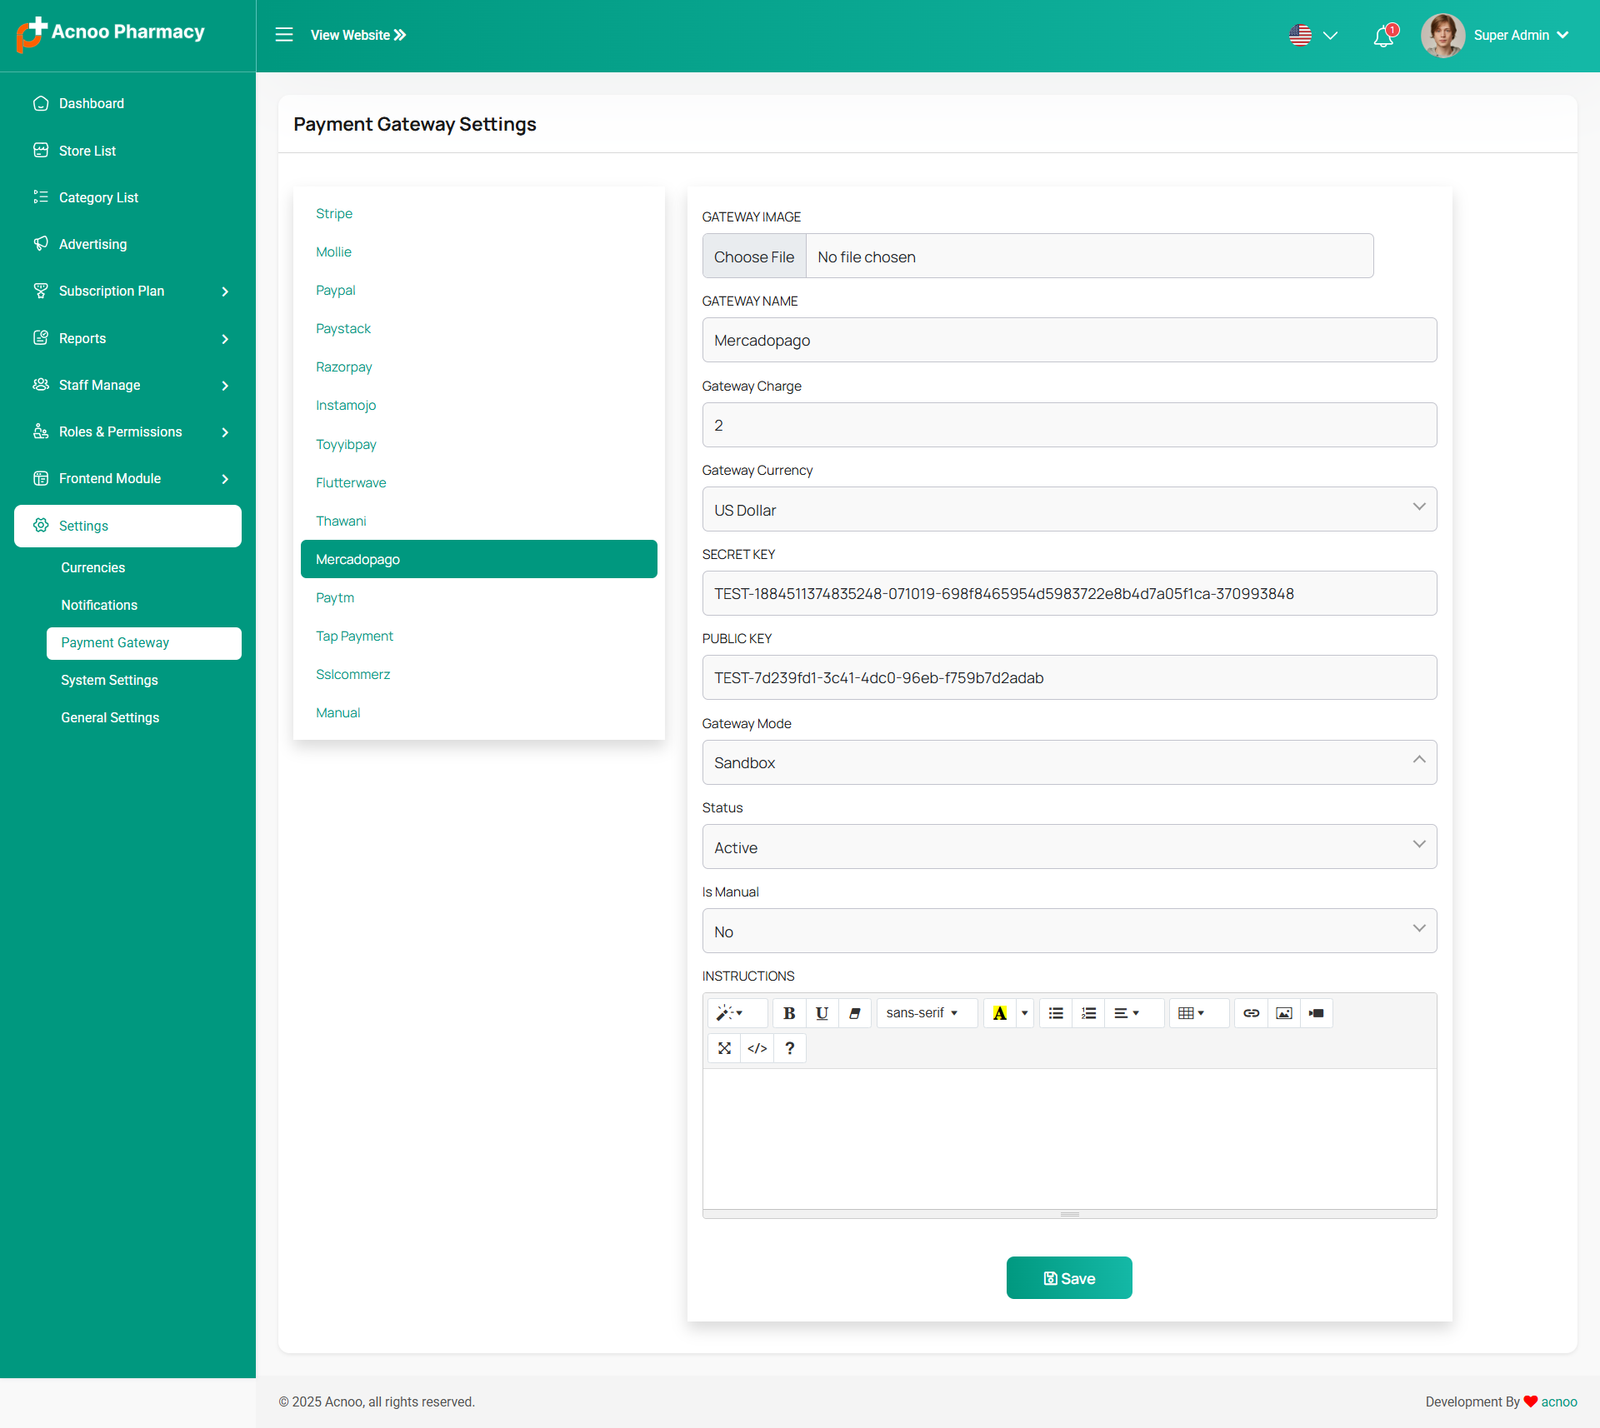
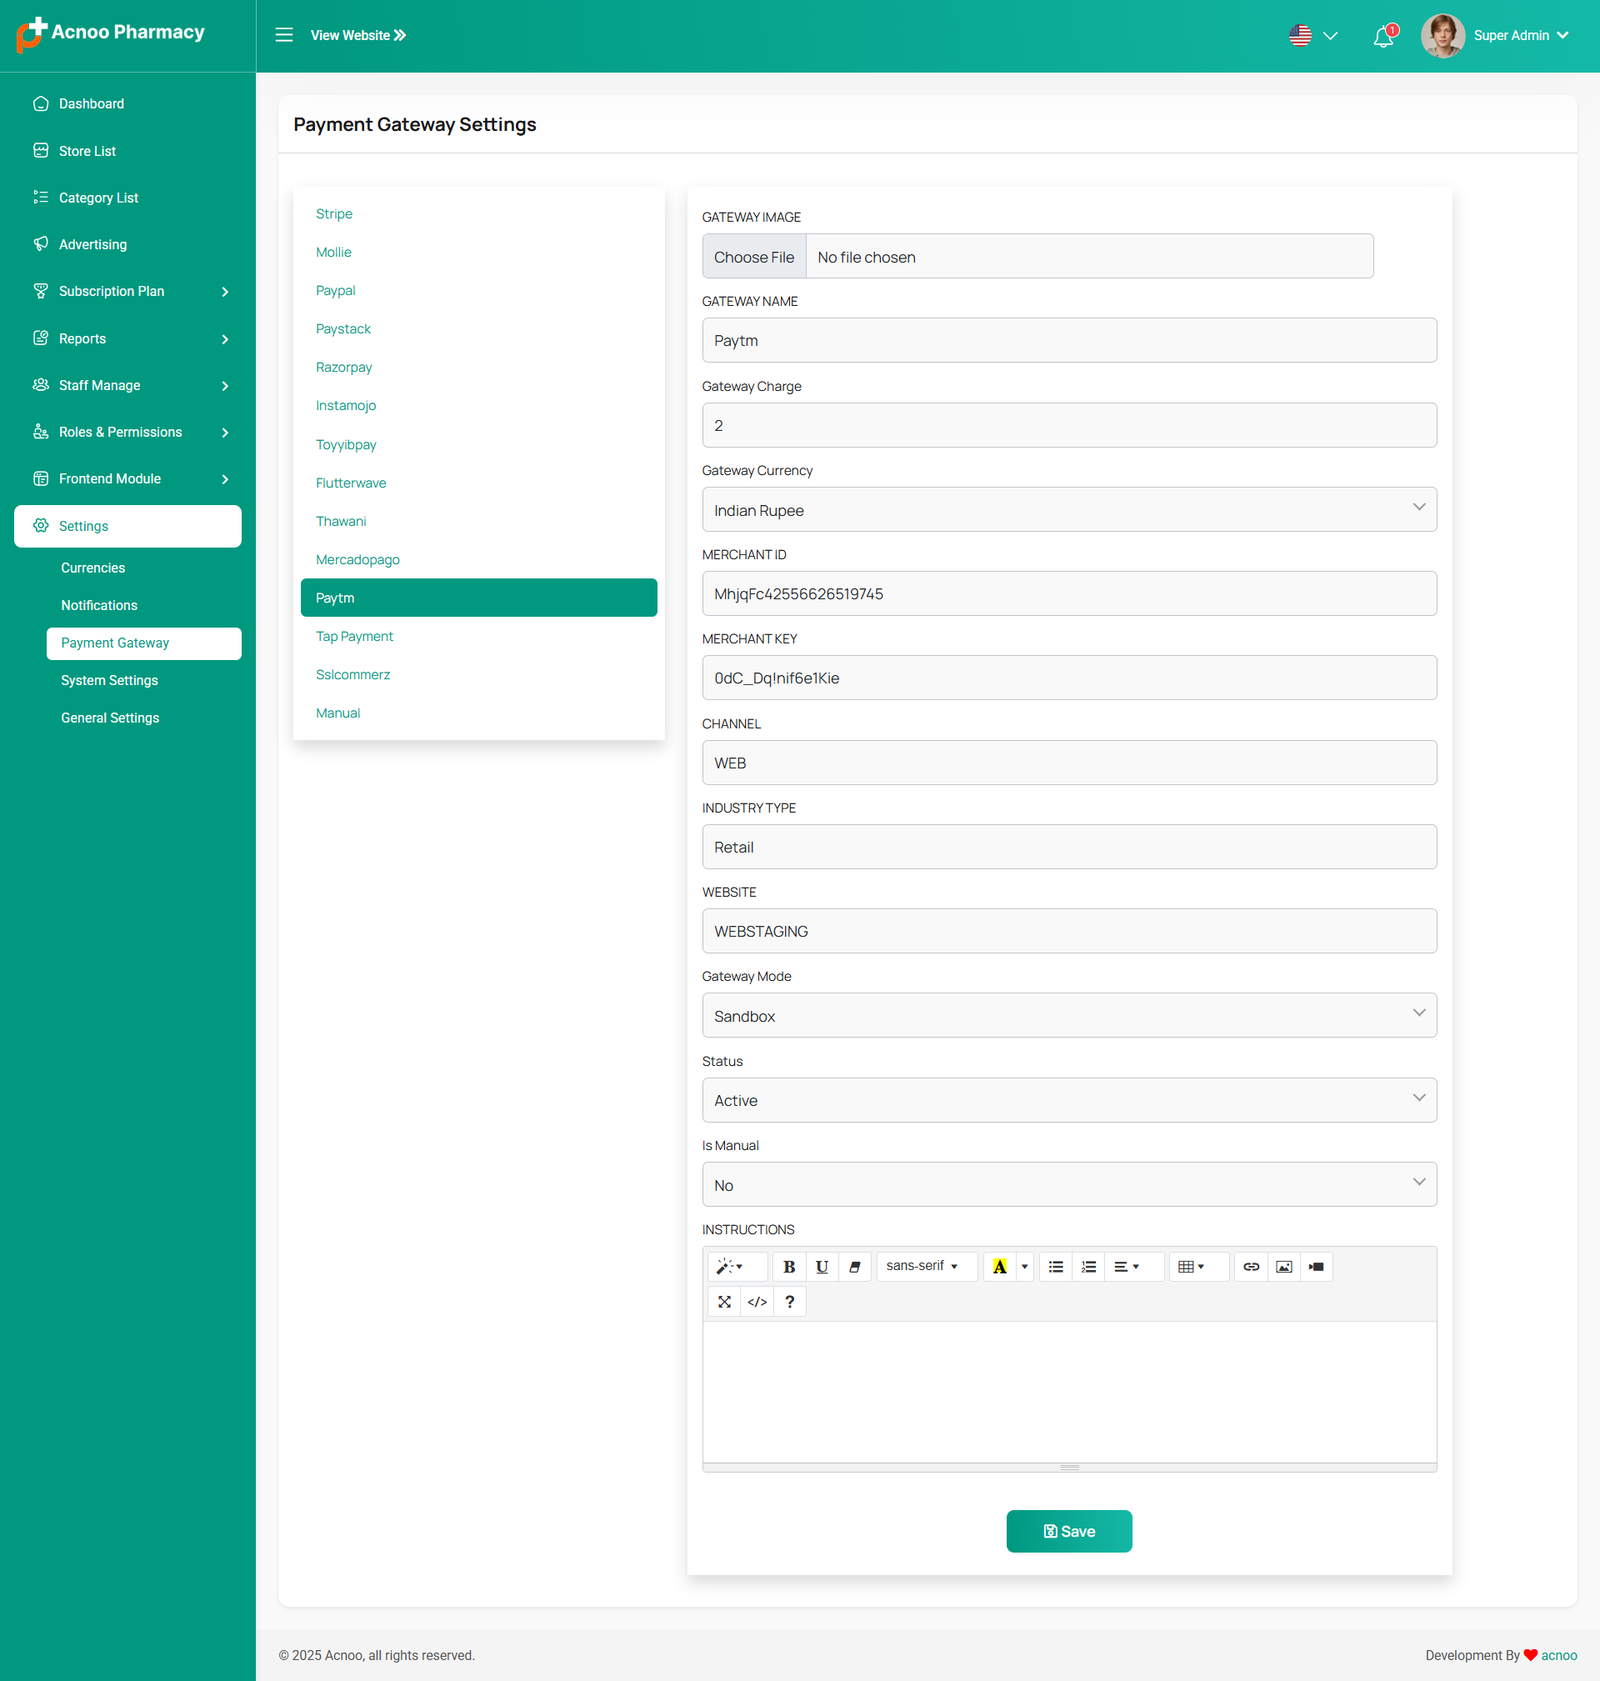
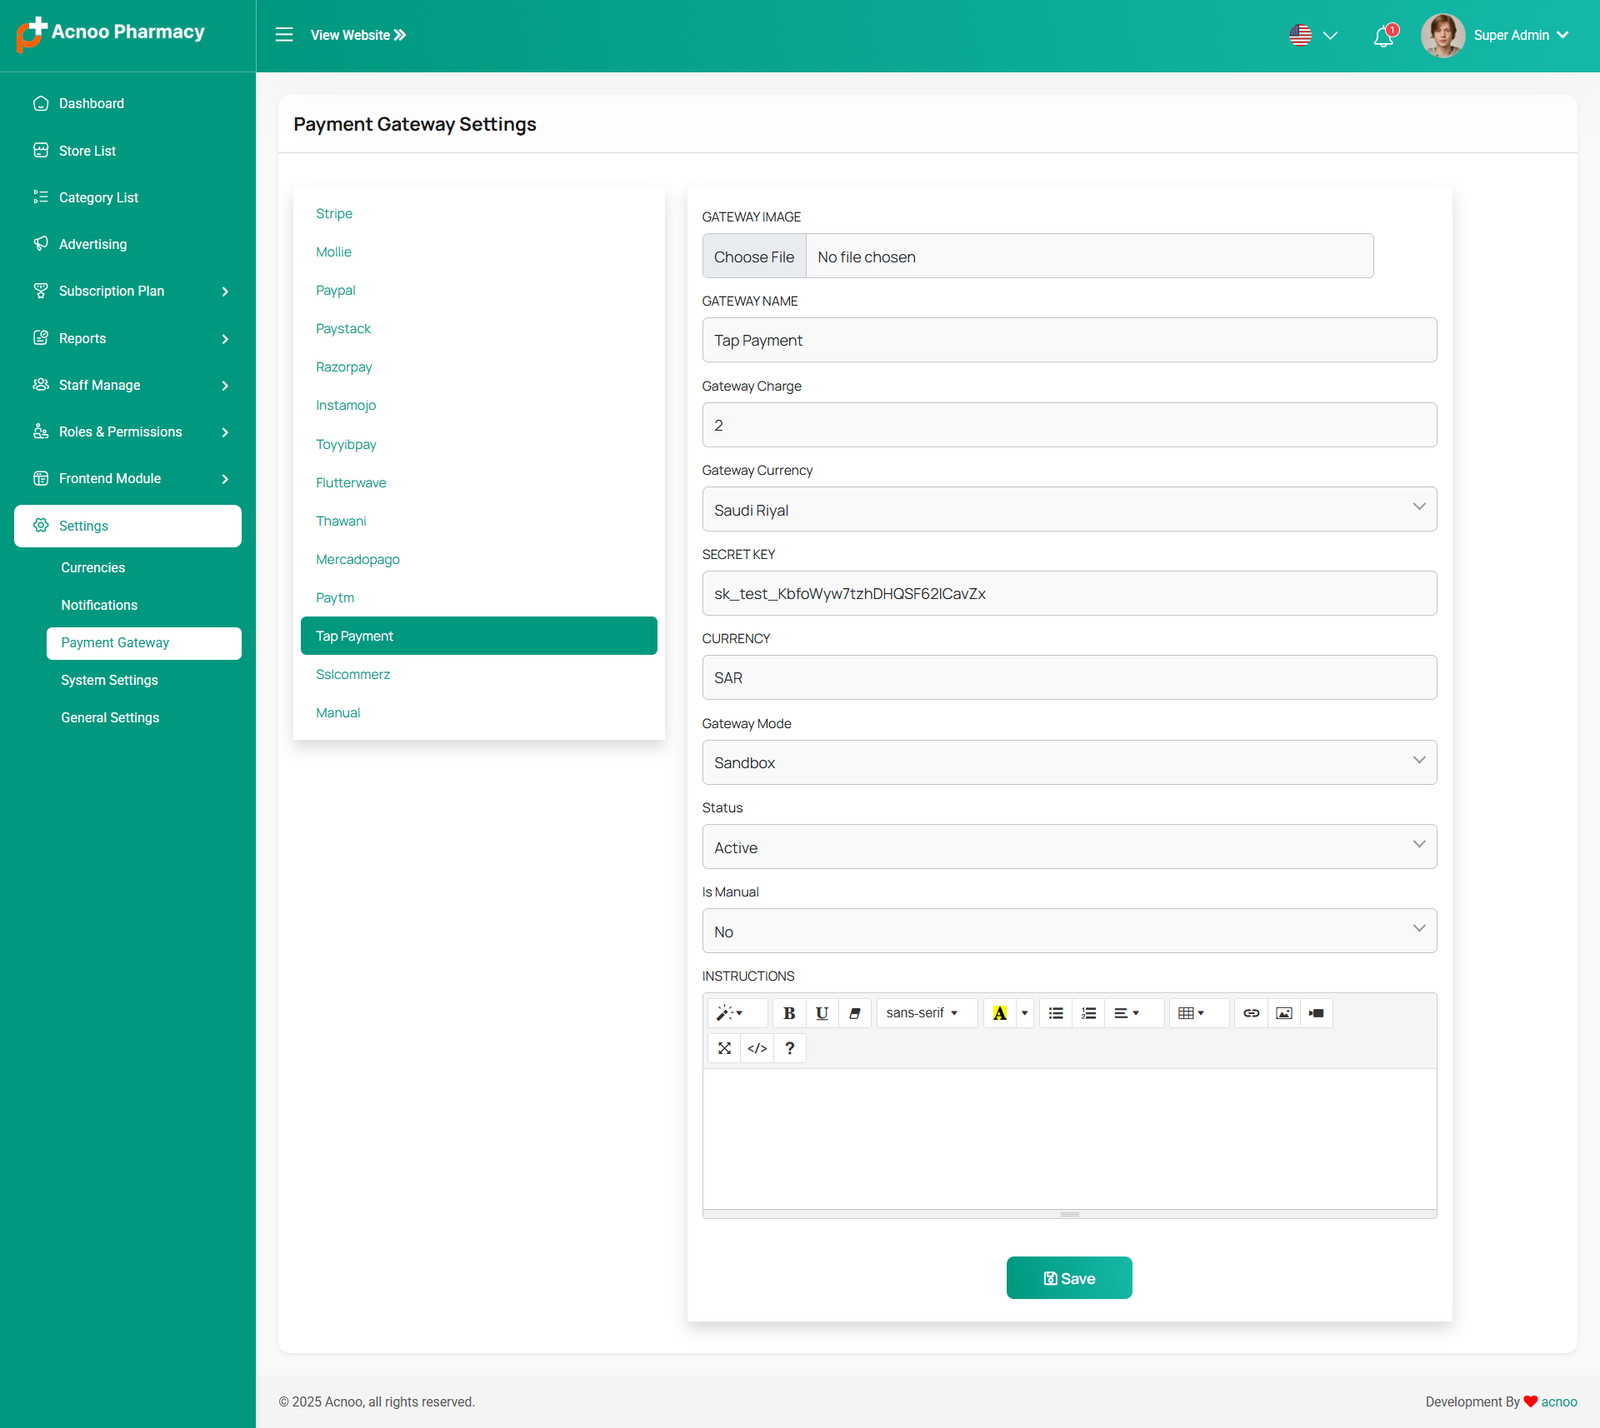
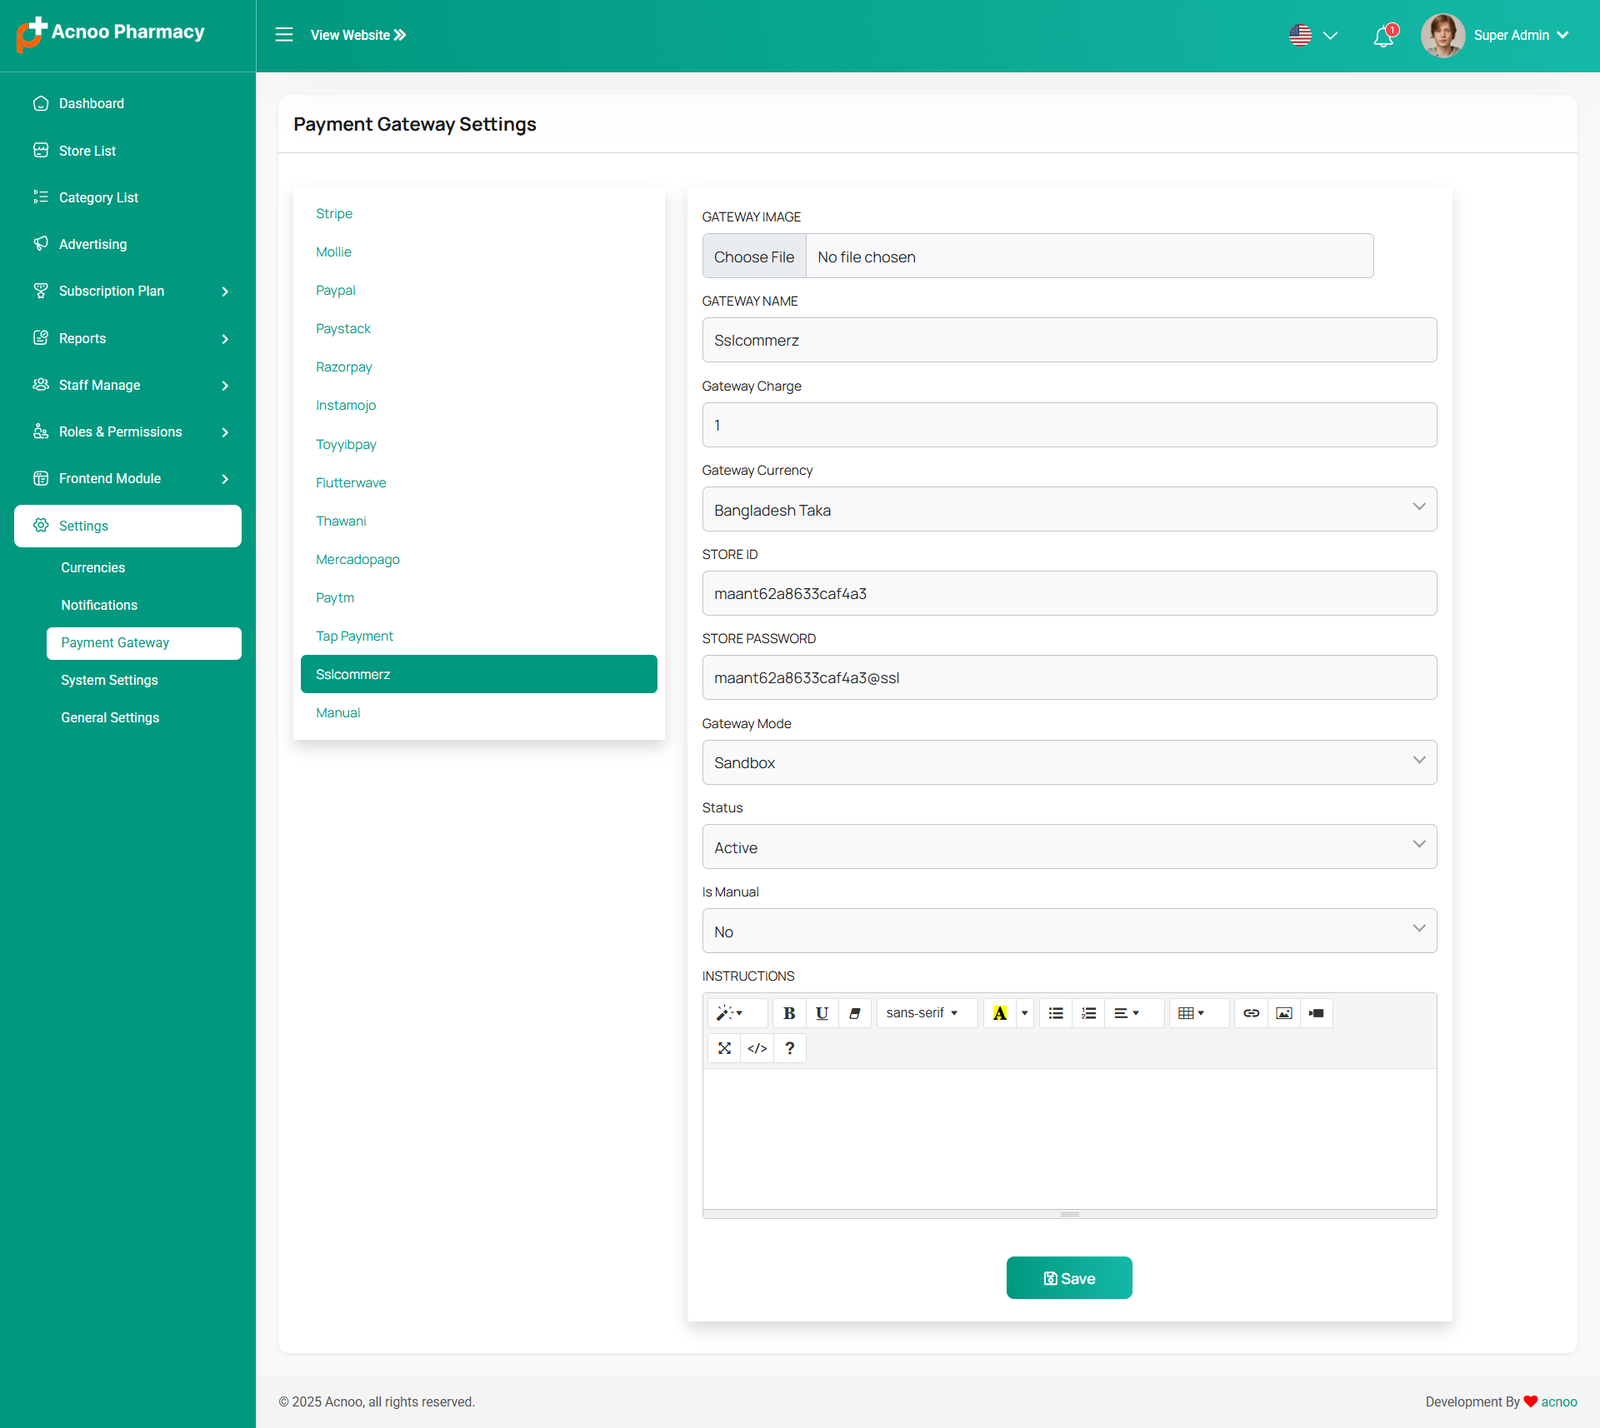
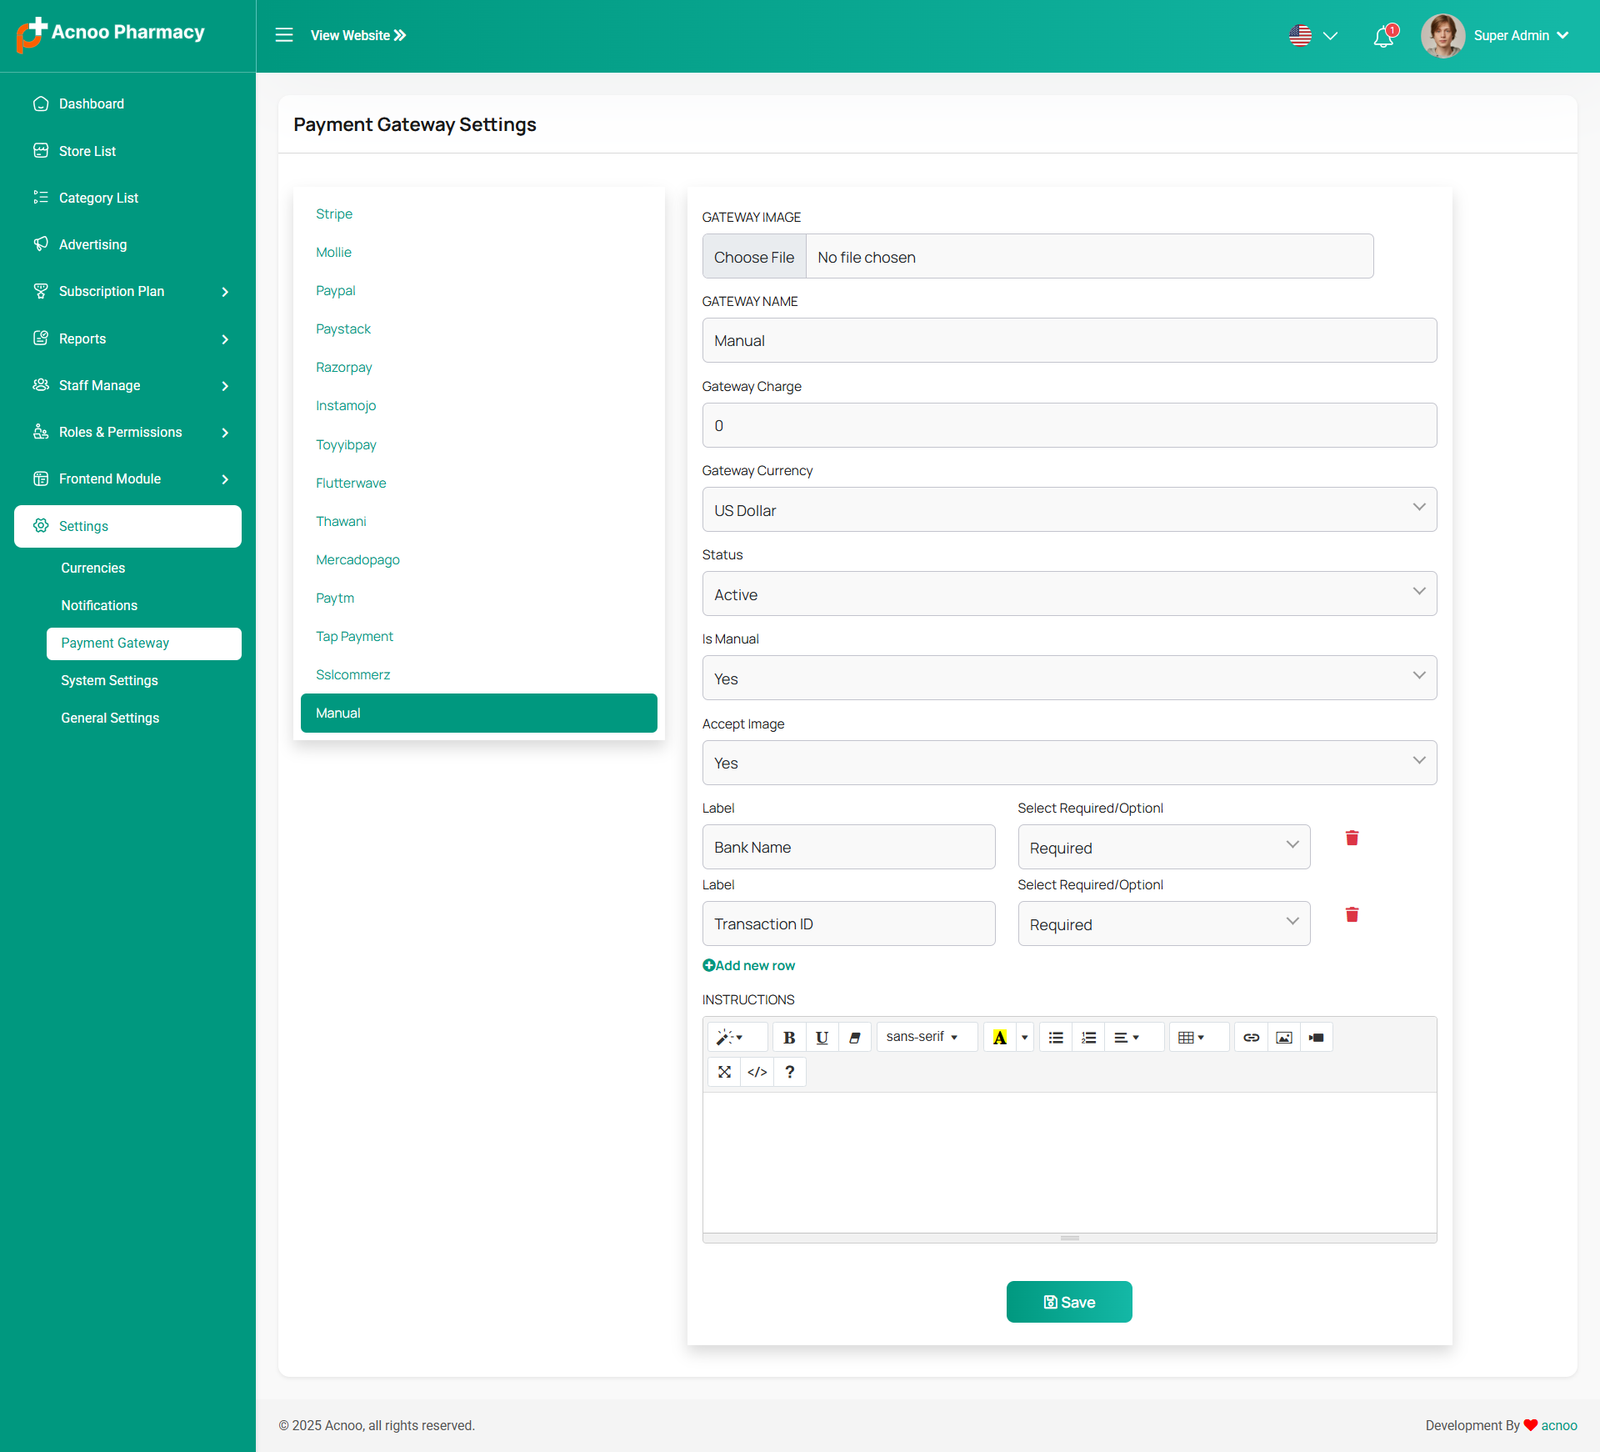
Payment Gateway Settings
Here, you can modify various payment gateways like Stripe, PayPal, SSLCommerz, manual and many others options.
Stripe
Mobile
Paypal
Paystack
Razorpay
Instamojo
Toyyibpay
Flutter Wave
Thawani
Mercadopago
Paytm
Tap Payment
Sslcommerz
Manual
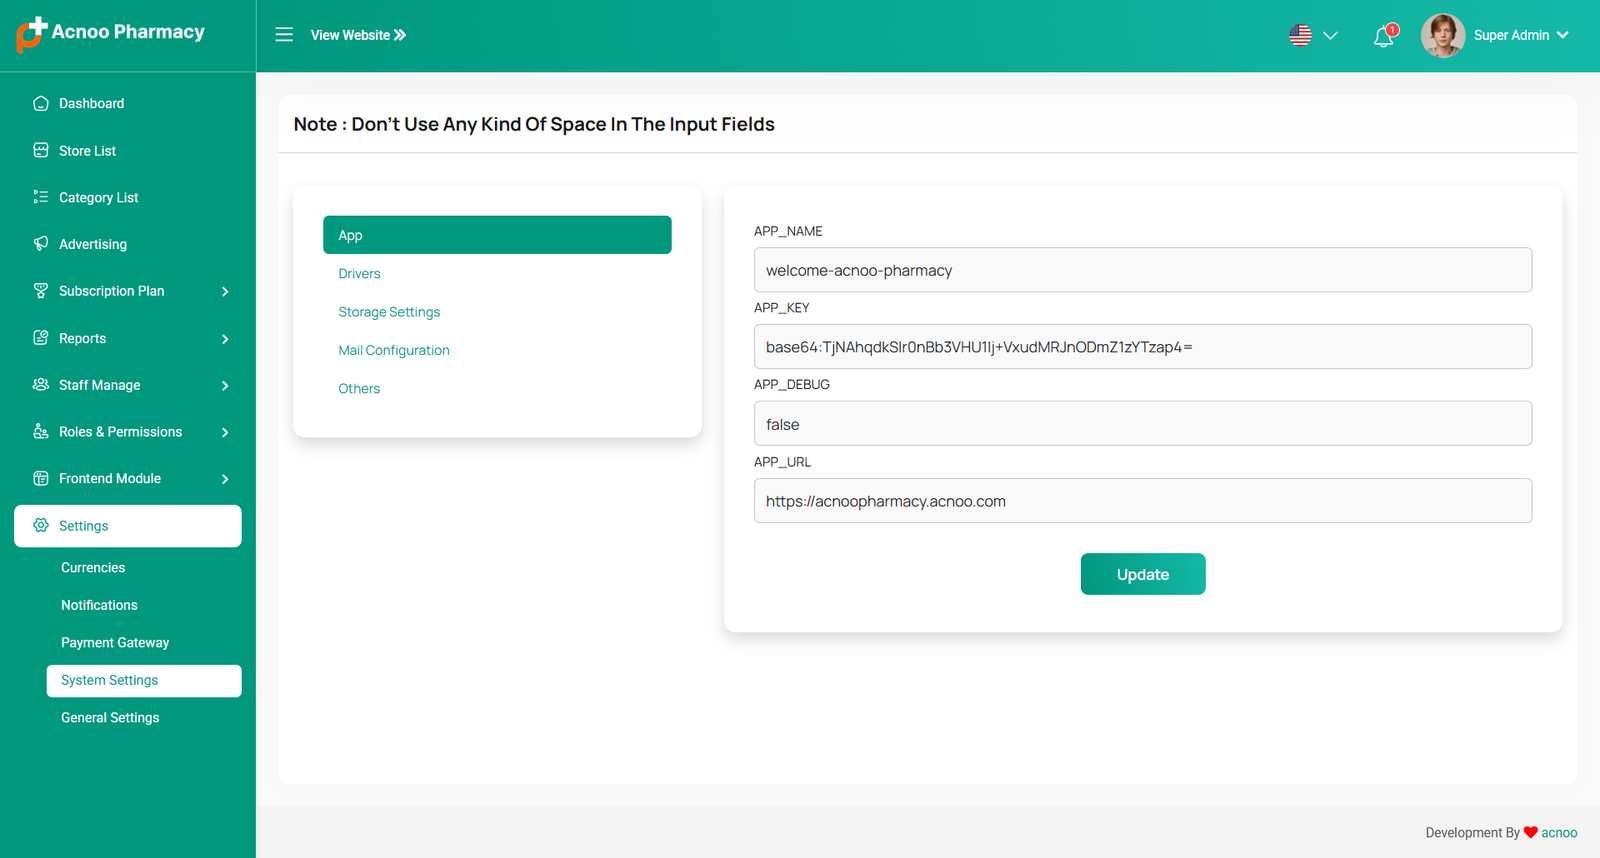
System Settings
In this section, you can configure various backend settings for the project, including application setup, driver configurations, mail settings, storage configurations, and other essential components. It's crucial to handle these configurations with care as they impact the functionality and security of the system.
App
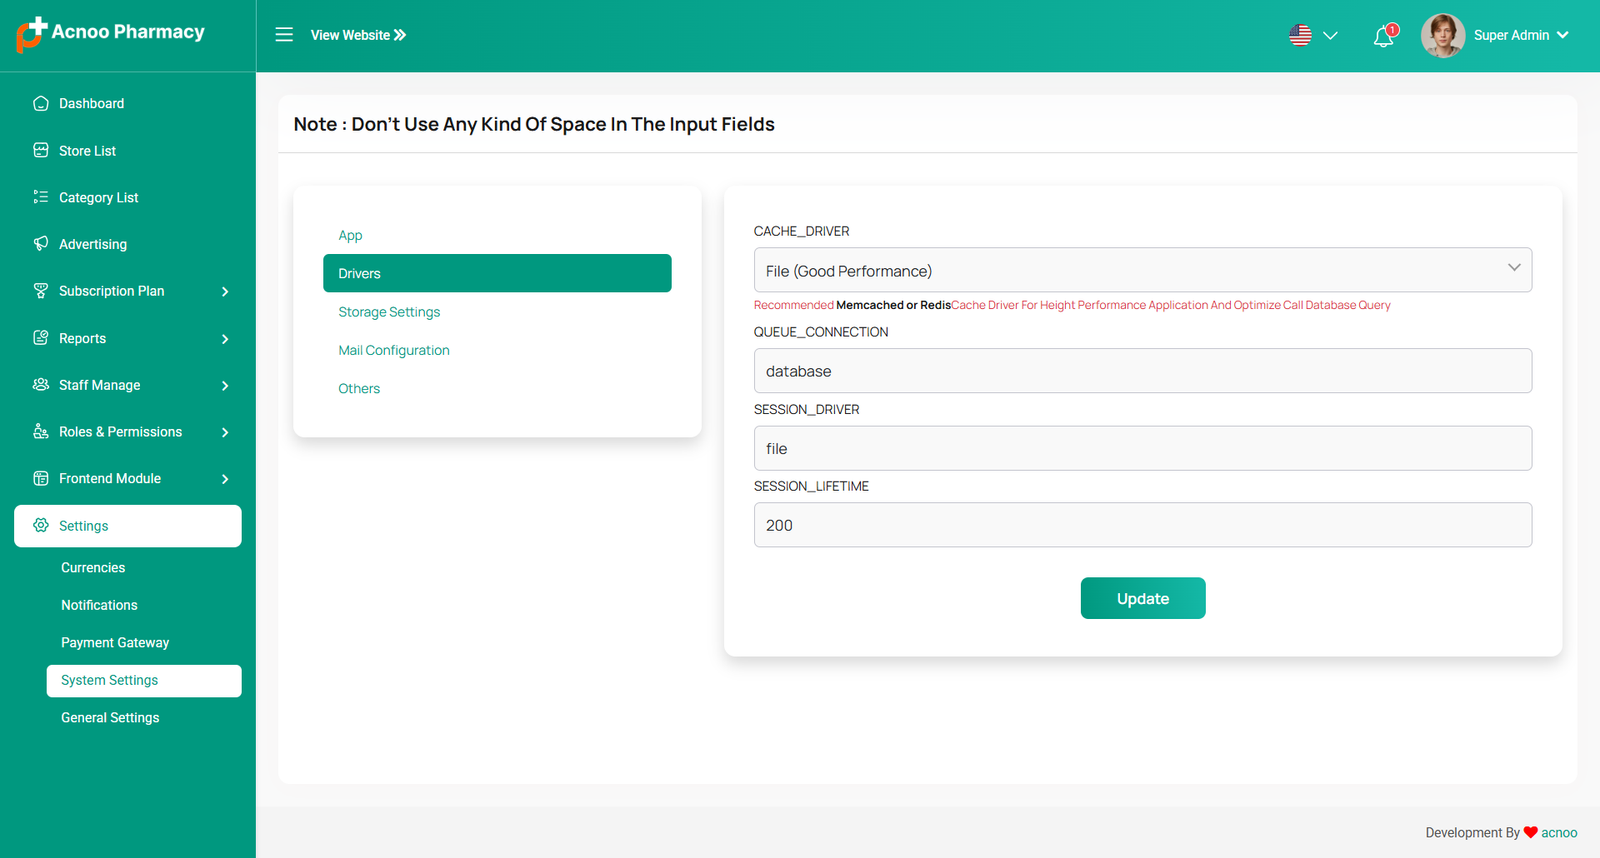
Drivers
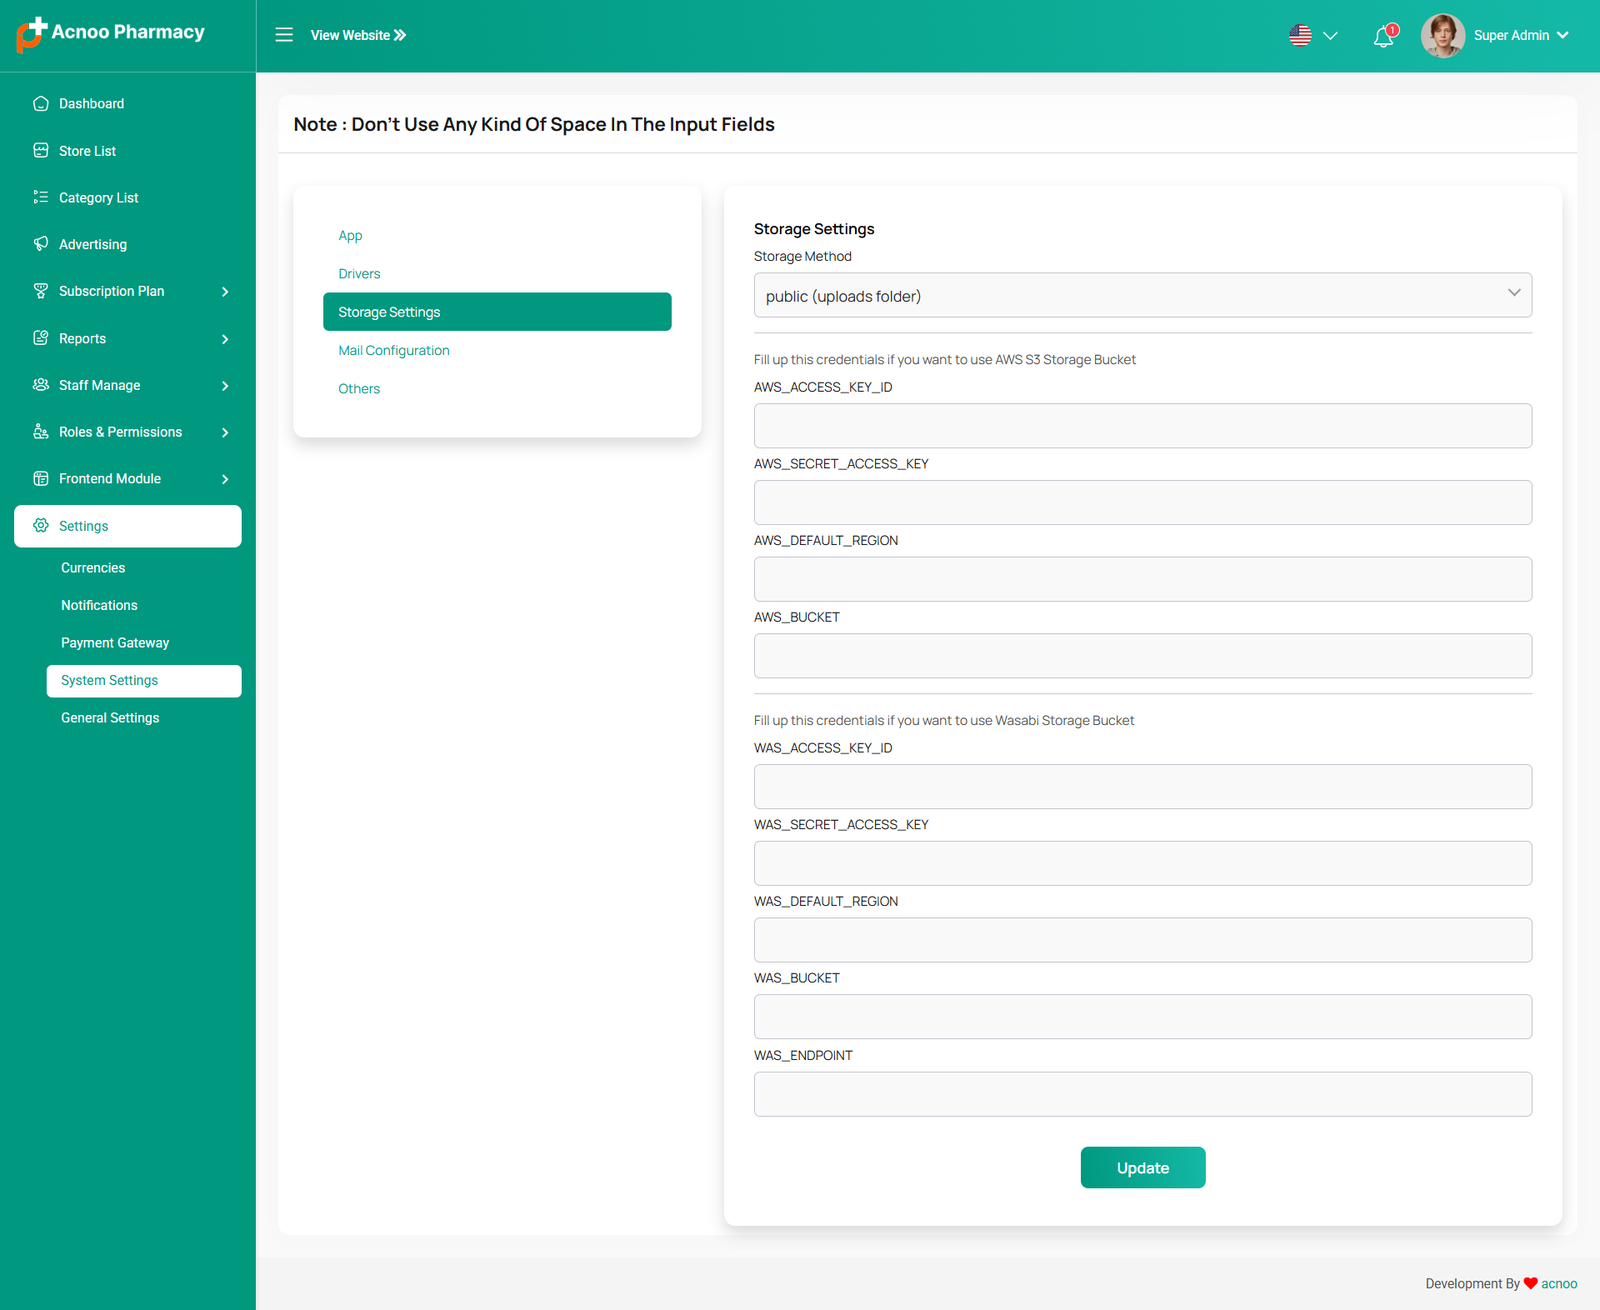
Storage Settings
Mail Configuration
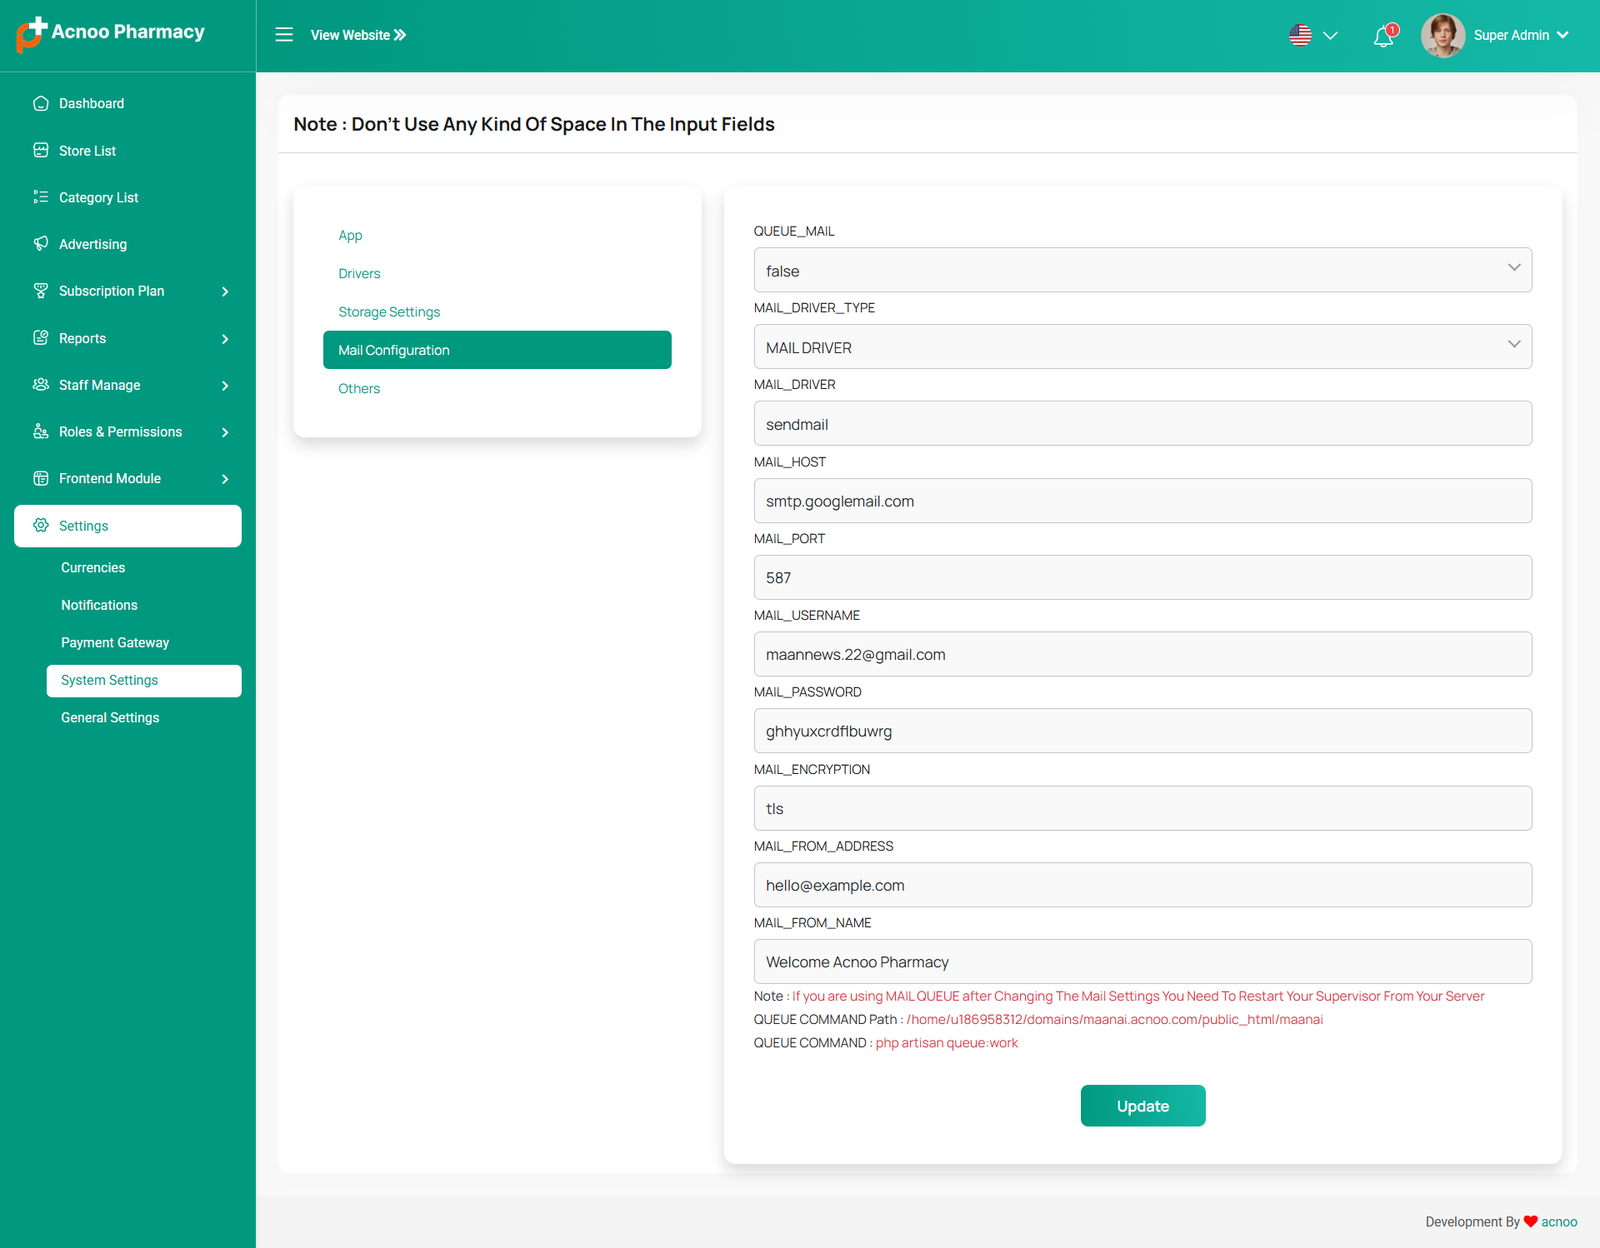
Note: Please note that if you change QUEUE_MAIL from false to true, you need to run the following command: php artisan queue:work. Remember: The command path should be: /home/u186958312/domains/yourdomain.com/public_html. Make sure you're in the correct path.
Note: If you're not familiar with running the command, there's another option. Simply visit yourdomain.com/queue-work and it will be executed automatically.
Note: If you select QUEUE_MAIL as true but do not run the command or visit the URL, email functionality will not work properly.
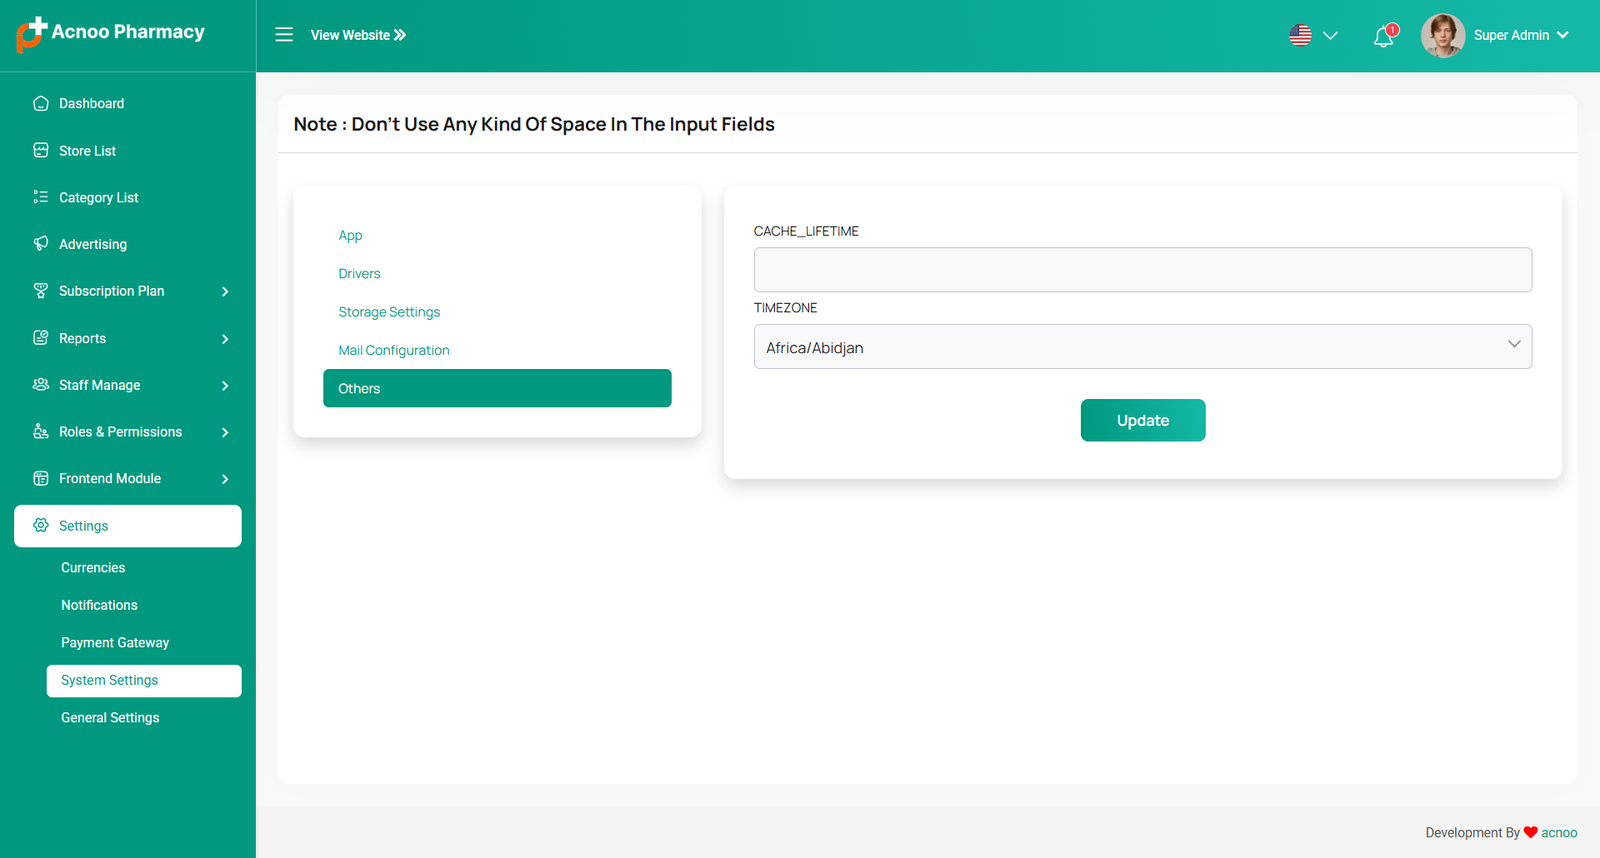
Others
General Settings
You have the capability to modify the general project information.

Admin Change Logs & Update Guide
Note: Before updating to the new version, please ensure you have a database and full project backup, and that your project is already updated to the latest version. This is extremely important!
Version: 1.1
- New package added for laravel module.
- Landing pages added.
- Landing page dynamic from the admin panel.
Note: Please replace the following folders and files: config, Modules, routes, resources, vendor, composer.json and modules_statuses.json. After replacing them, visit yourdomain.com/update to install the new version. Without visiting the URL, your project will not function correctly, so ensure you complete this step.
Note: If you face any issues with the update, please contact us.
Version: 1.0.0 ( 6 March 2025 )
- Initial Release
Flutter App Installation Setup Start
Tools & Setup
Prerequisite
- Android Studio: 2023.3.1
- Flutter: 3.27.3
- Flutter & Dart SDK
- Anyone IDE Android Studio (Recommended), Visual Studio Code or IntelliJ IDEA
- To edit this project you must have Flutter and Dart installed and configured successfully on your computer.
- Set up your editor - Install the Flutter and Dart plugins.
- If you have got Android SDK installed and configured, to install Flutter you only need
to:
- Download Flutter SDK from official website and extract it.
- Add path to previously extracted SDK to your PATH variable
- Run flutter doctor tool to check if everything is configured correctly.
- All above steps are mentioned here: https://flutter.dev/docs/get-started/install/
Make sure you have added the purchase code inside the app
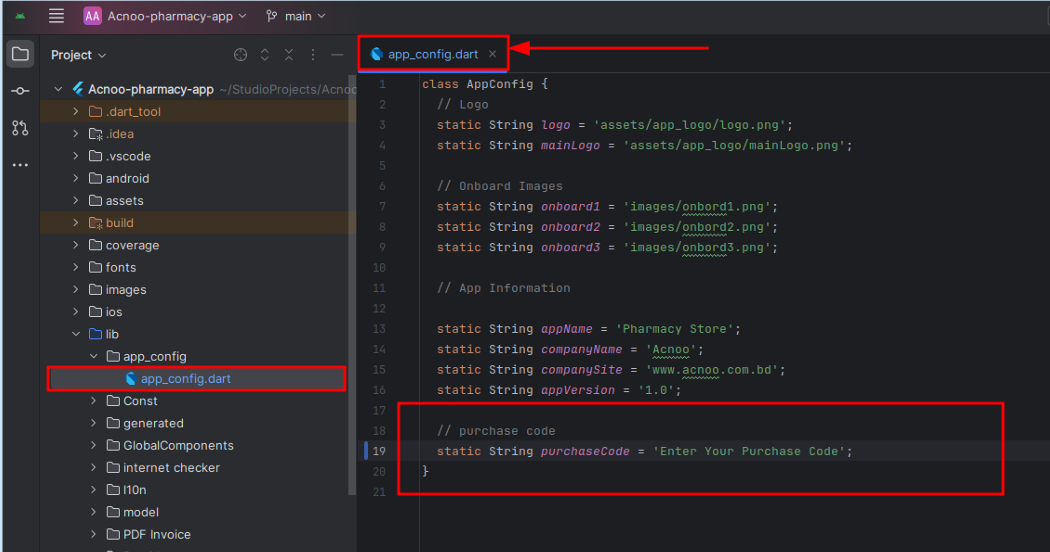 Directory: /lib/app_config/app_config.dart
Android Studio – Windows
- Download Android Studio - https://developer.android.com/studio/
- Get the Flutter SDK - https://flutter.dev/docs/get-started/install
- Learn more about Android Studio - https://developer.android.com/studio/intro/
Step 1 : Get the Flutter SDK
- Download the following installation bundle to get the latest stable release of the Flutter SDK:
- Extract the zip file and place the contained flutter in the desired installation location for the Flutter SDK (for example, C:\src\flutter; do not install Flutter in a directory like C:\Program Files\ that requires elevated privileges)
Step 2 : Update your path
If you wish to run Flutter commands in the regular Windows console, take these steps to add Flutter to the PATH environment variable: From the Start search bar, enter ‘env’ and select Edit environment variables for your account. Under User variables check if there is an entry called Path:
- If the entry exists, append the full path to flutter\bin using ; as a separator from existing values.
- If the entry doesn’t exist, create a new user variable named Path with the full path to flutter\bin as its value
Important
Note that you have to close and reopen any existing console windows for these changes to take effect. You are now ready to run Flutter commands in the Flutter Console!
Step 3 : Run flutter doctor
From a console window that has the Flutter directory in the path (see above), run the following command to see if there are any platform dependencies you need to complete the setup:
Android Studio – macOS
- Download Android Studio - https://developer.android.com/studio/
- Download Xcode - https://apps.apple.com/us/app/xcode/id497799835?mt=12
- Get the Flutter SDK - https://flutter.dev/docs/get-started/install
- Learn more about Android Studio - https://developer.android.com/studio/intro/
Step 1 : Get the Flutter SDK
- Download the following installation bundle to get the latest stable release of the Flutter SDK:
- Download SDK and extract downloaded file, just double click on that. and just copy extracted folder and paste it to your desired location (for example, Documents\flutter).
Step 2 : Update your path
Important
Path variable needs to be updated to access “flutter” command from terminal. you can just update path variable for current terminal window only. and if you want to access flutter commands from anywhere in terminal, we need to update SDK path permanently.
To update PATH variable, we need to open terminal.
To update PATH variable for current terminal window only, then enter this command "export PATH="$PATH:`pwd`/flutter/bin"" and hit enter key.
To update PATH variable permanently, then Open or create .bash_profile file. to open
or
create that file, then enter "sudo open -e $HOME/.bash_profile" and hit enter
key.Append
below line to bash_profile file at bottom of all other content. "export PATH="$PATH:
[PATH_TO_FLUTTER_GIT_DIRECTORY]/flutter/bin"" as
[PATH_TO_FLUTTER_GIT_DIRECTORY] is actual path of SDK folder.
Run this command on terminal "source $HOME/.bash_profile" to refresh PATH variables.
Then check whether our SDK is successfully installed or not.
You are now ready to run Flutter commands in the Flutter Console!
Run "flutter doctor" into terminal, If you are getting check list of flutter sdk requirements, it means SDK is successfully installed on your machine. and you can start building flutter apps on your machine.
Android Studio – Linux
- Download Android Studio - https://developer.android.com/studio/
- Get the Flutter SDK - https://flutter.dev/docs/get-started/install/linux
- Learn more about Android Studio - https://developer.android.com/studio/intro/
Step 1 : Get the Flutter SDK
- Download the following installation bundle to get the latest stable release of the Flutter SDK:
- Download SDK and extract downloaded file, just double click on that. and just copy extracted folder and paste it to your desired location (for example, Documents\flutter).
Step 2 : Update your path
Important
Path variable needs to be updated to access “flutter” command from terminal. you can just update path variable for current terminal window only. and if you want to access flutter commands from anywhere in terminal, we need to update SDK path permanently.
You’ll probably want to update this variable permanently, so you can run flutter
commands in any terminal session. To update PATH variable, we need to open terminal.
- Run
source $HOME/.to refresh the current window, or open a new terminal window to automatically source the file. - Verify that the
flutter/bindirectory is now in your PATH by running:
GETTING STARTED (BUILD & RUN)
Important
All below steps are must be followed to build and run application
Download Project
Download and find the your project folder, use your preferred IDE (Android Studio / Visual Studio Code / IntelliJ IDEA) to run the project

Get Dependencies
After you loaded project successfully, run the following command in the terminal
to install
all the dependencies listed in the pubspec.yaml file in the project's root
directory or just
click on Pub get in pubspec.yaml file if you don't want to use command.
Important
All below steps are must be followed to build and run application
Build and Run App
- Locate the main Android Studio toolbar.
- In the target selector, select an Android device for running the app. If none are listed as available, select Tools > Android > AVD Manager and create one there. For details, see Managing AVDs
- Click the run icon in the toolbar, or invoke the menu item Run > Run.

After the app build completes, you’ll see the app on your device.
If you don’t use Android Studio or IntelliJ you can use the command line to run your application using the following command
Important
Below step requires flutter path to be set in your Environment variables. See https://flutter.dev/docs/get-started/install/windows
You will see below like screen after you have build your app successfully.
Try hot reload
Flutter offers a fast development cycle with Stateful Hot Reload, the ability to reload the code of a live running app without restarting or losing app state. Make a change to app source, tell your IDE or command-line tool that you want to hot reload, and see the change in your simulator, emulator, or device.
Important
Do not stop your app. let your app run.
PROJECT STRUCTURE & FEATURES
- images: apps/widgets/snippets images as well as appIcon are stored here.
- lib: Application main file and folder are located here.
- Screens: Full Apps UI Code can be found here.
- Conts: Api configuration can be found here
- Constant: All constant value are located here
- Main: All the routes are been declared here.
- Pubspec.yaml: Application name and other project dependencies can be found here
Application Features
- Clean Code and a well structured project
- Single code base for both Android & iOS
- 60 FPS Support for both Android & iOS
- Fully responsive UI
- Best UI & UX
- Great animation
- Easy to customize
- Free life time updates & stunning customer support
- Easy to integrate in your project
Mobile Application Setup:
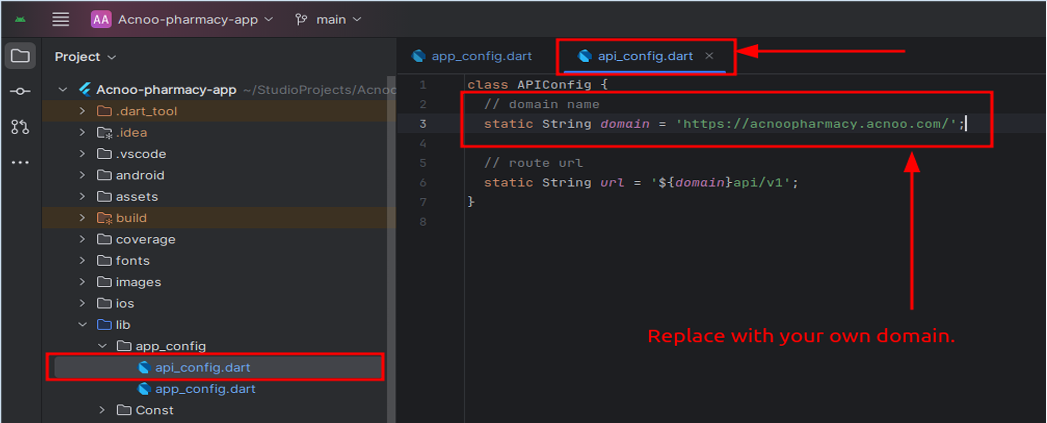
You’ll need to modify the api_config.dart file to replace the existing domain with your new one. Here’s
how you can do it:
1. Open the api_config.dart file located in the /lib/app_config/api_config.dart directory.
2. Replace 'https://acnoopharmacy.acnoo.com/' with your new domain:
3. Make sure the new URL is correctly formatted and includes the proper protocol (https:// or
http://).
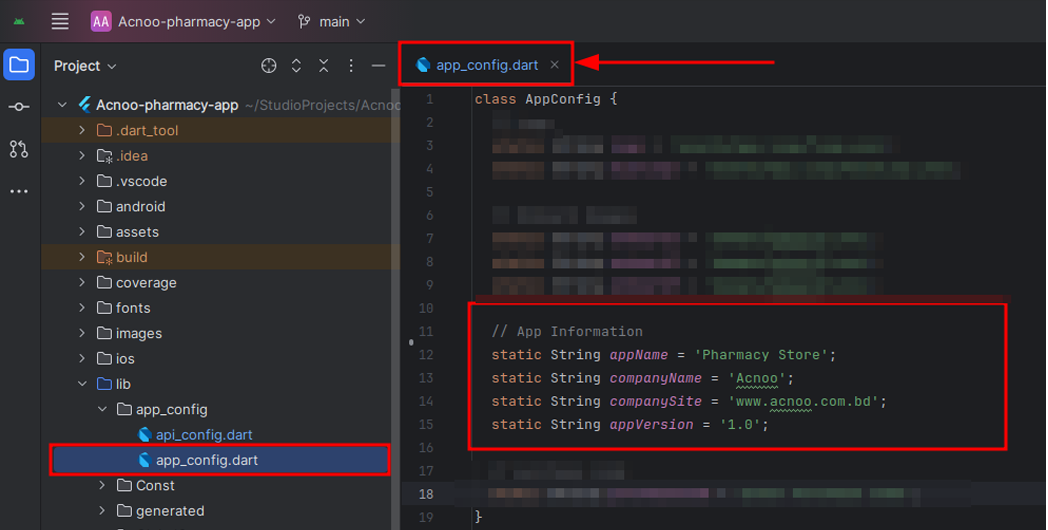
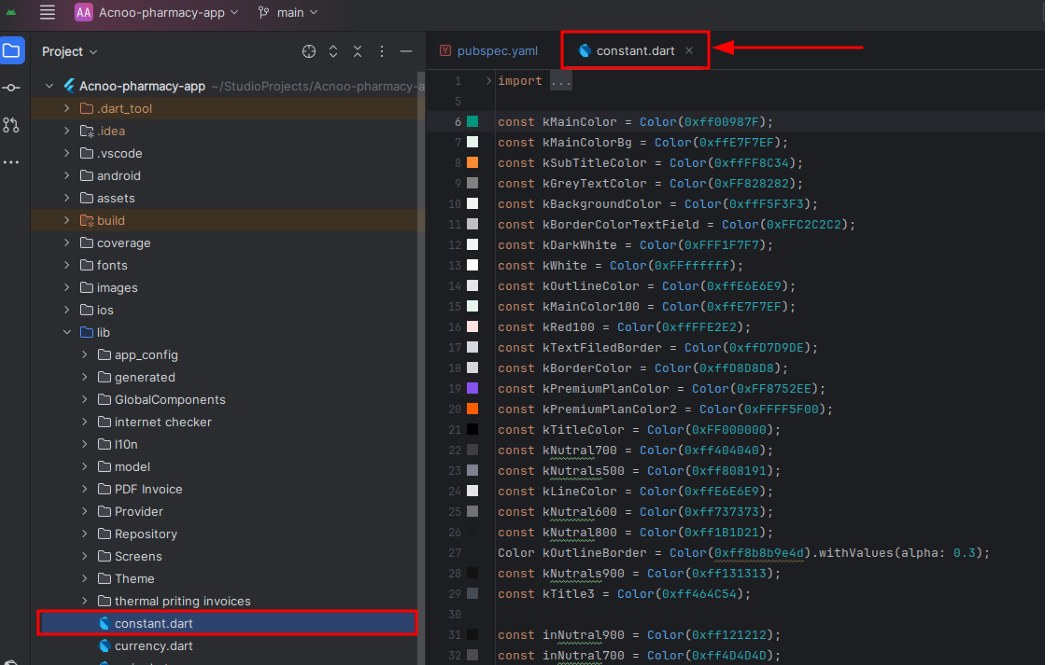
Now:
Please open the constant.dart file and update the app name, company name, and app version with the desired values, ensuring they are written correctly.
Change package name:
➢ Find the current package name, which is com.example.acnoo_pharmacy_app
path:/android/app/src/main/kotlin/com/example/acnoo_pharmacy_app/MainActivity.kt
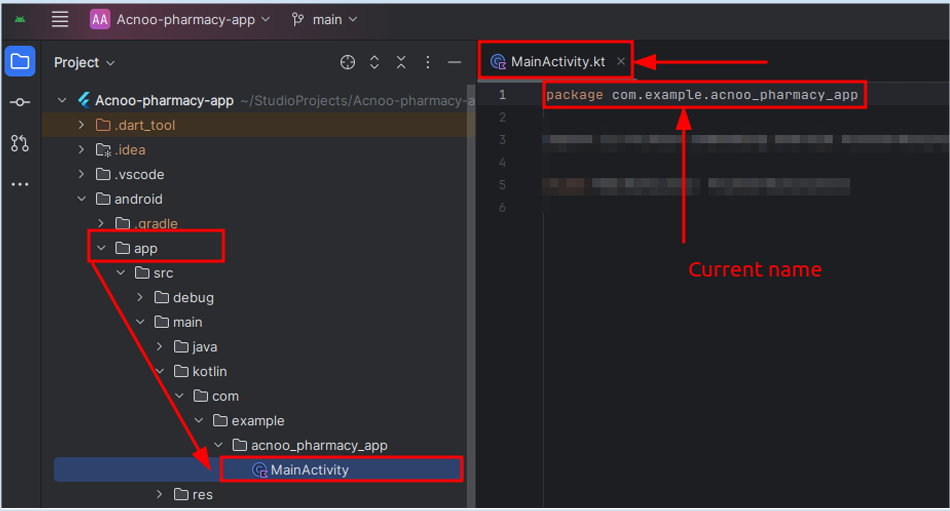
➢ Select the project file & Press Ctrl + Shift + R to replace the old package name with your new one throughout the entire codebase.
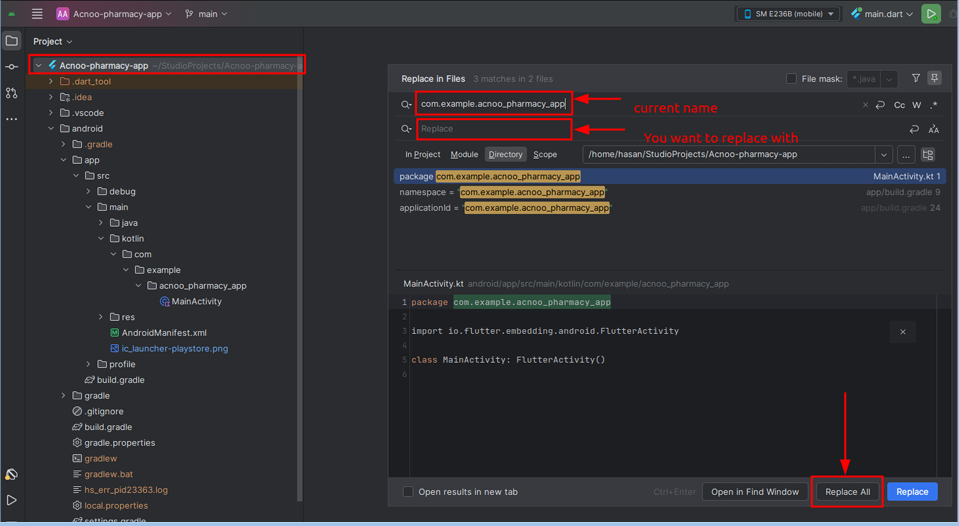
➢ Now in the first box paste the current package name (com.example.acnoo_pharmacy_app) and in the second box write the new name and press Replace All button.Please consider assigning a meaningful package name and try to follow the structure.
Run Flutter Project:
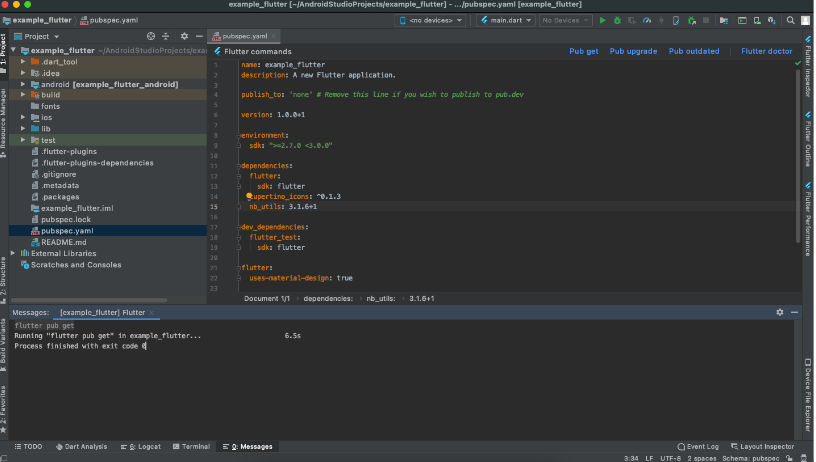
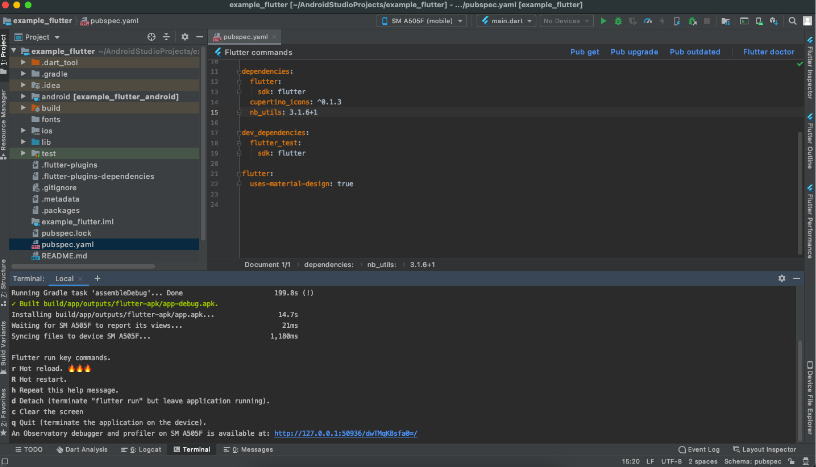
➢ For first-time users, enable Dart support for the project. Afterward, navigate to the pubspec.yaml file and retrieve the packages by clicking on "Pub Get" located at the top right corner, as illustrated in the image.

➢ After enabling Dart support and fetching packages, select a device or run an emulator. Click the 'Play' icon in the upper-right corner to launch the app. For physical devices, enable 'Developer Options' and 'USB Debugging' on your phone.

How to change application name:
➢ To change the app name you have to go to the AndroidManifest.xml file.
➢ path: android/app/src/main/AndroidManifest.xml
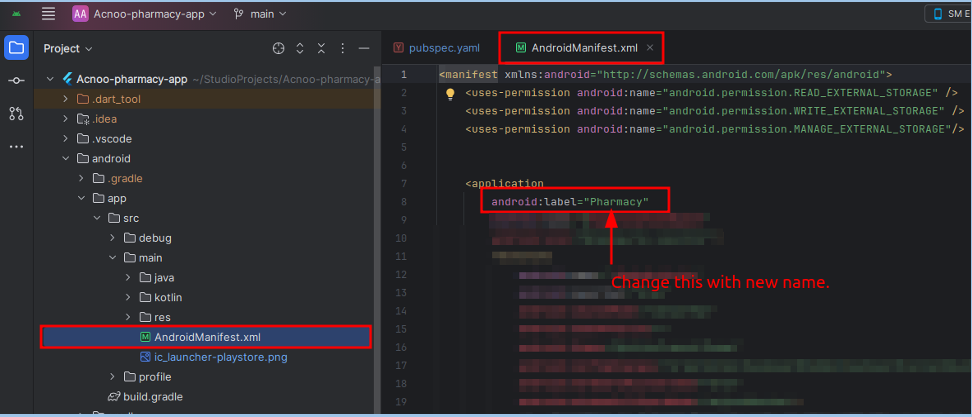 After opening the file change the android:label =”AppName” & replace your current name.
And build the app. The App name will be changed.
After opening the file change the android:label =”AppName” & replace your current name.
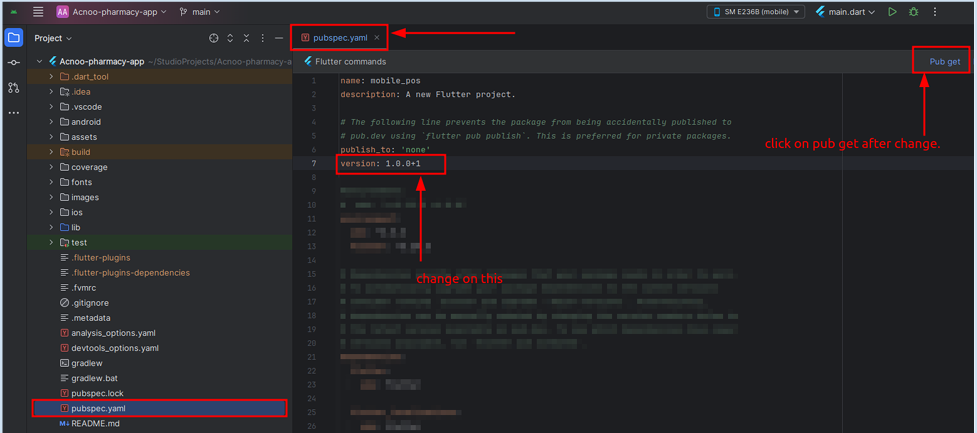
And build the app. The App name will be changed.How to change application version
➢ Navigate to the pubspec.yaml file and modify the 'version' field. For instance, if the previous version
is 1.0.0+1, update it to 1.0.1+2.
➢ IMPORTANT: Ensure to execute 'flutter pub get' and 'flutter run' after making this adjustment.
How to change application version
Select Images:
● Choose three images that you want to use for icons.
● Ensure the images are appropriate and formatted correctly for the app's display requirements.
Rename Images:
● Rename the selected images with the following filenames:
○ icon: app_icon.png
● Make sure to keep the file extension as .png
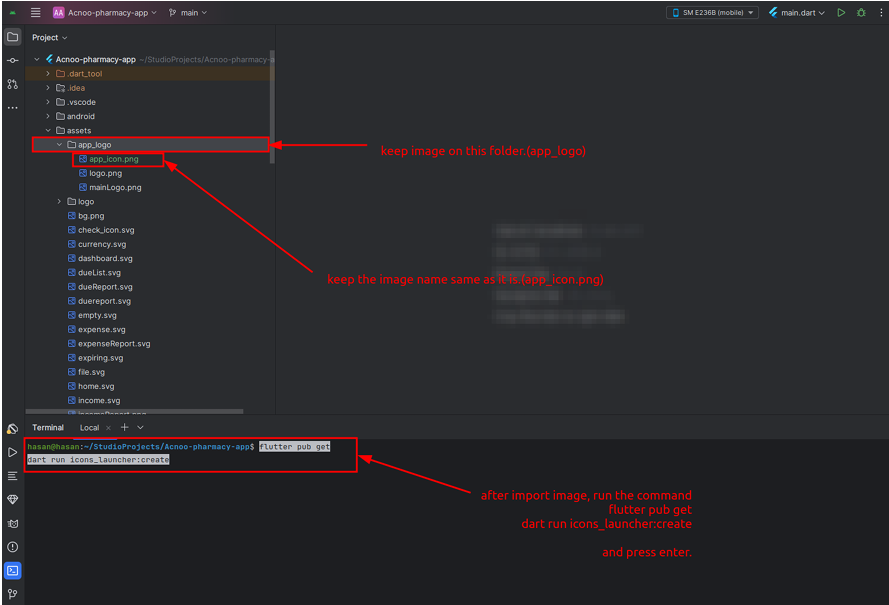
Now replace the existing image with a new one.
Replace Existing Images:
● Locate the folder where the current icon image is stored. This is typically named assets
● Copy and paste your newly renamed image inside this folder named “appIcon”.
● If prompted, allow the new images to replace the existing ones.
Now from the terminal run the command:
flutter pub get
dart run icons_launcher:create
Restart the App:
● Close the app completely to ensure all changes take effect.
Restart the app and verify that the new onboarding images are displayed correctly.
Project Structure
\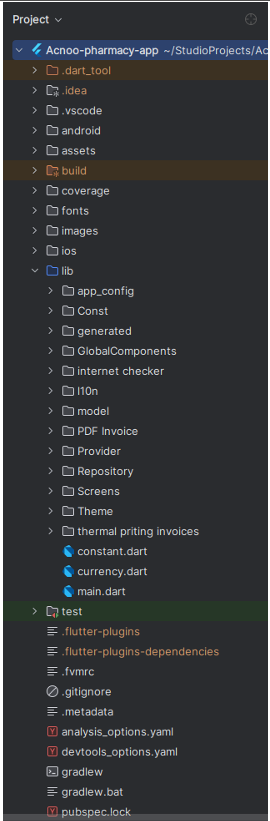
If you want to modify any of these screens, you can do so from these directory. Each directory name corresponds to the title of the respective apps screen, making it easy for you to locate and identify the files you need to edit.
app_config: Here you can find the API setup option & app setup option.
Screen: Here you can find the screens of the total app.
l10n: Here you can find all the language files.
Change Splash logo & logo inside the App.
Select Images:
● Choose the image that you want to use for the main logo.
● Ensure the image is appropriate and formatted correctly for the app's display requirements.
Rename Images:
● Rename the selected images with the following filenames:
○ splashLogo: logo.png
○ Others: mainLogo.png
Make sure to keep the file extension as .png
Replace Existing Images:
● Locate the folder where the current logo & avatar images are stored. This is typically named assets/app_logo
● Copy and paste your newly renamed images into this folder (app_logo)
● If prompted, allow the new images to replace the existing ones.
Restart the App:
● Close the app completely to ensure all changes take effect.
Restart the app and verify that the new onboarding images are displayed correctly.
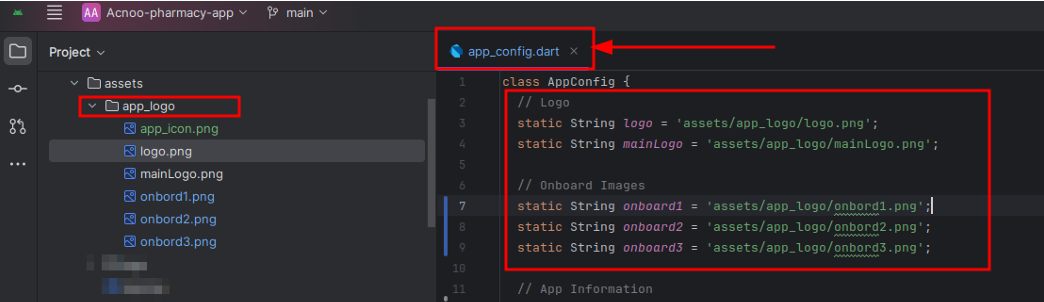
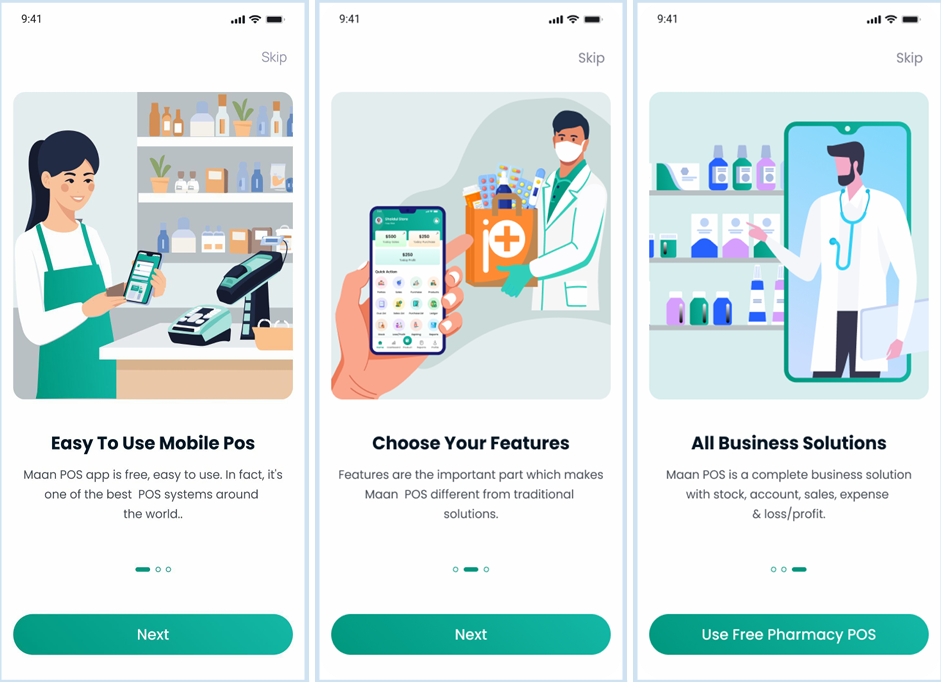
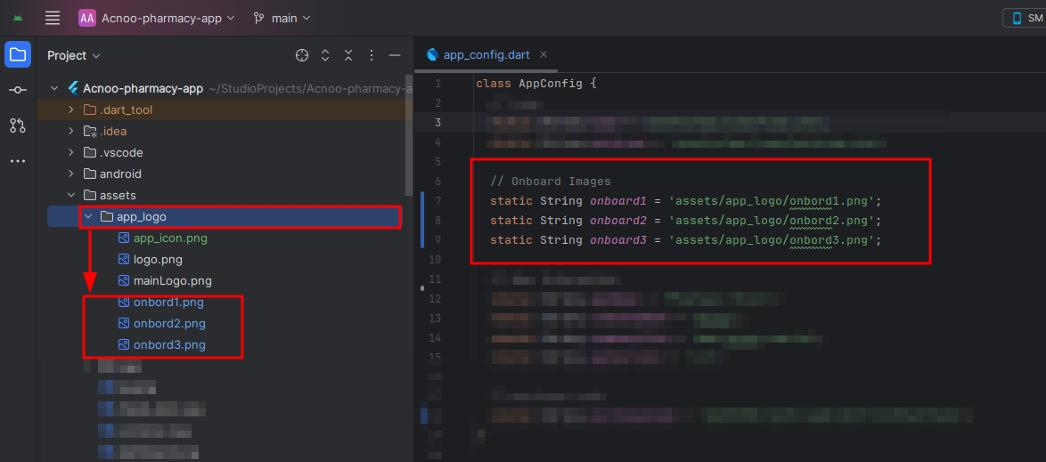
Change Onboarding App:

Open app_logo folder.
path: assets/app_logo
Select Images:
● Choose three images that you want to use for the onboarding screens.
● Ensure the images are appropriate and formatted correctly for the app's display requirements.
Rename Images:
● Rename the selected images with the following filenames:
○ First Image: onbord1.png
○ Second Image: onbord2.png
○ Third Image: onbord3.png
Make sure to keep the file extension as .png
Replace Existing Images:
● Locate the folder where the current onboarding images are stored. This is typically named app_logo.
● Copy and paste your newly renamed images into this folder (assets/app_logo)
● If prompted, allow the new images to replace the existing ones.
Restart the App:
● Close the app completely to ensure all changes take effect.
Restart the app and verify that the new onboarding images are displayed correctly.
Theme Change:
You can change the app theme color for the constant.dart file. Here you can find all the colors, widgets, global gradients, which are used in many places inside the apps. path: lib/constant.dart
Here the primary color is MainColor.
Change Language:
This guide explains how to add or edit localization (translation) files in the app. If you want to support a new language or modify existing translations, follow the steps below.
1. Understanding the Localization Structure
The app uses ARB (Application Resource Bundle) files to manage translations. These files are located in the lib/l10n directory. Each language has its own file, e.g.:
app_en.arb for Englishapp_es.arb for Spanish
app_fr.arb for French
2. Adding a New Language
To add support for a new language:Create a New ARB File
Duplicate an existing ARB file (e.g., app_en.arb) and rename it to match the language code you want to add. For example, for French, create app_fr.arb.
Translate the Strings Replace the values in the new ARB file with the translated strings. For example:
app_fr.arb
                            {
                                "helloWorld": "¡Hola a todos!"
                            }
And just add a new parameter and value. And use it where you want to use it.
3. Editing Existing Translations
To edit an existing translation:
Open the corresponding ARB file (e.g., app_es.arb for Spanish).
Modify the value of the string you want to change. For example:
app_es.arb
                            {
                            "helloWorld": "¡Hola a todos!",  // Updated the translation only, not the parameter.
                            }
Then just hot reload. It will be created automatically.
4. Delete Language
Remove references to the language from the code:
● If any part of the app was using keys specific to the removed language (e.g., lang.of(context)!.someKey) , you can either:
○ Replace the reference with a static string, or
○ Use the default language for those strings.
For example, if you were using:
lang.of(context)!.hello
You can replace it with a static string like:
"Hello"
5. Common Issues
Missing Translations
If a translation is missing for a specific language, the app will fall back to the default language (English).
So when you create, keep in mind that you have to create that parameter for all the locales. Otherwise, just edit the one you want to modify.
And you can find the supported locales from here:Click Here
https://api.flutter.dev/flutter/flutter_localizations/flutter_localizations-library.html
How to build release apk
To build a release APK for your Flutter project, follow these steps:
1.Open Your Project: Launch Android Studio and open your Flutter project.
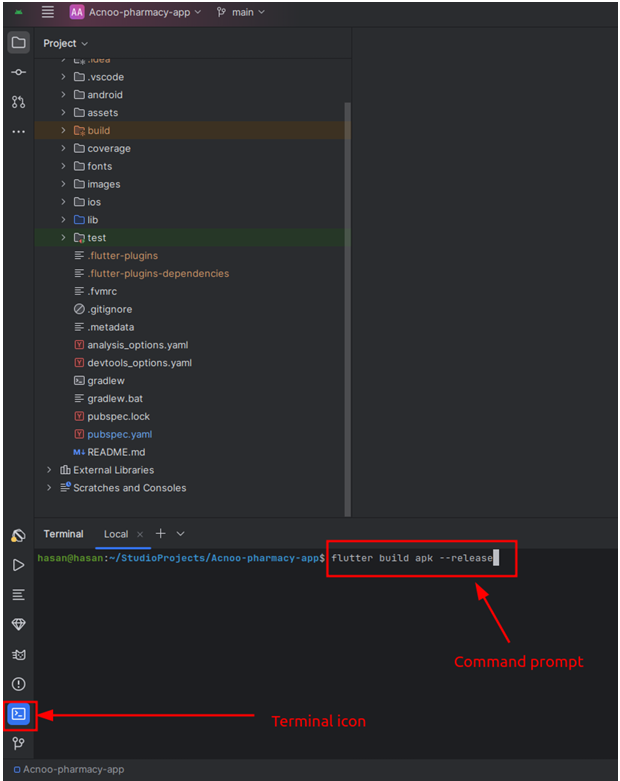 2.Access the Terminal:
○ In the bottom left corner of the Android Studio interface, locate the navigation bar.
○ Click on the Terminal icon to open the terminal window.
○ In the terminal, enter the following command:
Locate the APK:
○ Once the build process completes, you can find your release APK in the following directory:
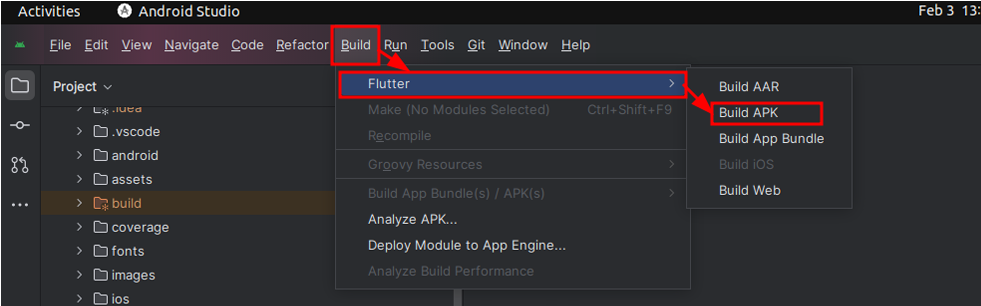
build/app/outputs/flutter-apk/app-release.apkTo build a release APK for your Flutter project using the Android Studio top menu, follow these steps:
- Open Your Project: Launch Android Studio and load your Flutter project.
- Access the Build Menu:
- Select Build APK:
- Monitor the Progress:
- Locate the APK:
HELP & SUPPORT
Free support policy includes troubleshooting, technical assistance with the product only. It does not include any customization, additional features integration or concerns about third- party plugins compatibility. But, support is applied to plugin(s) we have developed and integrated ourselves. We appreciate your understanding!
If you need assistance and information on purchased product that is not covered in documentation, mail them on our support at
You can expect answer within 24-48 hours, usually as soon as possible in the order they were received.
Additionally, if any email has no response from the item owner for more than 7 days, that support email will be archived by default. However, if you need further assistance, you can mail us again.